Issue 5 of Strange & Charmed Magazine

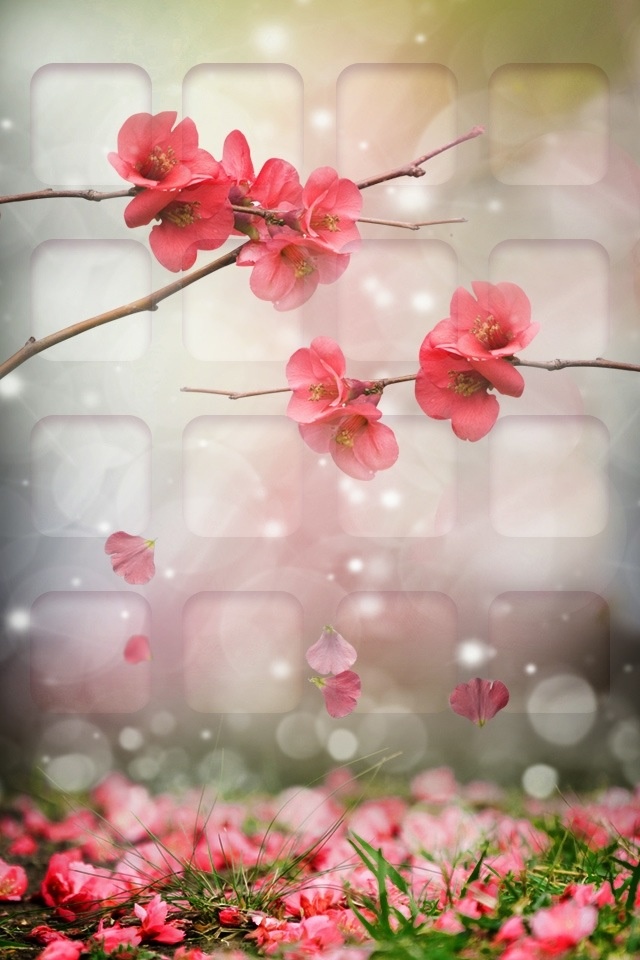
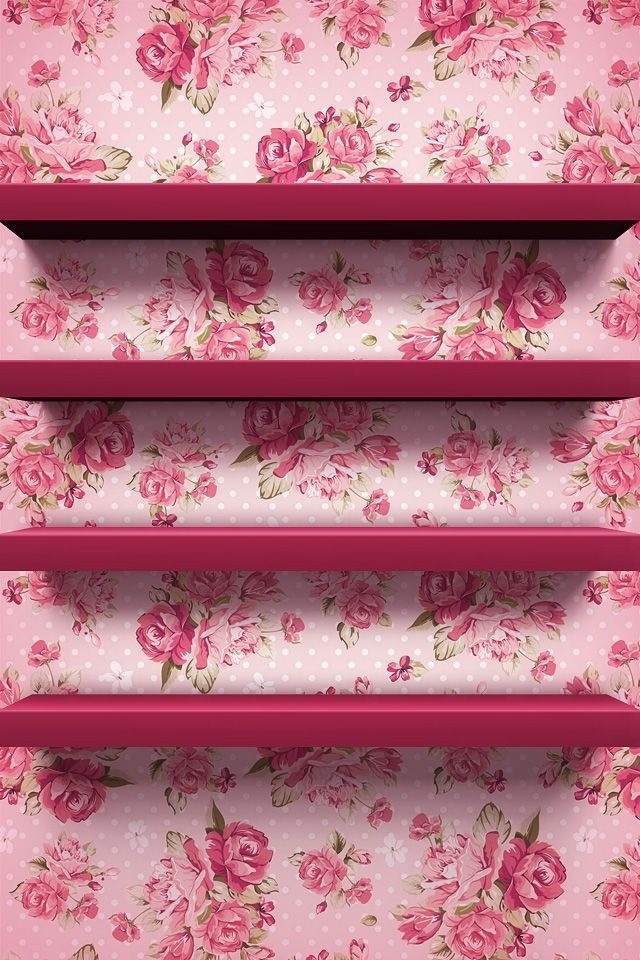
May is nearly here, so I have found a few iPhone wallpapers with some bright and inspiring florals to brighten up your month! Take note that two of these wallpapers are actually for your home screen and not your lock screen as they sort of help display your icons. Check it out and enjoy!


You Missed a Spot is a new Spring Cleaning feature for the month of April focusing on the not so obvious places you will want to tidy up for the season! Each Thursday visit us for a new installment that goes beyond the how to’s of vacuuming, window washing and laundry!
Ladies, I know we love our makeup and all, but many of us have too much and worse, we are probably keeping and/or using items that may be expired! Seriously, mascara has an expiration date and its not when it dries out. Think about it, makeup goes on your face and is reused multiple times so from the very first use you are certainly contaminating it! As time progresses, the bacterial multiplies until your makeup in riddled with it which means when you use it, your applying the bacteria back onto your face, lips, around your eyes etc! Gross, I know! Since makeup isn’t an a completely organic substance, you often can’t even tell that the makeup is filled with bacteria so the best indicator of whether or not you should keep or toss your makeup is time! It doesn’t matter if you bought the makeup a year ago but used it twice, from day one it was contaminated with bacteria and over the last year it has been multiplying. So, here are some tips on when to keep and when to toss.
One final tip I have is to really limit your spending habits when it comes to your makeup! Buy only what you know you will use and for any extras, try picking up a drug store brand instead of a high end name so that its easier to part with your makeup once the expiration date has passed. If you can, try to label your makeup with a small sticker or keep a list of when you purchased each item in your makeup bag and leave it in there so you can keep and eye on when you need to get rid of an item.

Sleep. Its something we are supposed to be spending roughly a third of our day doing, but often with our busy lives we do not. Whether you are an insomniac, suffering from circadian rhythm disorder, or just too busy for a solid eight hours, there are a few things you can do to prepare yourself for a good nights rest, refreshing your mind and body and perhaps also influencing you to stick to a regular sleep cycle.
1. Schedule your sleep
Now, this may seem a little odd, but the idea of scheduling your sleep time is very helpful for a few reasons. It forces you to look at your day and your plans and ask ‘what is a reasonable time for me to go to sleep and what is a reasonable time for me to wake up.’ Once we grow up and no longer have a set bedtime, we have no one but ourselves to make sure we are sleeping enough, so take a look at your day and your needs and set yourself that schedule for sleep for at least six hours, but 8-9 is best!
2. Give yourself a full day of activity
One of the reasons people do not get to bed at a reasonable time is because their bodies are simply not tired. Like a parent will wear out a child throughout the day so that they sleep well at night, so must you wear yourself out! If you find that you are still wide awake after being up for at least 16 hours, you may need to add more activity to your day or perhaps lay off the caffeine and sugar that could be keeping your body awake longer than it should be.
3. Set the mood in your bedroom
When you think of your bedroom, do you think of a place of peace and relaxation? Or, do you think of it as the place you eat, watch tv, maybe even work? If your bedroom does not give off the ambience of relaxation, you may need to give it a makeover. Make sure you have a comfortable mattress, seasonally appropriate sheets and bedding (i.e. warm flannel for winter months and light, breathable cotton for warmer months), and as few distractions in your room as possible. Experts say you shouldn’t have a tv and lots of gadgets in your bedroom, but I think as long as you have a place for everything and everything is in its place you can keep the tv and iPad in your room as long as you know to turn them off at bedtime!
4. Start a night time regimen
One of the reasons you may find it hard to get to sleep is that you do not have a nightly ritual that you follow each and every night that will mentally prepare you for sleepy time! Try creating a nightly to-do list of slow, relaxing things you can do to unwind before bed. Start by signing off the email and daily to-do lists mentally. Then, perhaps take a warm shower or bath to relax your body and quiet your mind. Then brush your teeth and wash your face, perhaps starting a nightly face regimen if you do not have one already. Make yourself some tea, slip into comfortable pj’s, pull your hair up into a top knot and get into bed with a good book. For some added aromatherapy, I highly suggest and adore Bath and Body Works Pillow Mists. I spray both the Stress Relief and Sleep Mists on my pillows before bed and the smell melts me into a slumber!
5. Lower the lights and relax
Its very important that your bedroom be dark or mostly dark in order for you to fall asleep and stay asleep throughout the night. When we sense light, our bodies automatically think “stay awake its day time!” The same goes with darkness, if you lay down in a dark room your body is thinking “its dark, so it must be nighttime, lets sleep!” So turn off all the lights and if you have to have a nightlight, keep it in a far corner of the room and make sure its not too bright. If you cannot make your room completely dark due to a window that perhaps opens to a street where lights are present, try getting dark or thick curtains to block out the light. If that doesn’t work use an eye mask! I also suggest eye masks for those who find that they wake up often during the night. I am definitely one of those people and I find that when I wear an eye mask to bed, I stay asleep throughout the night.

You Missed a Spot is a new Spring Cleaning feature for the month of April focusing on the not so obvious places you will want to tidy up for the season! Each Thursday visit us for a new installment that goes beyond the how to’s of vacuuming, window washing and laundry!
{Spring Cleaning your Car}
I always find that women have the weirdest clutter in their cars. Tubes of lipstick and pallets of makeup crammed into cup holders, extra shoes and clothing decorating the floors and back seats, trunks filled with bags of items to be returned to various stores and boxes with discarded mail, not to mention the variety of catalogs and magazines and half empty coffee cups that are just there, for really, no good reason! Us ladies certainly find the most extraordinary uses for our vehicles, and I think its because we like to be prepared… for anything! A high-heel breaks at work, no problem, I have a spare pair in the car! A guy calls for a last minute date, no problem, I have some dinner clothes in a bag in the back! I ran out of the house without makeup on, not a problem because I can apply my makeup in the car on the way to work! I think you know what I am getting at and I am sure we have all been in one or all of those situations before. The other thing about ladies and their vehicles is that they are often not always clean, and I think this is because women aren't so into their cars, so they don't think about taking it to the auto wash to vacuum out the caked on eyeshadow covering their passenger seat (am I right?). So, to help a sister out, I have put together a how- to on cleaning your car, yourself, and keeping it organized and clean as part of an ongoing effort.
Step 1. Remove everything from your vehicle.
If you haven't cleaned your car out in a while, its time to do so. You won't be able to vacuum it out or properly detail it unless its empty so go ahead and take some bags out to your car and start removing everything. As you remove items, trash the trash (it should be obvious what trash is), and toss any broken makeup or melted lipsticks that really aren't useful anymore (seriously, if you liked them that much, why did you subject them to such bad living conditions as though you didn't know lipstick would melt on your dash board in direct sunlight). Obviously, anything you need, or anything not broken does not need to be trashed, but I bet the extra clothes should be washed if they have been in your vehicle for a while.
Step 2. Take your car to the local car wash.
Most towns have a car wash where you pay with quarters for foamy water and brushes and industrial strength vacuums to self clean your car. Better yet, most large towns also have drive thru car washes where they take your car and wash the exterior and interior for you and you can watch them on a conveyor belt as three men vacuum, Amor All and Windex your car inside and out. If you don't have the cash for that, definitely stop by your local gas station, as one will usually have at least those large vacuums outside for you to use for fifty cents to a dollar. Plus there are lots of household items you can use on your car, like carpet stain remover that will work on auto carpet and if you have a steam cleaner for your house you can use that on your vehicles carpets or upholstered seats as well.
Step 3. Time to organize.
Once your car is clean inside and out its time to start putting things back inside it, but you must do this with organization in mind! First, think about what you really need in your car and what you don't. Yes, having extra clothing and shoes in your car is a good idea, but lets limit how much we leave in the car and better yet, lets make sure its organized inside a travel bag so that they clothes are contained and not all over the place. If you definitely need to keep some makeup in your car, I suggest getting a decent quality makeup bag and putting inexpensive makeup items in it. You don't want to ruin a YSL lipstick, but I am sure you won't be heartbroken if a Wet & Wild melts or breaks. Better yet, try to use all liquid makeup for the car so you don't have to worry if the item melts, and that way you also avoid the issue of powered makeup making a mess of your seats and dashboard.
Step 4: Put together a car emergency kit.
I highly suggest that you also put together an emergency kit filled with everyday items you may need on the road so that you don't end up taking items from your house with you and then leaving them in the car. Fill a small travel bag with packets of tissues, hair brushes, band aids, tampons, travel sized lotion and hair sprays. If you want to see what I keep in mine for inspiration, click here. Also, if you live or travel to questionable areas, it would be good to keep some sort of weapon like a taser or at least pepper spray in your car just in case. (P.S. Learn how to use the pepper spray first and the proper places to use it- like don't spray it while your in your car because ventilation and all!)
Step 5: Get a roadside emergency kit.
One other thing that a lady should always have in her car is a roadside emergency kit. You can buy these at local auto stores or put one together yourself, but buying them at the store is generally easier and cheaper than a DIY. These roadside emergency kits will include things like jumper cables, an electronic jumper (for times when no one is around to help you, think night time on a side street), flares, a flashlight, a blanket, hand warmers, batteries, some first aid items and other useful times you wouldn't even think of needing in your car. Check the contents of the premade kit before you buy it so you know you are getting everything you may need, and compare kits because some have items that you may prefer if you are not so hands on with your vehicle.
Step 6: Check your chargers.
The last thing I suggest is to make sure you have the proper chargers for your phone, gps, and other gadgets you may need in the car. Call me a worry wort, but I am often afraid of my car breaking down and my cell phone dying all at the same time while I am alone at night in an unfamiliar area (I do a lot of driving for work and my GPS likes to get me lost sometimes so this scenario could totally happen to me). Its better to be safe than sorry, so make sure you have what you need to prevent a bad situation from getting worse.

To be completely honest, I really love tax season because I know I will be getting my big fat refund check which is like an extra bonus to my income! I do happen to be one of those people who claims the least amount of deductions so that the maximum is taken from my salary because I am a complete weirdo who considers tax refunds to be a sort of instant savings account! I know this isn’t great tax advice and its not meant to be, but if you are like me and expecting a nice little sum of money and want to find a way to indulge, this post is just for you!
Since you work so hard to earn that tax money you are getting back, you mine as well treat yourself to some well deserved relaxation time. You can go all out and book yourself a spa day at a high end Spa like the Elizabeth Arden Red Door Spa, or you can be a little more frugal and book yourself a nice morning filled with a mani, pedi and a massage from your local nail salon. My local salon does nails, waxing and some spa treatments like massages and facials at a budget price so you don’t have to spend all your money in one place!
If you are someone who would prefer to invest as well as splurge you may want to update your wardrobe with some classic pieces that may be too costly to purchase on your regular salary. A high quality suit for work, a designer hand bag or a nice leather jacket that you know you will get years of use out of is well worth the money and will still feel like a splurge.
For the longest time I didn’t have a complete bed, all I had was a mattress and box spring on a simple metal frame. No head board, no nice looking bed frame, just raw metal that I used to cut my toes on if I ran into the corner of my bed. Buying a real bed frame with a fancy headboard was one of the most luxurious purchases I have ever made and its one that I never regretted. So, think about what areas in your home could use an upgrade. Are you still using mostly IKEA furniture and perhaps would like a grown up desk? Maybe you have a hand me down couch and want to invest in some nice new furniture for your living room. Think in terms of single pieces that you know you will need no matter where you move to. You don’t want to get a whole new living room with multiple pieces that you may not be able to use if you move to another place with a different layout, but single items like a good couch, a good mattress, or a good desk are pieces you will be able to take with you anywhere you go.
If your into tech like I am, you may want to put some of your refund money towards a new gadget. Maybe you have an old laptop and could use a new one, or have a really outdated camera but think you could get good use out of a nice DSLR. Whatever your needs may be make sure you do your research. A gadget is a major purchase and you want to make sure you are getting something of good quality that will last you a few years before needing to be replaced again. Try checking out sites like newegg.com or finding a professional to talk to about the device you need. A professional photographer will have some great insight on which new camera to buy (more so than the high schoolers at Best Buy) and an IT professional should be able to tell you what specs you will need on a new computer. So seek out the advice of others before making the purchase and also check into warranty information as well!
Perhaps you would like to use your windfall to advance yourself personally or professionally. Its a tough market out there and if you want to find your dream job you will need to get some important skills under your belt. You may want to sign up for a night class at a local college or an online course that will help boost your resume and gain you some useful new skills. Professional conferences as well are great places to meet new people in the field you are working in or would like to work in. Networking with others is a great way to find out about hot job openings and get insider insight on what would be required of a good candidate. This year, I have decided to put some of my money towards attending a blogging workshop called Blogcademy to help me network with other bloggers and increase my skills and knowledge to help me bring my blogging to a new level. I am all for bettering yourself whenever possible!
You Missed a Spot is a new Spring Cleaning feature for the month of April focusing on the not so obvious places you will want to tidy up for the season! Each Thursday visit us for a new installment that goes beyond the how to’s of vacuuming, window washing and laundry!
If your the average woman, you have about 10 handbags in your collection and the average price of those bags is about $150 each. So, I am going to walk you through keeping your handbags clean and properly stored so that you are taking care of your rather large investment because you may not even know your not caring for your handbags properly!
You are going to need to make sure your handbag is empty so that you can properly organize it and identify any areas of concern that may need attention.
You will want to evaluate your bag to make sure its in good condition. If you find any stains, you will want to address them based on the fabric of your purse and try to get them cleaned off. If you find tears and the bag is expensive, contact the manufacturer to see what can be done.
Make sure the interior lining of you bag is intact. Often times, it can tear causing bits of dirt or even whole objects to disappear into the lining. In most instances you can probably repair the lining safely enough on your own, but if you have questions and the bag is pricey, again, speak to the manufacturer.
At this point, if you bag is clean and in good condition and you want to continue using it (remember, its probably one of ten and you may want to rotate!) make sure to be deliberate with the objects you carry inside it so it is not too heavy or filled with useless items. Also, make sure your makeup is contained in a makeup bag so that powders and lipsticks don’t break or melt on the interior of your bag causing stains or damage to the bag in the future.
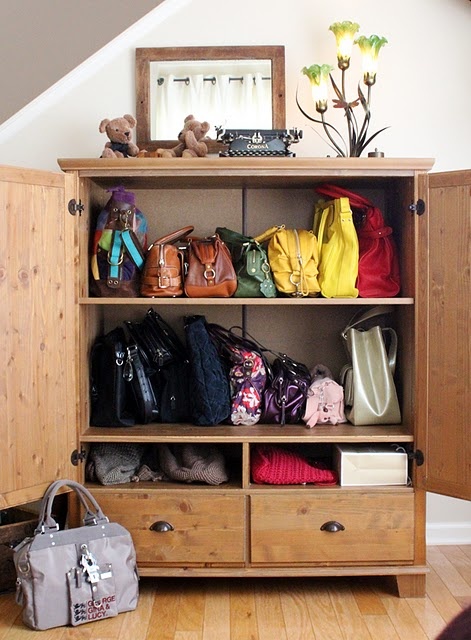
If your bags were designer made, they may have come with a dust bag to use for storage, you should be using these but a dust bag alone doesn’t cut it as a storage solution! You must also make sure to stuff your unused bags with bubble wrap or tissue paper so that the bags keep their shape. You may not think this is necessary, but especially with leather bags, its easy for them to ‘deflate’ in storage, causing the leather to crack due to the lack of structure. Also, make sure to keep the bags in a cool, dry, and dark place. This will preserve color and give the bag longevity.
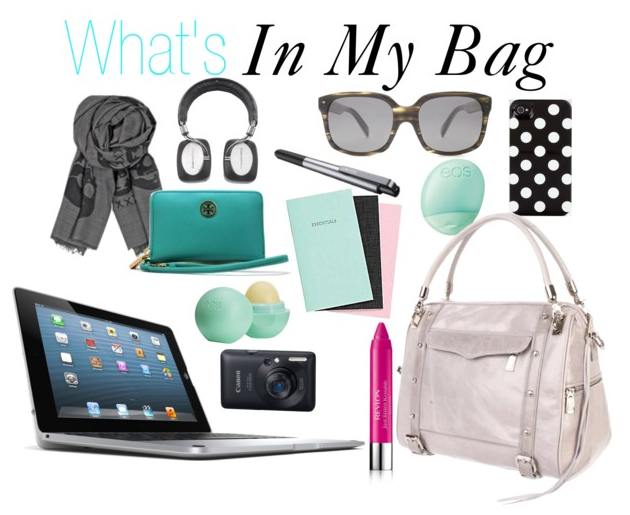
Last month was my birthday and I got so many fun new accessories I thought I should share with you all an updated What’s In My Bag to show you how things have changed since my birthday!
My everyday bag is still my favorite Rebecca Minkoff Cupid in Pale Grey. Although I switch between a few RM bags frequently, this one is my go to catch all bag that never fails to disappoint.
1. The most obvious new addition to my everyday bag is not exactly what it seems. I am of course referring to the laptop- that’s not a MacBook Air, but instead its my iPad 3rd generation in its new ClamCase Pro Keyboard case. I wrote about this nifty case on The Pink Mac, and made a video review if you care to check it out in greater detail!
2. My new wallet. I am now carrying around a Tory Burch Robinson Smartphone Wallet. This compact case has enough room for cash, change, my important ID’s and credit cards, as well as a special slot for my iPhone. I love this wallet because it doubles as a clutch when I need it to with its removable wristlet.
3. Kate Spade Pavilion Black and White Polka Dot iPhone 4 Case. I love updating my iPhone case and this is one I have been eyeing for a long time. I think the polka dots are fun for spring and the case is very protective, I know my iPhone is secure in it!
4. Grey and Black Skull Scarf. I am very into scarves, but this one is so chic and edgy I feel like a complete rock star whenever I wear it. The pattern is similar to the Alexander McQueen Skull Scarves but this one was so much more affordable off Amazon for under $20 and I get so many compliments whenever I wear it! Now to pin, 1001 ways to wear a scarf…
5. The final new addition to my bag are my wonderful new Sunnies from Warby Parker! Yes, they are prescription sunglasses, which is awesome because I have never owned a pair before and they make a world of difference while driving during the day. This style is the Jules in Stripped Evergreen and I think they are a neutral yet chic addition to my day to day wardrobe!
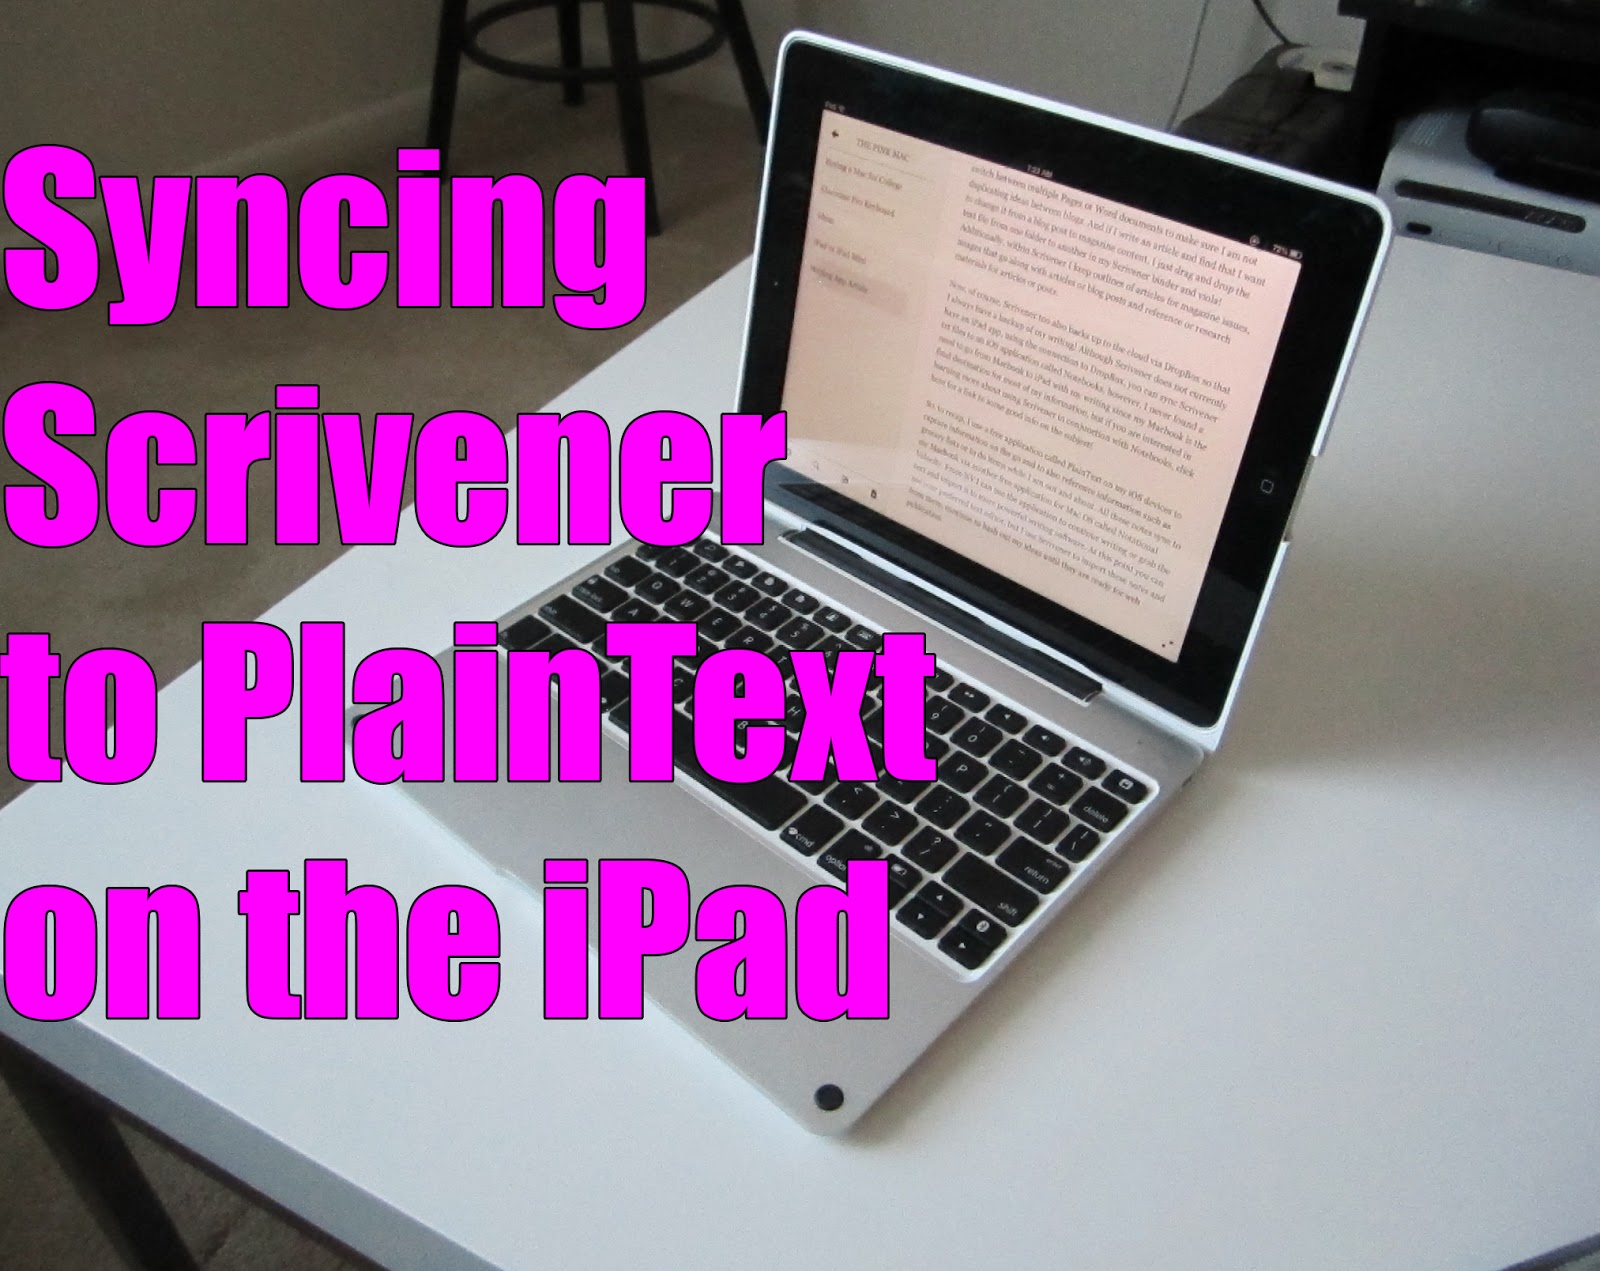
As I am now using my ClamCase Pro keyboard and iPad full time as my portable writers desk, I have been working on finding a solution that will complete the loop of writing between my iPad and MacBook Pro. When I first received the ClamCase Pro, I was using a multipart system, using the PlainText app on my iPad to write, then using Notational Velocity on my Macbook to sync with my PlainText documents and finally, moving the files over to Scrivener on my Mac where I organize all my writing. It was a reliable system thanks to Dropbox, and it worked, but it was only a one way street. It was a great way for me to import documents I wrote on my iPad back to my Mac, but I could not call up existing files sitting in my Scrivener project back to my iPad to be completed. I suddenly realized that my ClamCase Pro was so powerful that I did not need the crutch of my Mac to assist my writing, instead what I needed was complete access to my Scrivener project files in an infinite loop between my Mac, Dropbox, and iPad, then back to the Mac.
So, I started looking into alternatives for how to Sync my Scrivener folder with my iPad, because ultimately that is what I want and need. I do love Scrivener because its organizational ability is outstanding and if it had an iPad app that mirrored my Mac and my iPad that would be ideal! Sadly, it does not currently as I am writing this, perhaps in the future it may, but I won't hold my breathe in the meantime. Scrivener does, however, sync to Dropbox, also to a few iOS apps, and has built in functionality to work with SimpleNote- but I don't use SimpleNote. I know many people like it, but once I found PlainText I was in love and really don't want to keep switching around between iOS apps.
Luckily, in my research I did find a way to make my Scrivener/PlainText relationship work. Scrivener has an option to “Sync to Folder.” This option allows the user to sync all or some of the files in your Scrivener project to a specific folder and if I were to sync to my PlainText folder within Dropbox, well then, that may actually solve all my problems! So, I gave it a try and I am glad to say it actually works! On the iPad's end, its not the prettiest sight, but the files did show up in the order they appear in my Scrivener file, so I am now able to reference back to previous articles or in progress works between my iPad and Mac. If I create new documents on my iPad, it syncs those back as well and although they fall into a catchall folder, all I need to do is drop them in the correct place to remain organized (upon syncing Scrivener the document then falls into the correct order on my iPad.)
Step-By-Step Guide to Syncing Scrivener with PlainText on the iPad
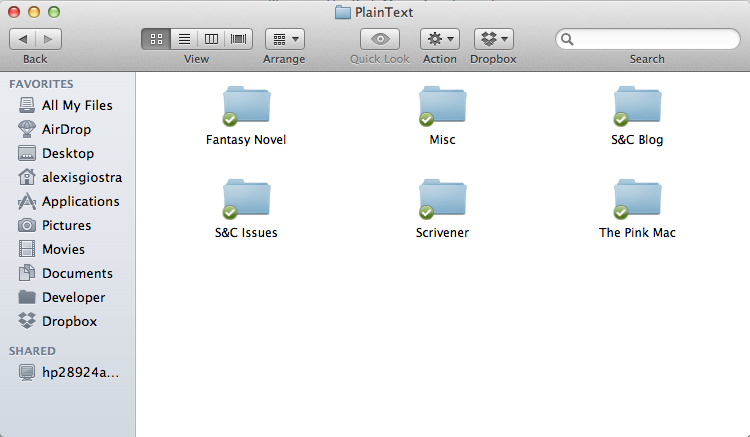
Step 1: Make sure all your connections are in place. In order for this to work, you need to be syncing PlainText to DropBox. This means your PlainText Files are actually stored in your DropBox file. Even if you do not sync your PlainText across numerous devices, this is necessary. Simply open the system preferences (the cog wheel) within PlainText and use the DropBox option to sync to your DropBox account. You can verify that this has happened by opening up your DropBox folder and seeing the PlainText folder inside. If you open this folder it will show plain text documents of any documents you have created within the app. I suggest creating a folder called “Scrivener” or some equivalent within the PlainText folder so that you have your Scrivener documents separated from your other PlainText documents.

Step 2: Select the Scrivener project you would like to sync. With this process you can only sync one .scriv file at a time to your PlainText, so open up the project of your choice. Give it a once over and make sure that all your text documents and folders are organized the way you want them. This will dictate the order in which the files will appear in your PlainText folder.
Step 3: Getting to the Sync with External Folder Option. From your File Menu hover over the Sync option and then choose with External Folder. See image for details.
| Navigate to the Sync with External Folder option from the File menu. |
Step 4: Set up your External Folder Options.Within the dialog box that appears, you must first choose the shared folder you would like to sync to. In this option you are going to navigate to your DropBox folder and open the PlainText file that you have stored there and finally select the “Scrivener” file you created in Step 1. By doing this you will have a separate space for your Scrivener documents, which will come in handy for organizing all your PlainText documents. Once your shared folder is selected, I recommend using the settings I have selected as illustrated in the below image. If you are using PlainText you need to make sure your files are formatted as Plain Text files instead of the default Rich Text.
| Choose your options in the Sync with External Folder dialog box. |
Step 5: Sync. Once everything is set properly, you can select the Sync option. Once the sync is complete you should be able to turn on your iPad, open PlainText and see a new folder called Scrivener organized amongst your documents. If you navigate into this folder you will then seen a subfolder called Drafts and another called Notes. Open the Drafts folder to see your Scrivener writing project laid out in the order in which they appear in your Scrivener file. Folders will be empty documents (this is for organization) but text documents will show content so long as their had been content in the files on your computer.
 |
| Upon Syncing you will find the Scrivener file among your other files and folders in PlainText. |
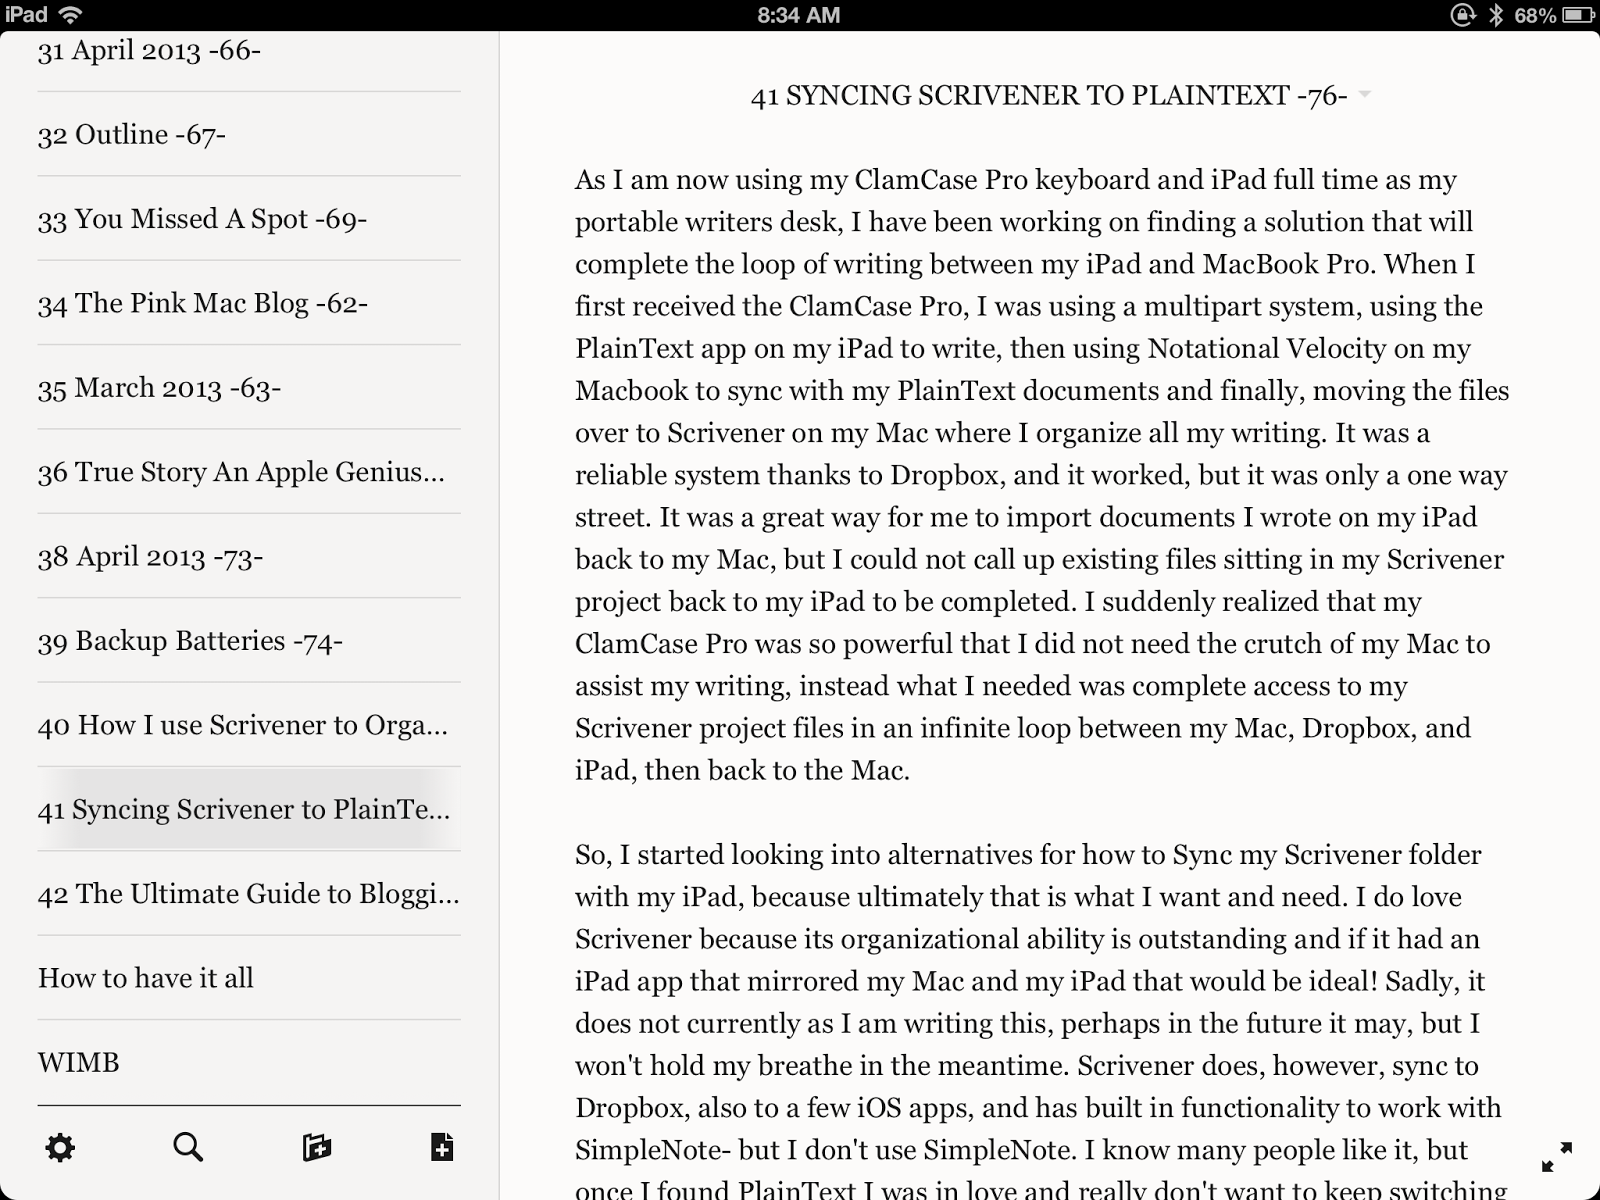 |
| Navigate through the files Scrivener > Drafts until you come to your Scrivener files organized in their original order. |
Now you are free to continue writing and editing your Scrivener project on your iPad. PlainText automatically syncs back to your DropBox folder when changed are made to your documents so the next time you open your Scrivener project on your computer it will ask you to sync and it will import all the changes made through your iPad. Because your iPad does have complete control over your Scrivener file, I suggest that you keep your project backed up in case you delete something important from your iPad. The Automatic back up options are found in the File Tab under Back Up for your reference.
If you enjoyed this post, I suggest also reading my previous article on How I use Scrivener to Organize my writing for a short overview on organizing files within Scrivener. Enjoy!

You Missed a Spot is a new Spring Cleaning feature for the month of April focusing on the not so obvious places you will want to tidy up for the season! Each Thursday visit us for a new installment that goes beyond the how to’s of vacuuming, window washing and laundry!
{Organize your Lingerie Drawer}
Your lingerie or underwear drawer is probably the last place you would think to organize, so I figured we should start there! Its not uncommon for people to hoard bras and panties thinking, ‘you can never have too many’ but the truth is, you should be filtering through your underclothing at least twice a year.
Bra’s: You should get fitted annually to make sure you are the correct size or anytime your weight changes significantly. Since we wear bra’s daily for hours at a time, they wear out quicker than you would expect, and you need to know what to look for in order to determine if you should keep or toss one!
Signs you need to toss your bra
Panties: Like bra’s your panties are worn everyday (hopefully!) and worn for nearly 24 hours in most cases! You should make sure to regularly check your underwear to make sure it is in good condition and immediately toss any undesirable pairs and replace them with a few new ones.
Signs you need to toss your panties
Stockings: Stockings may not be worn as often as your bra’s or panties, but they are significantly more delicate in most cases. Its not rare for someone to put a run or a hole in a pair of sheer stockings the moment they put them on, which is pretty upsetting because no one wants to toss something that’s new, but keeping stockings with imperfections, especially those in visible areas, is just not good sense.
Signs you need to toss your stockings