Month: September 2013

Rediscover your Wardrobe

organized closet
Image via Rubbermaid Products

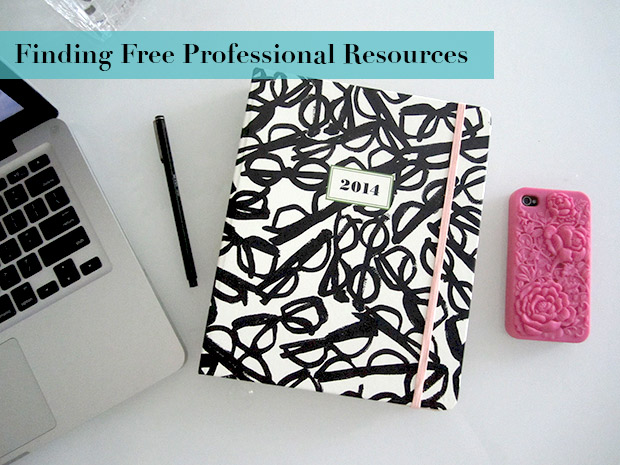
As part of this month’s commercial detox, I have made it one of my goals not to purchase any unnecessary clothing. After all, I do have a wardrobe filled to the brim with clothes that I already own, most of them sitting unused at the backs of drawers or hidden between garments hanging in the closet. Since it’s now the end of summer as we head into fall, it’s about time to do a wardrobe change over anyhow, and in the process I plan to use the following tips to help me rediscover old pieces that have been hiding out of sight out of mind! The purpose of this exercise is not only to help me find existing items in my wardrobe that I haven’t been wearing, but to also help me create a “new” fall wardrobe by mixing and matching items I may not have normally thought to put together during that morning rush preparing for my work day! I suggest giving yourself a good amount of time dedicated to finishing this project, like two to four hours depending on the number of garments you own, so make sure to clear your schedule and your mind before you begin. I promise though, this will totally be worth it in the end and will almost be like a shopping experience except you’re using your own clothes and don’t even have to leave the house! Your credit card will thank you!

1. Prepare your space.

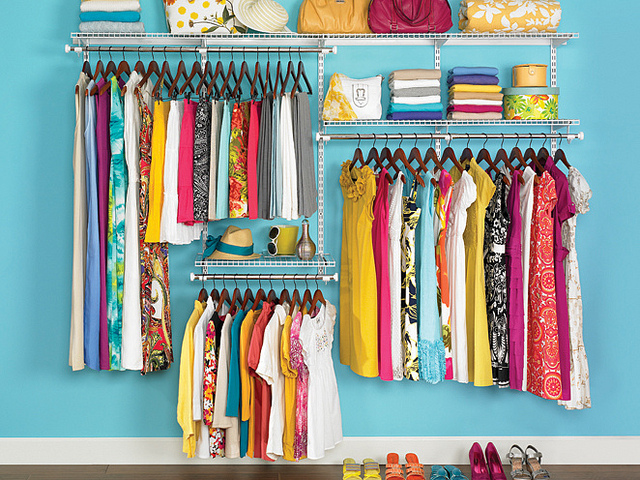
Before you begin this wardrobe transition, you will first need to have a good deal of space set out for yourself in your bedroom or living room where you can spread out your clothing and give good thought to how you want to style them for the fall season. Once you know the space you would like to use, I suggest cleaning it up a bit by sweeping or vacuuming the floor, making sure there are no other clothes or items that could get covered or lost during the process and generally make the space clear of any objects that might get in your way. This is an important step because your clothes are going to be everywhere during this process and getting them dirty or being too cramped will hinder your creative juices!

2. Grab your camera.

It doesn’t have to be a fancy DSLR, unless that’s what you want to use! Your cell phone’s camera , webcam or even a Polaroid will work fine! The point of the matter is that you need something to visually capture the outfits you are about to create. This is a very important step because you will need the visual reminder later on when you forget about your clothes and get back into your clothing rut!

3. Sort your clothing by color and type.

Now comes one of the hardest parts of this whole exercise. You will need to begin removing all the clothing from your closet, drawers, etc and start sorting them into piles laid out on your bed, the floor, etc. I suggest sorting clothing by the type of garment (blouse, long sleeve shirt, pants, etc) and then group them by color family the way you might do while washing them. I suggest the following color groupings, but yours may vary by the items in your closet: Darks (Black, Grey, Navy, Dark Greens, etc), Lights (White, cream, beige), and Brights (Colors of the rainbow). Once you have completed this step, all your clothing should be in piles around you. Don’t get overwhelmed! The next part can be super fun if you let it!

4. Start “shopping” your closet until you come up with at least 5 “new” outfits.

Go through your piles and take a good look at your clothes. Start putting together new outfits based on different combinations of clothing that you haven’t tried before. Try different techniques like layering blouses and sweaters, mix a few prints, imagine a dress or tunic as a top tucked in and belted! If you’re really lacking inspiration, pull our your laptop or iPad and start searching Pinterest for outfit inspiration. I bet you if you look hard enough at the clothing you have in front of you, you probably have items right in front of you that would create that ideal outfit you pinned last year! Don’t be afraid to swap garments out for one another. So, the look you want includes a henley, use a chambray instead. No short-sleeved blouse to go under your cardigan? Try a well fitted t-shirt instead! You don’t have to own every item you see on a model in order to capture her style. You just need an open mind to find the pieces in your own wardrobe that could act the same way to evoke the style!

5. Snap a quick pic of your “new” outfit.

Once you have an outfit put together, lay it out in front of you and photograph it. It would also help if you gave the outfit a name, like “Edgy Office Look” or “Casual Friday Polka Dots”. The image and name association are going to help you remember the outfit and what your thoughts were for wearing it later on when all your clothes have been put away. Another way to help you remember the outfit would be for you to hang it up as an outfit in your closet instead of separating the outfit into its pieces when you put it away.

6. Clean up and organization.

At this point, once you have all your new outfits photographed and planned out, you will need to start your clean up. If you change your clothing out for the season, proceed with putting last seasons clothing away and replacing the dominant spaces in your wardrobe with the current seasons clothing. Now is also a great time (since your clothing is in color coordinated piles) for you to look and see if you have any unnecessary duplicates, old, worn out or damaged pieces that need to be mended, discarded or donated to your local thrift shop! Slimming down your wardrobe is a great way to keep yourself motivated to wear all the pieces in your closet. Too often we get caught up wearing the same outfits repeatedly and when we get sick of them, the answer is shopping for new. Fight the urge to shop for new and shop your closet first!

Did this exercise inspire you to begin rediscovering your own wardrobe? Do you have more clothes than you actually wear on a regular basis but also find yourself constantly shopping for new? Think about your triggers for buying new clothing and let me know your plans to pare down your wardrobe or start wearing pieces that you had forgotten about! We’d love to hear your stories in the comments below!

Free Professional Resources

Free-Professional-Resources

Often times when we are looking for professional or career advice, we turn to popular books on the subject. I have read my fair share of career and business books in order to help me develop my skills and talents, but do you really need to buy a book to help you on this subject or can you do a little of your own research using free online websites as resources? Here are three of my favorite professional advice websites, some geared specifically towards women, that I hope you find as helpful as I do!

Levo-League

Levo League

Levo League is an organization and free website ran by career minded millennial women. Their site includes profiles that connect members with mentors that work in a variety of industries and have had anywhere from a traditional to a unique career path! You can interact with other members that are just like you, ask questions about career advice and read daily articles on a variety of business, career or personal issues affecting young women in the workplace. I have even written for Levo, and you can check out my profile and posts here.

 Shetakesontheworld

She Takes On the World

She Takes On the World is a website for business women and female entrepreneurs written by writer, business woman, motivational speaker, Natalie MacNeil and her team! This fun site is filled with blog posts and videos that cover real hard-hitting issues and questions facing female business owners and professionals. I love this site because it always has fresh perspectives and unique views on day-to-day problems facing businesses. Natalie and her team do a great job of giving real life tips, advice and complete solutions to every business problem!

 Brazencareerist

Brazen Careerist

The Brazen Careerist site is not geared specifically towards women, but it is no less useful! The site itself provides virtual solutions for real life hiring needs for businesses and schools, but also includes a blog that addresses common and not so common issues that workers face. From finding a job, to turning your current job into a dream job, this site covers all the real life issues of being a professional in an insightful and relatable way.

Do you enjoy reading about professional and career advice? What sorts of topics do you find yourself interested in? Are you looking for a job or find yourself networking on career sites like Levo? What is your opinion of business websites vs. books? What other professional or career advice websites or blogs do you follow? Let us know in the comments!

Finding Free iOS Apps

Finding-Free-iOS-Apps-Cover

I love iOS apps and I don’t mind paying for a good one, but whenever possible I try to get them for free! The app store is a tricky place though and although apps frequently go on sale, with price reductions or temporary promotional free price tags, it’s still hard to find those awesome apps on discount. So, let me tell you about the best two ways to find apps for free or at a discounted price!

 Free-iOS-Apps

AppShopper

The first way to find great apps for free is by downloading and skimming through AppShopper. App Shopper is a free iOS app that shows you all the app sales and discounts. Since apps go on sale everyday and can be on sale anywhere from a single day to an entire month, App Shopper keeps track of these sales histories to make sure you are seeing everything on sale! You can use the app to search for a specific app or search through categories to find a certain type of app you are looking for like a game or a utility. You can even use the app to create an App Wish List where you can list out apps you want to purchase and if they go on sale AppShopper will notify you!

Starbucks Pick of the Week

If you are not familiar, the Starbucks Pick of the Week is a promotional program hosted through Starbucks that highlights great music, movies, apps and more! Basically, when an App is chosen as part of Starbucks Pick of the Week program, free download codes are distributed by Starbucks in their stores and through their iOS app. You may have seen these little credit card sized cards sitting by the pickup station of your Starbucks, and when you take one, they have a code that you can use to download the chosen app for free. You can also use the Starbucks App to get instant notification of new Starbucks Picks that are available through their app as a digital download. The Starbucks Pick of the Week cards and downloads are always free, but you need to use the app or visit your local Starbucks in order to get them.

Are you an app junkie? Do you pay for apps or do you strictly download the free apps! Have you seen the Starbucks Pick of the Week program? Do you pick up those free cards or prefer to use the Starbucks App for free downloads? Let us know in the comments!

Starbucks @ Home: Salted Caramel Mocha

 Starbucks-at-home

Coffee house visits can be a major source of unnecessary, and usually avoidable, expense in the average professionals life. Don’t get me wrong, I love Starbucks and although spending $3-6 dollars on a gourmet beverage may seem like a minor thing if you are making these trips occasionally, daily visits can certainly become very costly. Think about it, visiting a Starbucks every work day can cost you $20 a week and $1,040 a year! That is rather much for a single beverage a day habit and that’s not even including weekends! So, what’s a girl to do if she wants to avoid this expense? Well, make it at home, of course! Most people do own a coffee machine, even if they get their coffee fix elsewhere, so put yours to good use with this simple recipe I have created at home using Starbucks coffee products! Hopefully, this will help you see that a delicious barista style drink doesn’t have to cost you much time or money, and you can still say your drinking Starbucks, because, well, you are! I will be using a Keurig to brew my coffee, but you can easily translate this to a standard coffee machine!

 Starbucks-ingredients

What You’ll Need

A Reusable Starbucks Cup: I bought this simple reusable Starbucks cup earlier this year when Starbucks was running a reusable cup promotion. I believe the cup only cost me $1 and it looks exactly like a regular Starbucks cup!

Starbucks Cafe Verona K-Cup: This coffee is also available in regular ground form, but I use this blend because it is actually made with chocolate in the brew so it is already a little sweet and mocha flavored.

Starbucks Salted Caramel Hot Cocoa: I only use half of a packet in order to get that salted caramel flavor without my coffee tasting like hot chocolate.

Creamer: I use a lite non-dairy creamer, but milk, soy/almond/rice milk, or cream will do fine as well!

Whipped Cream: You don’t need this per se, but if you want to give yourself that extra special Starbucks feeling, its easy to add a but of whipped cream to the top of your drink before you lid it.

Sweetener: Although the coffee and the cocoa itself are sweet, you may want a bit of something extra. I use stevia to sweeten my coffee, but feel free to use whatever you’d like. Just make sure to go a little easier on the sweetener than you normally would because your drink is already slightly sweetened.

Garnish: I garnish this drink with just a pinch of the cocoa mix, some natural sea salt and some colorful pink sugar crystals, but you can top it or not top it however you would like!

 starbucks-kcup

Let’s start brewing!

The first thing you will need to do is brew your coffee. K-Cups are super simple, but they do cost a bit more than regular coffee grounds. Obviously, you will just use whatever method of brewing your coffee you have available to you! Once I have my coffee brewed, I transfer it to the reusable Starbucks cup and spoon in half a packet of the cocoa mix. I then add my creamer and sweetener to taste. If you plan to add whipped topping, make sure you leave a little room at the top of your cup for that. Next, add your desired amount of whipped topping and your garnish. I use a small wire sieve to distribute that pinch of cocoa mix evenly. I then add another pinch of sea salt and the pink sugar crystals for added color and general delightfulness!

 starbucks-topping

Voila! Top your cup with its lid and take a sip! Delish right? Depending on the size you made, this recipe costs at least half of what you would pay at Starbucks, is significantly fewer calories, and is quicker than the Starbucks drive thru!

Starbucks-salted-caramel-mocha-and-others

Has this recipe inspired you to start making your own coffee-house drinks at home? Would you be interested in more easy, at-home coffee recipes like this? Do you visit Starbucks or your local coffee-house as part of your daily commute to work? Or, perhaps you already brew your coffee at home? Let us know in the comments!