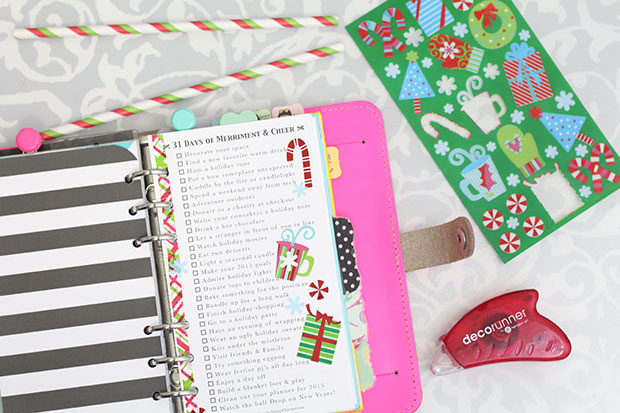
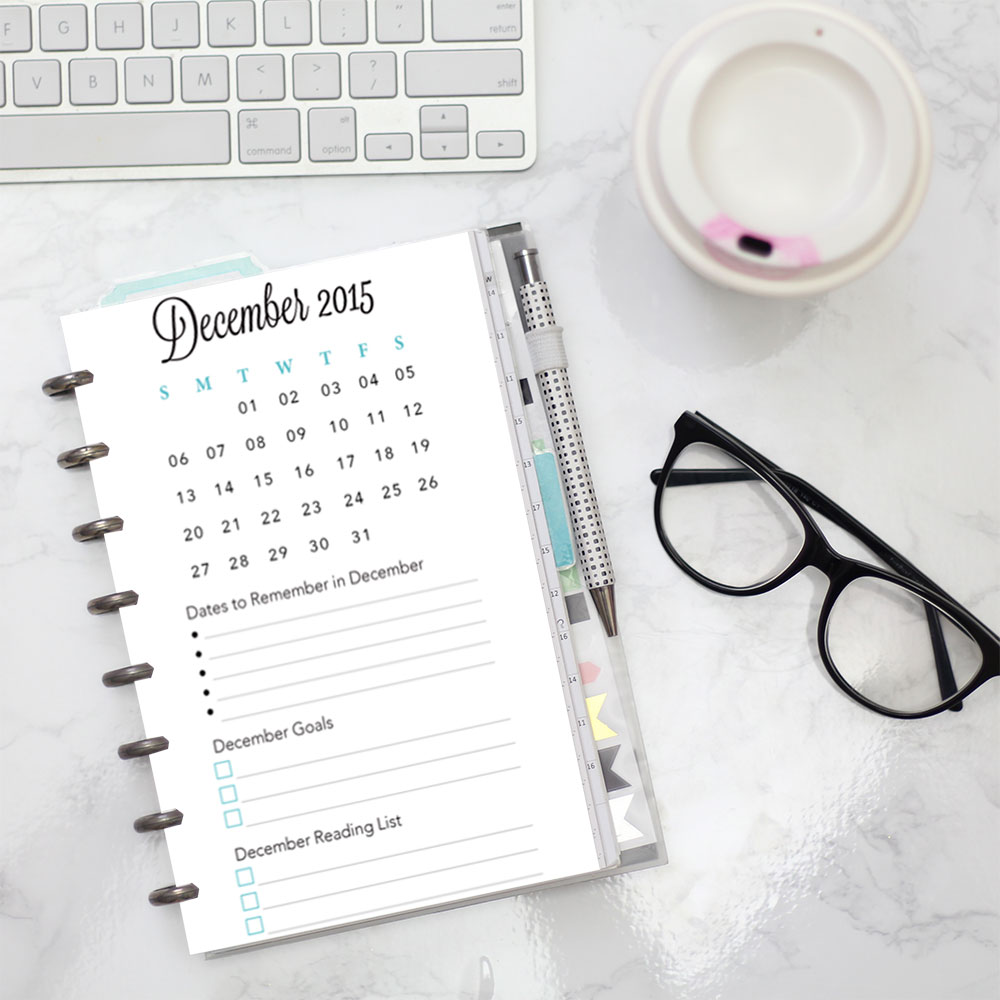
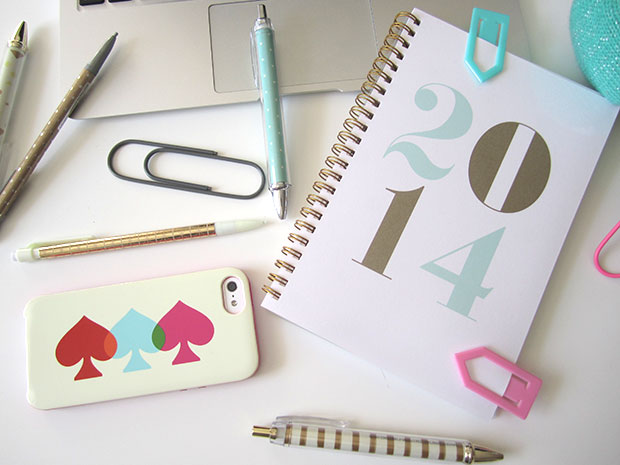
Hello Friends & Happy December Eve! I’m here to share with you all my latest free Filofax printable insert! As I have been doing in previous months, I created a monthly to do list filled with seasonal and holiday driven items called 31 Days of Merriment & Cheer! Of course, I also have my monthly December Dashboard as well to help you get organized and make the most of this holiday filled month. These inserts are available in both A5 and Personal Filofax equivalents over on my Shop as an instant download! Make sure to pick up yours while you are taking advantage of the BONUS DAY of my CYBER WEEKEND SALE! That’s right! The biggest sale I’ve ever held is still going on for one more day. Use coupon code CYBERWEEKEND15 for 20% off anything and everything in my shop thru the end of November eastern time!!
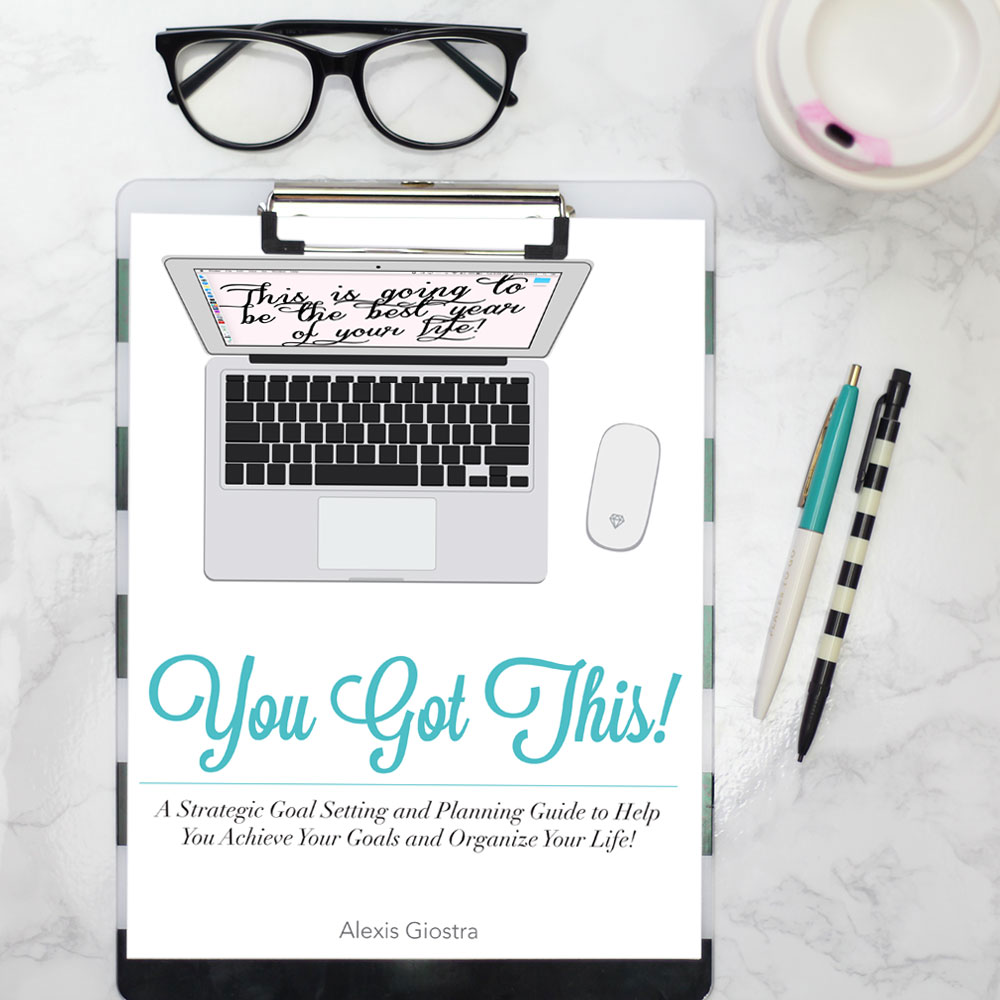
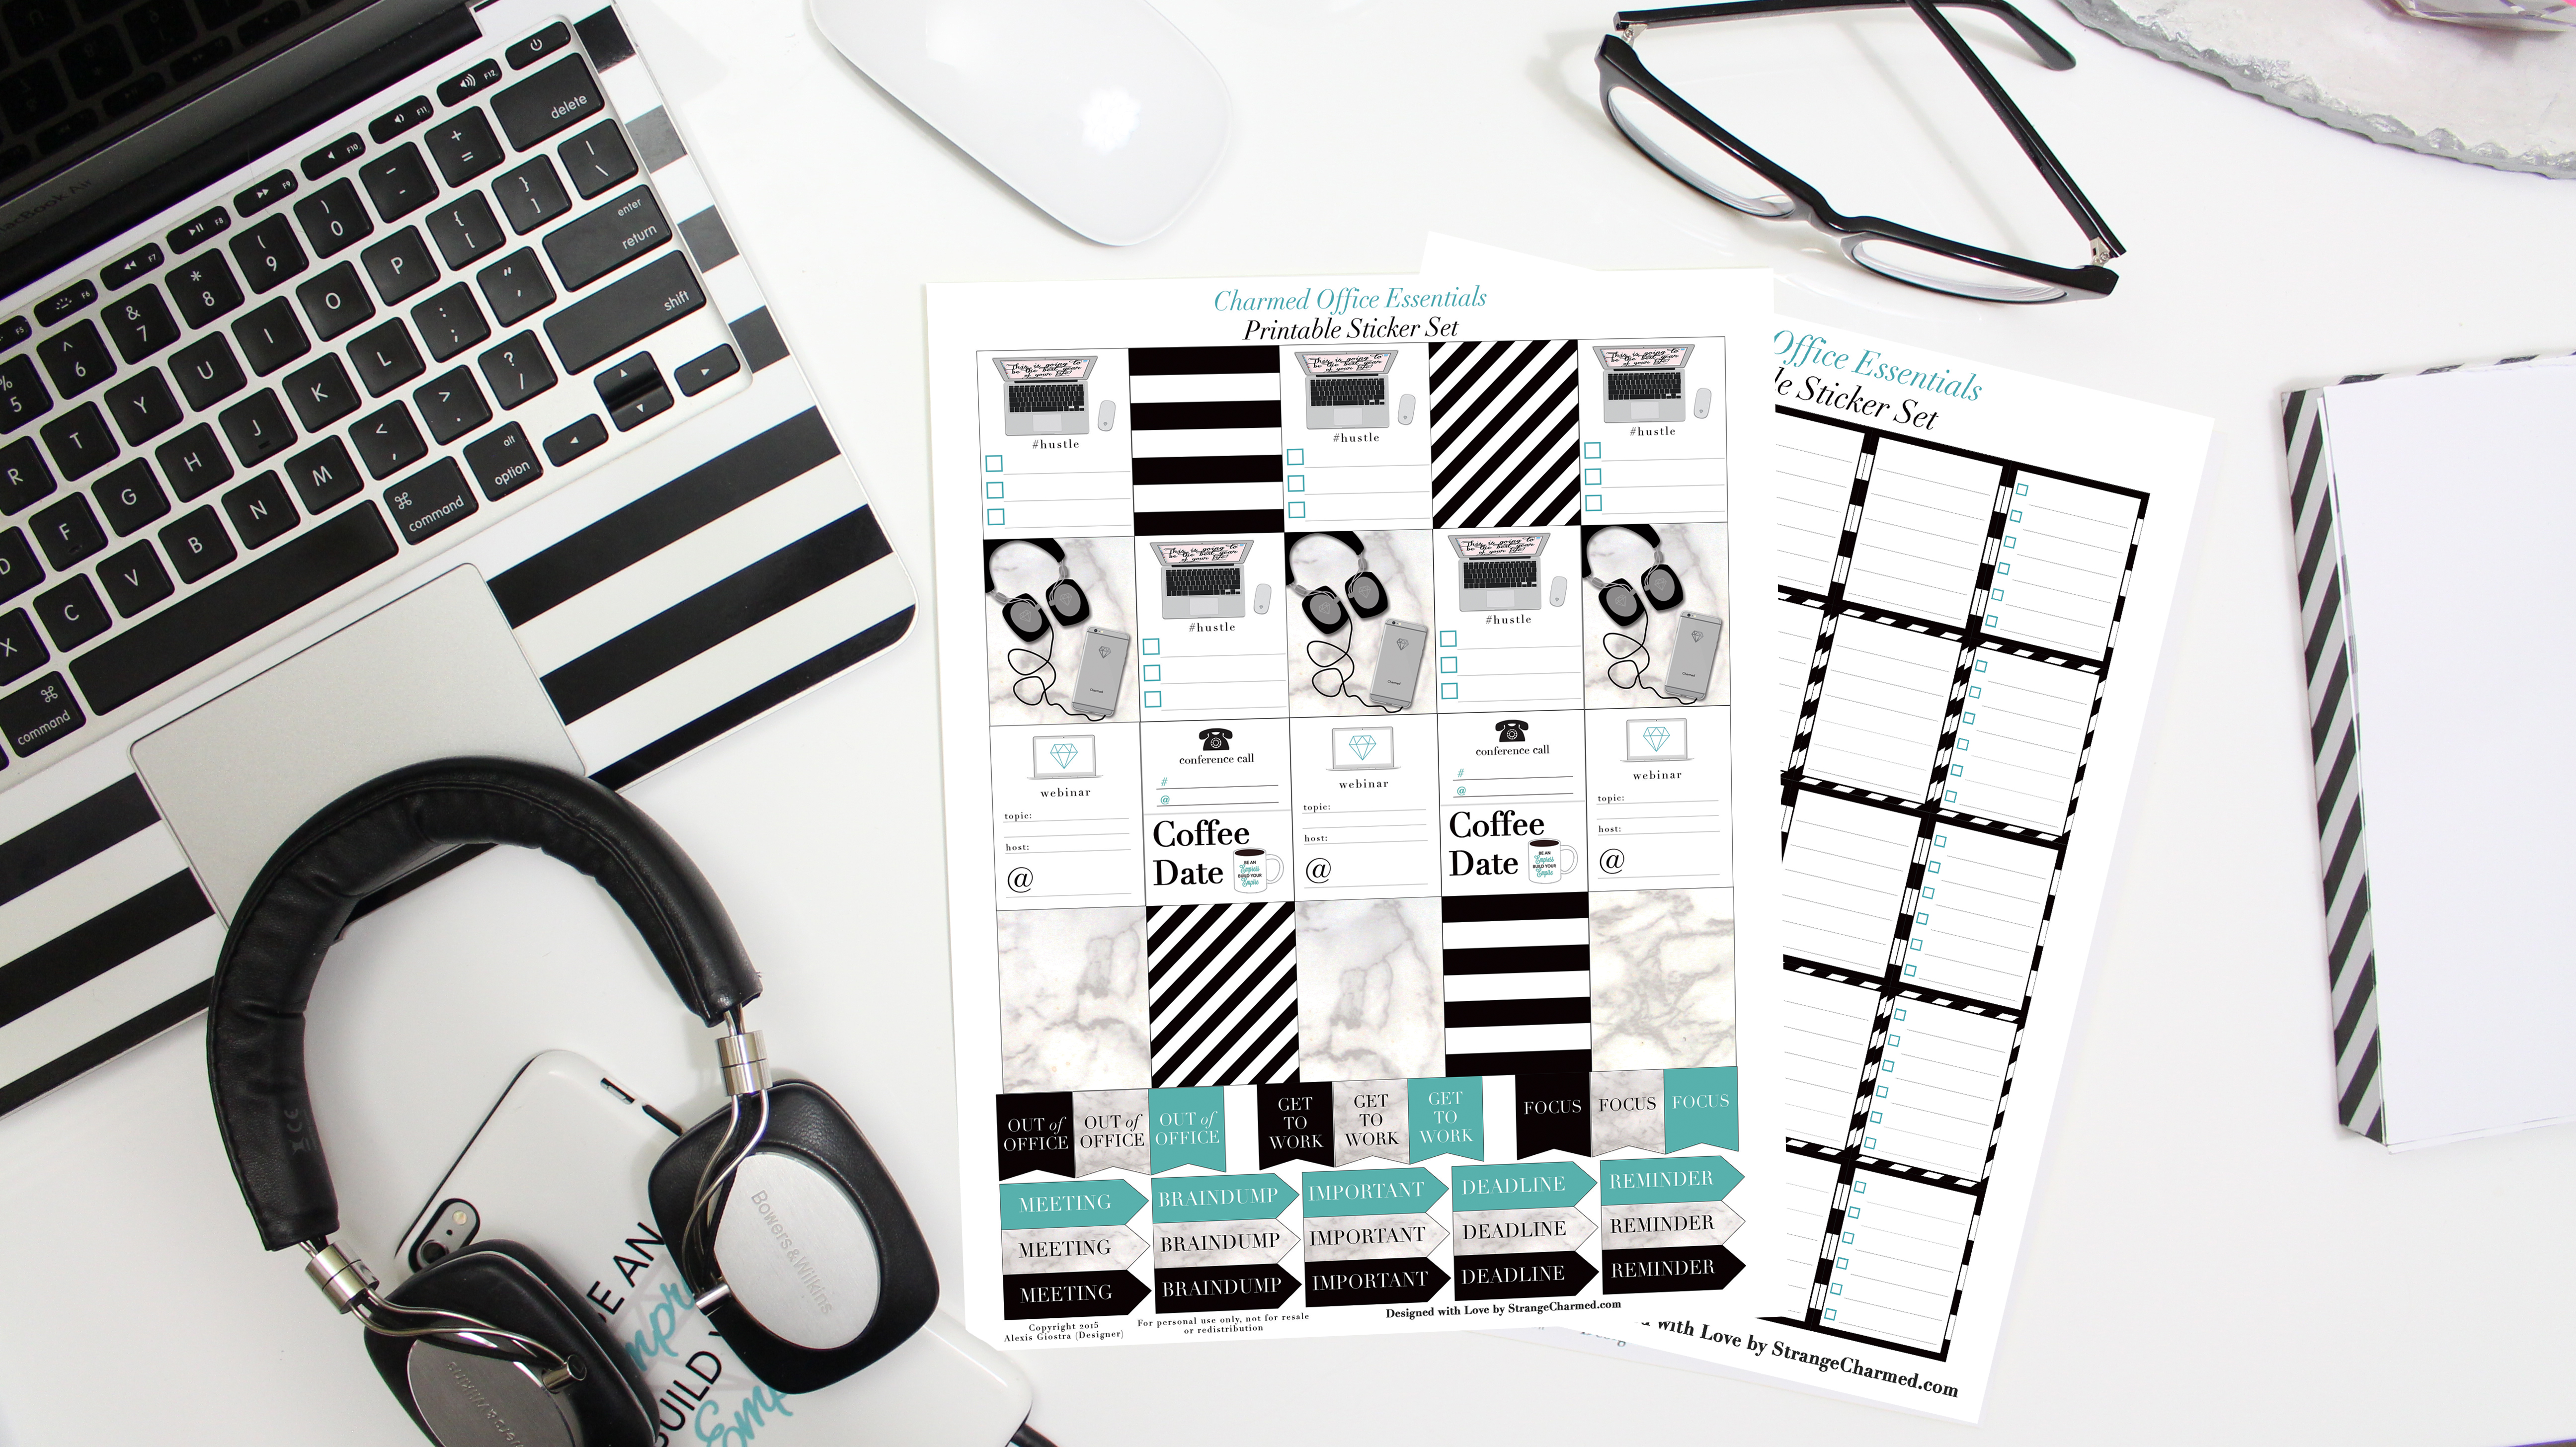
New in the Shop!
If you haven’t been keeping up to date with my latest releases in the shop, let me give you a quick run down of some new items you won’t want to miss!
Don’t forget, the code CYBERWEEKEND15 will get you 20% off your entire purchase in my shop thru midnight December 1st, so be sure to take advantage of this holiday sale before it is too late!
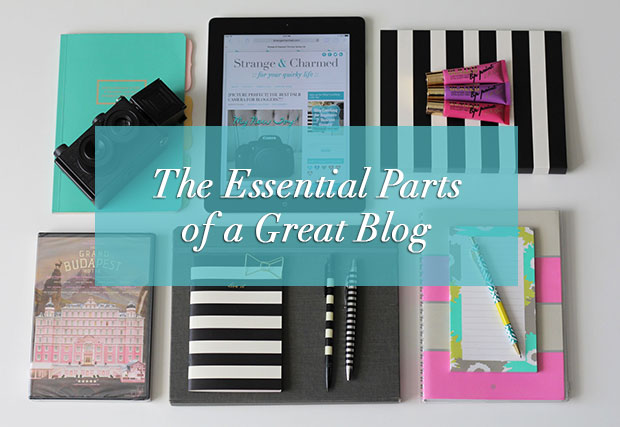
I have been spending a lot of time lately thinking about what goes into making a great blog. I honestly believe that it’s not just great writing alone that makes a blog great. Perhaps a few years ago this would have been the case, but blogs now are so much more of an experience beyond words and because of this, it takes a combination of a lot of different factors like great writing, inspiring pictures and a well-organized layout. In an effort to help improve my own blog, I have been making a study of this topic recently and you may notice new things popping up here and there on my site over the next few days and weeks! So, back to the title of this post, the essential parts of a great blog. I read a lot of blogs and I’m always surprised when I come across one that is lacking some of the most essential elements that make up a great reader experience. What are these essential elements? Let’s discuss them one at a time!
An About Page
No matter what the topic of your blog, I think its very important to have an About Page so that interested readers can learn more about the history of the site, who writes it and why they should bother reading it. In an About Page, it’s always good to have some important pieces of information to share with your readers.
A picture of the blogger(s), so that readers can make that human connection from one computer screen to another.
A description of the types of posts they can expect.
A brief history as to why the blog was created and its point of view that makes it unique.
A FAQ Page
After a blog has been established for some time, it becomes common for the blogger behind the site to receive the occasional question. It’s inevitable, however, that after some time, readers will have the same questions. So, to save yourself time and some effort, its always nice to put together a FAQ page. I think it gives readers a sense that the blogger cares about making sure their questions are answered. So, if you get a lot of questions and specifically a lot of similar questions, you may want to add a FAQ page.
Contacts
Although while you are writing, blogging may sometimes feel like a one way street, the truth is that when your posts will often inspire conversations and connections with your readers in ways you may not ever have expected. While comments are a nice way to connect, they are not always the be all and end all. Make sure to leave some form of contact for your readers to get in touch with you, either by means of a contact form or better yet, an email link.
Social Media Links
If you are a blogger, you will no doubt also use a few forms of social media, and readers that enjoy your posts and read your blog regularly will no doubt want to follow you elsewhere on the internet. Make sure to display your social media links in a prominent spot on your blog so they are easy to spot. You would be surprised how often readers feel compelled to send you a Tweet or check out your Instagram feed when they are enjoying your blog!
A Guided Tour or Best Of for New Readers
Now, I will admit, this one is a little more rare in my opinion, but I still think it’s an awesome feature to have on your blog and one that I am in the process of putting together. What is it exactly? Basically, it’s a post or page on you blog that is filled with some of your best work! It’s like an introduction to your blog through your posts themselves. Arrange posts by topic and pick out some of your favorites to showcase for your readers. It’s a really great way to help new readers get a good footing on your best and most popular work, as well as give them a general overview of what you tend to write about. If you’re stuck on how to put together this type of post, I suggest asking yourself which of your posts best describe you and your blog. Think about which posts have the most comments and don’t forget to link to any series’ you may write on a regular basis so new readers can catch up on the fun!
Are there any other parts of a blog that you think as essentials for a great blog? Let me know what you think makes a great blog by sending me a tweet or leaving me a comment below!
This article was first published on Strange & Charmed on August 14th, 2014 and is being reposted as part of my Holiday Prep Hiatus! For the months of November & December I will be recycling some vintage S&C content that you may have missed in order to give myself some extra time to finalize projects and spend time with my family during the holiday season. All reposted content will be marked as such. I hope you enjoy this blast from the past blog post!
With Thanksgiving a few days away, I thought it would be nice if I shared with you all my favorite holiday recipes for dishes I will be serving at my Thanksgiving dinner this year! If you are looking for a new recipe or some inspiration for meal planning, hopefully this will help you discover a new dish!
Appetizers
Since I am hosting Thanksgiving dinner this year for my family, I like to have snacks and appetizers out before dinner for people to munch on while they watch tv and chat! My husband has requested shrimp cocktail this year as well as a plate of his favorite cured meats to go along with the baked brie I will be making as a hot appetizer. Baked brie is one of our favorites and I love it because its super easy to make, but it presents very, very well. This is the sort of appetizer that’s great to bring along to parties because you can prepare it ahead of time and once you arrive at the party you can heat it up in the oven for a few minutes!
1/4 cup of preserves (apricot or raspberry work very nicely, but use whatever preserves you prefer, you can also omit this if you don’t like preserves!)
Directions
Preheat your oven to 425. Lightly grease a baking sheet and place your thawed puff pastry upon it. In the center, place your brie (removed from packaging) and top with preserves (optional). Wrap the pastry up around your brie working in a single direction until the brie is covered completely by the pastry, ensuring there are no holes or cracks for cheese to spill out of. Bake in oven for 20-25 minutes until the pastry is fluffy and browned. Make sure to keep an eye on the cheese to make sure it’s not melting out of the pastry excessively (a little spillage is okay, but if rivers are flowing out, remove it immediately!) Let cheese stand 5 minutes once removed from the oven and then serve with your choice of crackers!
Side Dishes
For me, a great Thanksgiving meal is made by the side dishes! Although I am hosting a small gathering of family, I still like to have lots of options! We will have the traditional mashed potatoes, a salad, rolls of course, but two of our favorite sides are always Corn Bread Pudding and Sausage Stuffing!
Combine all ingredients adding the bread mix last, into a large mixing bowl. Bake in greased bowl or pan at 350 for 1 hour to 1 hour 15 minutes. Should be a light golden brown on top. Let the pudding rest for 5-10 minutes after removing from the oven!
1 16oz package of Jimmy Dean sausage (in the log style or use equivalent in Italian sausage style of your choice. I prefer the Jimmy Dean Sage Sausage, but that is just personal preference!)
1 Tbsp Olive Oil
1 Box of Stovetop Stuffing (or whichever stuffing recipe you prefer)
Additional Ingredients on stuffing mix box or your preferred style of stuffing!
Directions
In a large pan on the stove, heat oil and distribute on the pan on medium. Place sausage in the pan of heated oil and begin to break it up with a wooden spoon or similar utensil until the sausage is in crumbled, bite size pieces. Cook sausage until browned, drain excess oil and move sausage to the side while preparing your stuffing mix. Prepare stuffing as directed. Once stuffing is cooled, incorporate the cooked sausage and transfer to the serving dish of your choice.
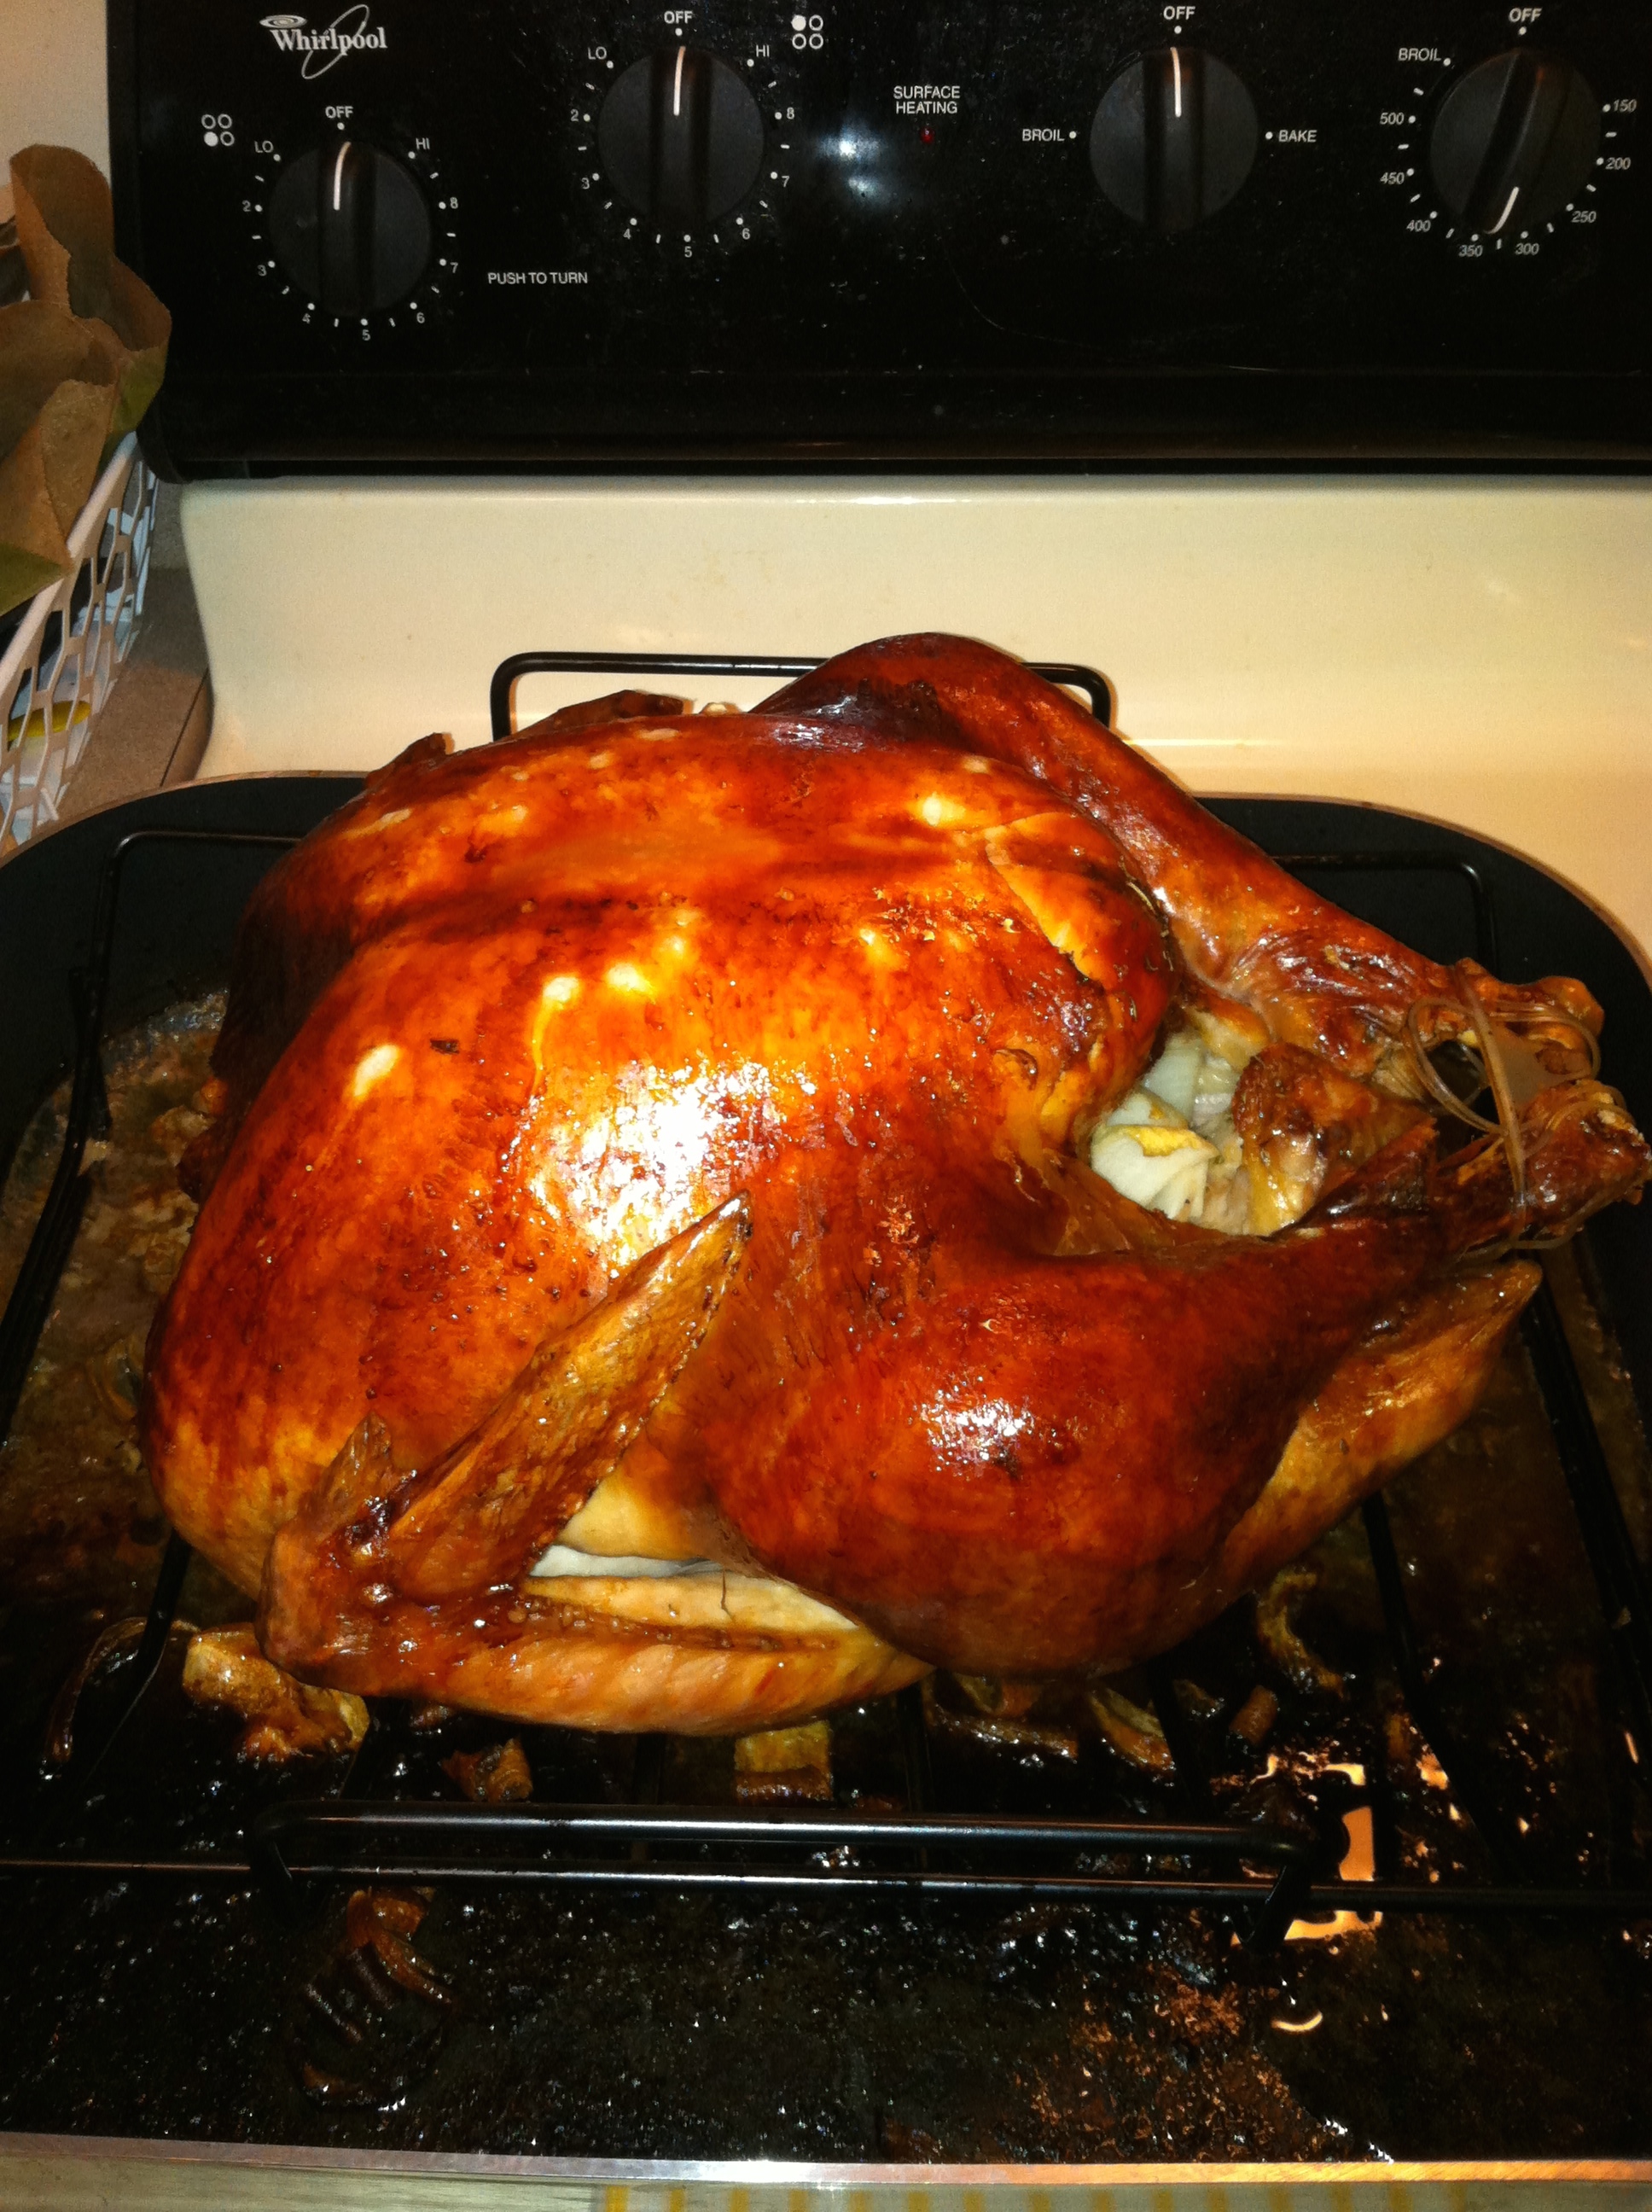
My Turkey via Thanksgiving 2012
The Turkey
If I had to venture a guess, I would say that Turkey is probably the most popular type of meat served on Thanksgiving, however, I have been to several Thanksgiving dinners where it was served alongside a ham or even lamb. I will only be serving one meat option on Thanksgiving, because, let’s be honest, its hard enough to get one meat right on Thanksgiving and turkey is a difficult bird to master! I, however, believe I make one of the best turkeys… ever! I’m just gonna say it, my turkeys are good! They are super moist, filled with flavor and golden browned by the time they exit the oven! I think this has to do with the awesome recipe I developed based off this Alton Brown recipe!
Ingredients
1 frozen Turkey (size doesn’t matter folks, but a rule of thumb is 2 lbs per person you’re feeding. I have made this recipe with a 16 lb turkey to a 23 lb turkey and they have all turned out great!)
1-2 Apples
1-2 Onions
Cinnamon (I prefer ground)
A few cups of water
1-2 Cups of Apple Cider or Apple Juice
Sage (packaged seasoning is fine!)
Rosemary (again, stick to the stuff you have in your cupboard unless you really want fresh!)
A bulb of garlic
1 stick of butter
Directions
Now, I just want to warn you, that for me, this is one of those recipes that is all about judgement calls. I don’t believe you can go wrong with anything except the cooking time, but just do what feels right!
2-4 Days before cooking, take your turkey out of the freezer and let it defrost in your fridge (the larger the turkey, the more time it needs, 4 days would play it safe, 3 is probably average, 2 days and I would worry about having some frozen innards still!
Day of cooking: Preheat your oven to 500 and make sure the racks of your oven are properly positioned to fit your turkey (there is nothing worse than having to mess with those once they are hot!) Remove the thawed turkey and place it in a completely clean sink (very important that your sink be as clean as possible and I would work with the turkey inside a large container of some sort as well)! Remove the turkey from the packaging and remove the neck and other misc innards from the cavity (if you have plans for those innards, put them aside, if not, toss them)! Rinse out the cavity with cool water to make sure there is no bits of ice or slush in there!
Place the turkey on a roasting rack that’s sitting inside a roasting pan. In a microwavable bowl, place an apple or two (chopped up), an onion (also chopped) mixed with a good amount of cinnamon and some apple juice/cider. This part is all eyeballing it! I like to make more than I think I need, because, trust me, this mixture will not go to waste, so maybe a good estimate is to make about 3-5 cups of this mixture! Cook it in the microwave for 5 minutes and you will start to smell all those lovely aromatics brewing together (that smell is what your turkey is going to taste like once this is all done)! Once that mixture is out of the microwave, spoon out the chunks of apple and onion into the cavity of the bird. Add additional apple and onion slices to fill the cavity if necessary!
Coat the skin of the turkey well with the canola oil. Take apart your bulb of garlic and skin each clove of garlic. Take your butter and cut it into multiple pieces. Then take a small knife and begin to cut deep slits strategically all over the bird. This part requires some thinking on your behalf as to where best to place these slits, because inside each slit you are going to place a pad of butter and a piece of garlic, which will then melt and soak into the meat of the bird. I probably make 1-2 slits on the legs, 1-2 on the wings, and 4-6 around the breast.
The last thing I do before I put the turkey into the oven is I like to put some water and a little bit of the aromatics liquid in the bottom of the pan (about an inch of liquid) along with any excess apples and onions I have chopped up already, and then I cover the turkey and the pan completely with aluminum foil!
Put this into the oven at 500 for 30 minutes.
When the 30 minutes is up, remove the turkey and the aluminum foil (gently, because you are going to put it back on loosely after this) and using the liquid from the aromatics mixture, baste the turkey! I also like to use a flavor injector to actually inject this juice mixture into the meat of the turkey as well, all over!
Lower the temperature on the oven to 350, recover the bird with foil, loosely, and put it back into the oven for the remainder of the cooking time! According to Alton Brown a 14-16 lb turkey needs 2- 2.5 hours of cooking time additional, but double-check that with the size of your turkey against this turkey cooking time-table (you can never be too careful)!
For the remainder of the time the turkey cooks, I like to remove it from the oven every 45 minutes to baste it and flavor inject it with the aromatics liquid! I do not count the time out of the oven as cooking time, I set my timer after the turkey is back in the oven! Also, as a note, during the last 30 minutes or so of cooking, I remove the foil from the bird completely, so that it can get that nice brown color and a crispy skin. You may notice that the skin of your bird may have lighter patches around areas that were sliced for the butter and garlic, and this is normal. You may also get streaking from the aromatics mixture because the skin of the turkey really only browns in areas that lack moisture, and you have been basting yours to keep the meat juicy.
Once the turkey is completely cooked and either the thermometer in the turkey has popped or your own food thermometer (always preferable) indicates an internal temperature of 161 for the turkey, you can remove it from the oven and let is rest for 15 minutes before carving.
I hope you have enjoyed reading about my favorite Thanksgiving recipes! Like I said, I will be making all these items and more this year! I would love to know what your favorite family recipes are and what you will be cooking up this Thanksgiving, so feel free to leave me a comment below! Also, if you use any of these recipes, I would love it if you took a picture and sent it to me on Instagram or Twitter! Happy cooking!
xoxo,
This article was first published on Strange & Charmed on November 10th, 2014 and is being reposted as part of my Holiday Prep Hiatus! For the months of November & December I will be recycling some vintage S&C content that you may have missed in order to give myself some extra time to finalize projects and spend time with my family during the holiday season. All reposted content will be marked as such. I hope you enjoy this blast from the past blog post!
Does this ever happen to you? You sit down to start an important project, you know exactly what’s expected because you have either done it before or are familiar with what the end result should be, however, even before you have begun, those expectations begin to nag at you. You begin to worry that you may not do a good job, you obsess and knit pick over elements of your project and after all your mental anguish and second guessing you finish your project and it all turns out fine. Maybe you have also experienced this second scenario. You sit down to start an important project, but this time it’s something you have never done before. You’re not exactly sure how to begin or how things will look by the end, but you think about your project logically, put in a solid effort and in the end, it turns out spectacular! Why does that second scenario usually turn out better than the first? You would think that someone would do better in a situation where they had more experience and understood the expectations, but that isn’t always true. It’s beginners luck! You may have heard of it before, it’s a common phenomenon where someone attempts something new and ends up successful in their effort. Now, while “beginner’s luck” has never been statistically proven, most of us have experienced it in one way or another and we can certainly learn a thing or two about how to do great work from it!
Beginner’s luck is tied to the idea of expectations. When you attempt something new and admittedly know very little about it, you often find that when you give it a try, you are much better than you would have assumed. That’s because you didn’t expect much, but you gave an honest effort none-the-less! As humans, we are often tied up in notions of what is possible and what is impossible, and in that mindset we project upon ourselves what we think we can do, what we think we can’t do, and we end up surprising ourselves when we actually succeed where we had no expectations of success.
Okay, so how do we use this concept of beginner’s luck to our advantage? There are a number of ways where a shift in your perception to this beginner’s luck mentality can help you do your best work and live your best life!
1. Don’t be afraid to try new things, you will do better than you think!
This goes for work and personal situations. Although many of us are plagued with fear of the unknown, beginner’s luck tells us that when we try something with an honest effort we get a better result than anyone would have guessed. Even if you have tried something before with a negative result, giving it an honest shot the second time around may prove fruitful!
2. Reach for the “impossible” because that standard is imagined.
Voices outside and even inside of ourselves are often telling us what is possible and what is impossible. Think of these voices as bookies at a horse race giving you the odds in a situation. If you bet on the long-shot and lose, you just lost the few dollars you initially bet, but if you win you will rake it in! The odds may be against you in a certain scenario, but taking beginner’s luck into account, anything is possible. When it comes to your future and your dreams, if you have more to gain than to lose, trying for impossible is actually a better bet!
3. Let go of your expectations and just get to work!
Don’t think, just do! Thinking can often over complicate things and cause irrational fears to pop up. If you let go of your expectations for the end result, you will be open to whatever direction you are led to while you work. Some of the most creative and brilliant solutions have been found by accident while trying to find a solution to a different problem. Do not think, become.
Are there any areas of your work where you feel like expectations are getting the better of you? In what ways do you plan on letting go of your expectations and embracing the concept of beginner’s luck to help you do better work? Let me know in the comments how you think you can execute these ideas in your own work life and feel free to share any success stories that may have resulted from your own beginner’s luck experiences!
xoxo,
This article was first published on Strange & Charmed on July 10th, 2014 and is being reposted as part of my Holiday Prep Hiatus! For the months of November & December I will be recycling some vintage S&C content that you may have missed in order to give myself some extra time to finalize projects and spend time with my family during the holiday season. All reposted content will be marked as such. I hope you enjoy this blast from the past blog post!
In a world plagued by constant distractions, pop up notifications and a never-ending stream of calls, texts and to do’s, it can sometimes feel hard to live in the moment and concentrate on the tasks you have in front of you. If you suffer from this modern form of chronic connectivity induced mental lethargy, these tips could help!
Remove all distractions
This is probably the hardest thing you could ask any modern professional to do, but turning off the pop up notifications, silencing the smart phone and closing the email window are the first steps to reestablishing your mental focus and clarity. Unless you work in a field that requires you to answer your phone or text messages as a matter of life and death, you need to set aside time for you to get your work done without the constant interference of instant communication! So go ahead, turn your cell on silent, disable pop up notifications, set your office line to send all calls, remove your email from your active desktop and shut your office door if you have to!
Reason with yourself and others
If you have removed all distractions like suggested in step one, congratulations! I know that was probably difficult for you to do and you are probably freaking out inside just a little with fears of all the horrible things that may happen because people can’t get in touch with you. Well, that is simply not going to help you focus if your constantly worrying yourself about the unknown, so let’s be reasonable. I know as well as you do that you can’t go all day without answering the phone or responding to messages, so the next step to improving your focus is to carve out a time-table for how long you will work distraction free before returning to your email.
This part is up to you, but I suggest 2-3 hours of solid uninterrupted work, followed by a half hour or so of responding to emails, voice mails and messages. If you are worried that this could be too long for you and your specific job responsibilities, think about what is causing you to feel this way. If answering the phone is part of your job because, lets say, you’re a receptionist, than clearly you need to leave the phone on. However, if you are simply afraid that your boss or colleagues will be upset that they cannot contact you, I suggest letting them know in advance.
Even if your boss is a stickler for quick email responses, give them a call and tell them what your thinking. Let them know you have a lot on your plate and the constant messaging is starting to derail your productivity. If you let your boss and others know how long you will be disconnected and when they can reasonably expect a response for you, it will be much easier for them to swallow and they may even encourage this sort of behavior if they see a marked improvement in your work!
Leaving an out of office response on your email is also a good way to temper the expectations of others that depend on you. A simple message that explains that you are working on an important task or project but that you will be checking emails intermittently will give fair warning to those trying to contact you via email. You can do the same on your phone as well to ensure that everyone knows your busy but will be able to respond to their needs in a reasonable amount of time.
Have a plan of action
Once you are sufficiently distraction free you need to have a clear plan of attack for the work you want to accomplish. Make a list of everything you need to get done, ranking it in order of importance, urgency and time required. Making a list like this may require you to check some voice mails, print out a few emails and gather some information outside your office, but once you have your to do list ready, sit down and get to work!
Reward Yourself
Successfully sticking to a new plan or schedule is a hard thing to accomplish in and of itself. If the lure of improving your focus to get more work done isn’t enough of an incentive for you to stick to your plans, try giving yourself a more tangible reward. Perhaps it means a trip to Starbucks in the afternoon for a caffeinated pick me up or an extra stop on the way home to your local Redbox for a relaxing movie night. Whatever it is that will motivate you to stick to your action plan, commit to it, because eventually a new habit will form that will improve your focus in the long run!
xoxo,
This article was first published on Strange & Charmed on August 8th, 2013 and is being reposted as part of my Holiday Prep Hiatus! For the months of November & December I will be recycling some vintage S&C content that you may have missed in order to give myself some extra time to finalize projects and spend time with my family during the holiday season. All reposted content will be marked as such. I hope you enjoy this blast from the past blog post!
It’s that time of year again when we break out our favorite scarves for fall! Although we had something of a long summer into October here in the mid-atlantic, I am excited to report that in the last few days, the weather has started to turn and it officially feels like fall now! This weekend was great- although it rained a bit on Saturday, you couldn’t have asked for more quintessentially fall weather, and I even had the chance to wear my new DIY Blanket Scarf out and about to keep me warm with a light jacket!
Me, wearing my DIY Blanket Scarf this weekend in a corn maze! Don’t worry, I made it out!
So, I’m sure some of you are wondering about my DIY Blanket Scarf, so I will let you in on what that’s all about! I think most of you are probably familiar with the concept of a blanket scarf- Zara sold a wonderful tan and red plaid version last fall and I have been waiting for it to come back for what feels like forever, but apparently, I keep missing it… epic sad face! It just got to the point where I was sick of waiting and decided to take matters into my own hands, so I did the only logical thing I could think of- I headed to the craft store! JoAnn’s Fabrics to be exact, and searched through rows and rows of lovely fall themed plaid fabric until I came across a wonderful super light fleece material that I thought would make a perfect blanket scarf. I believe the Zara variation is made from a woven cotton and is very soft, but not as thick and warm as you might expect (at least, that is what I have heard from friends and around the internet). One thing the Zara Blanket Scarf is, however, is large! Something like 53″ squared! That’s like most of my height people, no wonder they call it a blanket scarf! My lovely fleece material, however, was only something like 45″ wide, so I had to make do with a slightly shorter, although still massive, piece of material. I just had the fabric cut into a square and it cost me something like $6 after I used a coupon! Can’t beat that for a DIY scarf that’s made of warm fleece and only slightly shorter than the original. I’d guess my version saved me something like $30, which I’m pretty happy about!
Now, onto the real meat of this post, the seven ways to wear a scarf! Well, for that, I assembled a very simple tutorial video to walk you through my favorite styles! The first three styles are ways to wear a blanket scarf specifically and then the final four apply to a traditional oblong scarf! The styles range from cozy to super chic, so no matter what weather you’re experiencing you will find a style to wear your favorite scarf that keeps you seasonally dressed and stylish! If you don’t have the time or ability to watch the video right now, just make sure to bookmark this post and refer back to it later on so you can learn these great styles! I know I am always looking for new ways to wear a scarf, so hopefully you learn a new style or two that you can integrate into your wardrobe this fall. Enjoy!
I hope you all enjoyed this video and this DIY Blanket Scarf information. If you have a tutorial with other ways you like to wear your scarves, please feel free to tweet me the link and of course, if you try any of these methods I teach you in the video, be sure to snap a picture and TAG me in it on Instagram so I can check it out!
xoxo,
This article was first published on Strange & Charmed on October 13th, 2014 and is being reposted as part of my Holiday Prep Hiatus! For the months of November & December I will be recycling some vintage S&C content that you may have missed in order to give myself some extra time to finalize projects and spend time with my family during the holiday season. All reposted content will be marked as such. I hope you enjoy this blast from the past blog post!
You probably didn’t know that the cold winter months can take a toll on your gadgets and tech devices! Its true, the cold weather creates a unique set of issues for gadgets that you should be aware of in order to keep your tech working properly. Here are 5 tech tips to help you treat your tech right this winter!
1. Do not leave gadgets like computers, smartphones or iPods in your car while its cold outside. The weather can freeze internal parts of your devices and potentially cause damage.
2. Keep your gadgets in heavy duty cases to protect from precipitation and drops onto snow or ice. Otterbox and Lifeproof cases that cover ports and openings in your gadget will help to make sure no excess moisture builds up in sensitive areas of your device.
3. Keep a stylus on hand in case your fingers are too cold to register on your touch screen devices.
4. If a gadget is excessively cold, be sure to bring it up to a normal temperature before turning it on or using it or else you could compromise internal parts.
I hope these tips were helpful to anyone who is experiencing cold winter weather or who may live in a region where cold weather is the norm! Do you have any other tech tips to share to help us get through the chilly winter months with our smartphones intact? Let us know in the comments!
xoxo,
This article was first published on Strange & Charmed on January 28th, 2014 and is being reposted as part of my Holiday Prep Hiatus! For the months of November & December I will be recycling some vintage S&C content that you may have missed in order to give myself some extra time to finalize projects and spend time with my family during the holiday season. All reposted content will be marked as such. I hope you enjoy this blast from the past blog post!
Blogging 101 is a 10 part series where I share my tips and tricks for creating and growing a blog from scratch. This is the fourth installment in the series, and you can find more information on the topics of this series here.
Blogging 101: Organization Tips for Bloggers
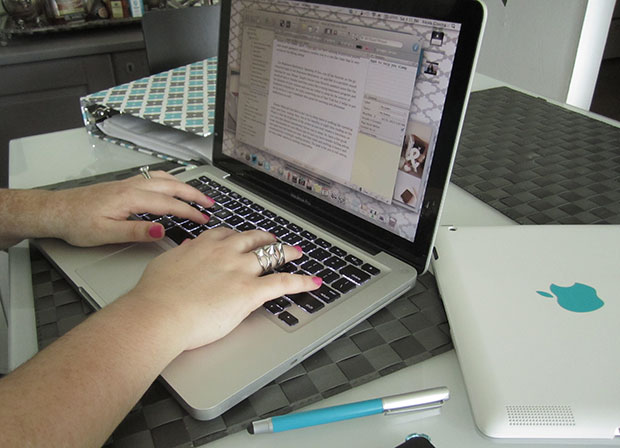
Being a blogger is like having another job. If you already work one full-time, you need to be very organized when it comes to your focus for your blog, your posting schedule and the time you allot to managing and responding to emails, comments and social media outlets. Now, I don’t work off a strict schedule for every hour of my day. Generally, I do what I can when I can, but I have a few organizational tools that help me stay on track, and make it easy for me to maximize my time.
First and foremost, I use an editorial calendar to plan out my posts. Now, what an editorial calendar looks like to me and what it looks like to you can be two very different things. My first editorial calendar was a printed one page monthly calendar where I planned out which blog posts would be scheduled for which days. Now, I use a monthly calendar in my Filofax. You could use a paper calendar, a list in a notebook, or even a digital calendar to map out your posts, but whichever way you choose needs to be convenient for you so that you can plan your posts and refer back to the calendar when you need to write them.
The next thing I use to help plan out my posts is a list for brainstorming blog posts. Whenever I think of a post idea, I write it down in my list that I keep in one of my Filofax’s. When I am on the go or don’t have easy access to my planner, I use an app on my iPhone called Clear. I will periodically move the blog post ideas from my iPhone app to my master list, which I then refer to when planning out my blog posts on my editorial calendar for the next month. I normally plan out a month at a time, but I have planned up to three at a time in the past. You could plan as much or as little as you want, as this system is extremely flexible.
As for managing my social media presence, there are a variety of apps I use to help me connect with my current readers and potential readers! I use a service called Twitter Feed that automatically posts links to my blog posts to my Twitter feed. That way, I don’t have to worry about forgetting to tweet out my posts. But Twitter Feed alone is not the best way to get my blog posts out on Twitter, so I also use a wonderful app called HootSuite that is one of the few apps that I have found that will allow me to schedule Tweets and even Facebook posts from my iPhone! I cannot even explain to you how convenient it is to plan out the Tweets you want to publish and set it to publish on its own without me having to babysit my Twitter! I will normally go ahead and plan out a weeks worth of posts and schedule them so I don’t have to remember to stop and Tweet during my busy day!
The final organizational tip I have for bloggers is not related to apps or planning tools. This has to do with photography and finding images for your blog posts. Now, I will be going into the topic of photography in a later post, but for now I want to talk about photo shoots and talking your own blog photos. If you’ve noticed, for some time now I have been relying on my own photographs to supplement my blog posts. It is very rare for me to use someone else’s images because I don’t own them. When I do use other peoples images, I make sure to source them from creative commons websites. Specifically, I like to use the Flickr Creative Commons Image Database. Like I said, I try to use my own images whenever possible, so to accomplish this, I plan frequent photo shoots where I take a look at my blog post topic list and get ideas for photo’s that I could use to accompany those posts. I set up vignettes, make sure my lighting looks nice and take an hour or two to just shoot as many pictures as I can. I would say I do these sorts of photo shoots once or twice a month and they give me plenty of images to work with that may pertain to specific posts I already have planned out and sometimes even posts that I may write in the future. I organize these photo’s on my computer by the date they were taken and the general theme for the photos so that I can always find what I am looking for in the future! If you are interested in learning more about how to take great pictures for your blog posts and social media, check out this video training on 7 Strategies for Using Photography to Elevate your Brand Online or if you want a more in depth training, sign up for my Digital Styling Lightroom video course today!
So, do you already implement any of these organizational tips in your current blogging process? Do you have any other tips and tricks that help to keep you organized that you can share with us? Drop us a line in the comments below!
xoxo,
This article was first published on Strange & Charmed on March 24th, 2014 and is being reposted as part of my Holiday Prep Hiatus! For the months of November & December I will be recycling some vintage S&C content that you may have missed in order to give myself some extra time to finalize projects and spend time with my family during the holiday season. All reposted content will be marked as such. I hope you enjoy this blast from the past blog post!
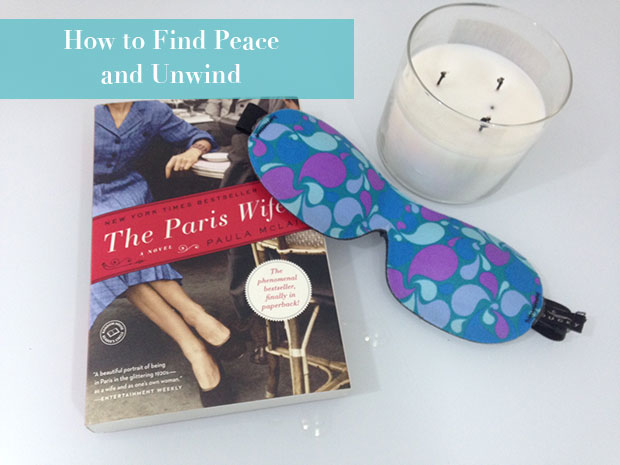
Do you ever feel like life is so hectic sometimes that you just don’t know how to unwind? I mean, we hear about the importance of finding time to locate your inner peace and all, but how does one actually start that journey? Do we need a map to locate peace of mind? Sometimes I think so! In all honesty, I am writing this post for myself because I have been so out of it and stressed for so long that I need to remind myself to take time and unwind, even if it’s really really difficult to do it! So, I sat down and thought about all the things that are mentally blocking me from unwinding and relaxing and some ways that I cope with stress when it gets too out of control on my own life. Hopefully this list will resonate with you, too!
1. Turn off notifications that ding: The threat of a dinging notification is a stressor in and of itself in my life. I have taken to turning my iOS devices on airplane mode just to escape them!
2. Light candles all over your home: I don’t know what it is, but for some reason candles make me feel like I have a clean home (…even if my home isn’t clean) and this releases an OCD stress about everything having a place and being there!
3. Take a nice relaxing bath: I suggest using epsom salts for a deep muscle relaxation and using whatever aromatherapy bubble bath or oils you have available to do. When I take a bath when I am stressed, I drown myself in the stuff!
4. Drink plenty of water: If you are well hydrated you are less likely to get a headache and I feel like water also helps me feel fresh and clean on the inside. Its like the water is cleaning out all the toxins from my cells and flushing them out (I actually think that might be what water does, so the more the merrier)!
5. Listen to soothing music or a book on tape: This one is pretty self-explanatory. If I take a bath with epsom salts and then put on a book on tape (usually the Hobbit!) I am guaranteed to fall asleep in 5.7 seconds!
What other tips do you have for relaxing and unwinding when you are stressed out? Please, please, please tell me, because I really need to know!!
xoxo,
This article was first published on Strange & Charmed on February 27th, 2014 and is being reposted as part of my Holiday Prep Hiatus! For the months of November & December I will be recycling some vintage S&C content that you may have missed in order to give myself some extra time to finalize projects and spend time with my family during the holiday season. All reposted content will be marked as such. I hope you enjoy this blast from the past blog post!
In my opinion, one of the most difficult parts of starting a blog is the whole starting part. It can feel overwhelming clicking on “new post” and then being faced with a blank screen just sitting there waiting to be filled with awesome and unique content. So, if you are suffering from a little bloggers block, I have put together a list of 25 interesting and unique blog posts that any blogger can do. Hopefully these ideas can help you get started with your own blog or inspire you to breathe new life into an existing one!
25 facts about you
What’s in your bag
The story of how and why you started your blog
A day in the life chronicle
A list of your favorite blogs
Show and tell
Something you collect
A guide to your city or town
Your favorite things
How you’d spend your perfect day
Your bucket list
A top 5 list
Your blog goals
Someone you admire and why
The book(s) that changed your life
An interview or Q&A with another blogger
Your room tour
Your favorite smart phone apps
How you stay organized
A video introduction to your blog
A photo journal
Your wish list
Introduction guide to your favorite hobby
Post from the POV of your pet or an intimate object
Inspirational quotes you love
Do you have any other ideas for blog posts that any blogger could write? What are some of your favorite blog posts? Leave your suggestions in the comments below and if you need additional help getting your blog up and running, check out my Communication Blueprint!
xoxo,
This article was first published on Strange & Charmed on April 8th, 2014 and is being reposted as part of my Holiday Prep Hiatus! For the months of November & December I will be recycling some vintage S&C content that you may have missed in order to give myself some extra time to finalize projects and spend time with my family during the holiday season. All reposted content will be marked as such. I hope you enjoy this blast from the past blog post!