One month down, eleven more to go, the new year has officially started! I almost feel like it’s useless to count the months down because they just keep recycling anyway to no end, but one point of significance I would like to point out is that this post represents a completion of a full year of Entrepreneurial posts and the start of round two. A full year has passed since my first installment of this monthly public entrepreneurship journal and I’m very pleased that time and time again, you within my community comment on how much you enjoy these posts. So, I guess I’ll just have to keep doing them! After I wrote the outline for this post, I actually went back into my archives and reread last January’s post, and it’s so interesting to me that some of the things I was struggling with last year came back up with this installment. Namely a sense of introspection and solitary reflection. As I will go on to explain in this post, I do think this is just par for the course for me and January. It can be a challenging month for various reasons and I do hope that if any of you felt the same way, this post provides you will a sense of comfort that it isn’t just you who is struggling to get into their groove and workout a sense of uncertainty and unease. So, let’s jump into my review of the month.
What I Did
1. Put myself first: Without a doubt my focus for the month of January was me. This wasn’t the original intention of the month, but pretty early on into the New Year I realized that I was going through something mentally and emotionally that needed time to play itself out. So, I chose to be graceful with myself and loosened my expectations for what I would get done and work on this month. It definitely helped me make progress with myself, even if I wasn’t giving my full attention to my other priorities.
2. A lot of Soul Searching: Because of aforementioned struggle, I ended up doing a lot of soul searching. I spent a lot of time with myself thinking, practicing self-care and putting my attention on matters that concerned my immediate wellbeing and mental health.
3. Participated in an Online Summit: I said no to a lot this month, both to myself and others, but one thing I did say YES to was participating in an online summit called the Go For It Summit. It’s organized by one of my Empire Building Alums and although I was being very careful with what I agreed to do this month, I felt like my participation in this event was so in line with my overall goals for 2017 that I had to say yes! I gave a great video interview and the summit, which is going live in early February, is open for registration if you are interested- it’s FREE. Click here if you’d like to sign up!
What I Didn’t Do
1. Make any videos for YouTube: This was probably one of the biggest shocks for me this month. I knew I was going to take a week or two off at the start of the year because that is what I usually do, but ending the month with no videos was unplanned. It wasn’t that I didn’t try to film- I did a few times, but for one reason or another, I was displeased with the footage or in one case, the footage was corrupted. I just didn’t end up having the mental energy to force myself to create a video against the flow, so I just let it be what it was going to be.
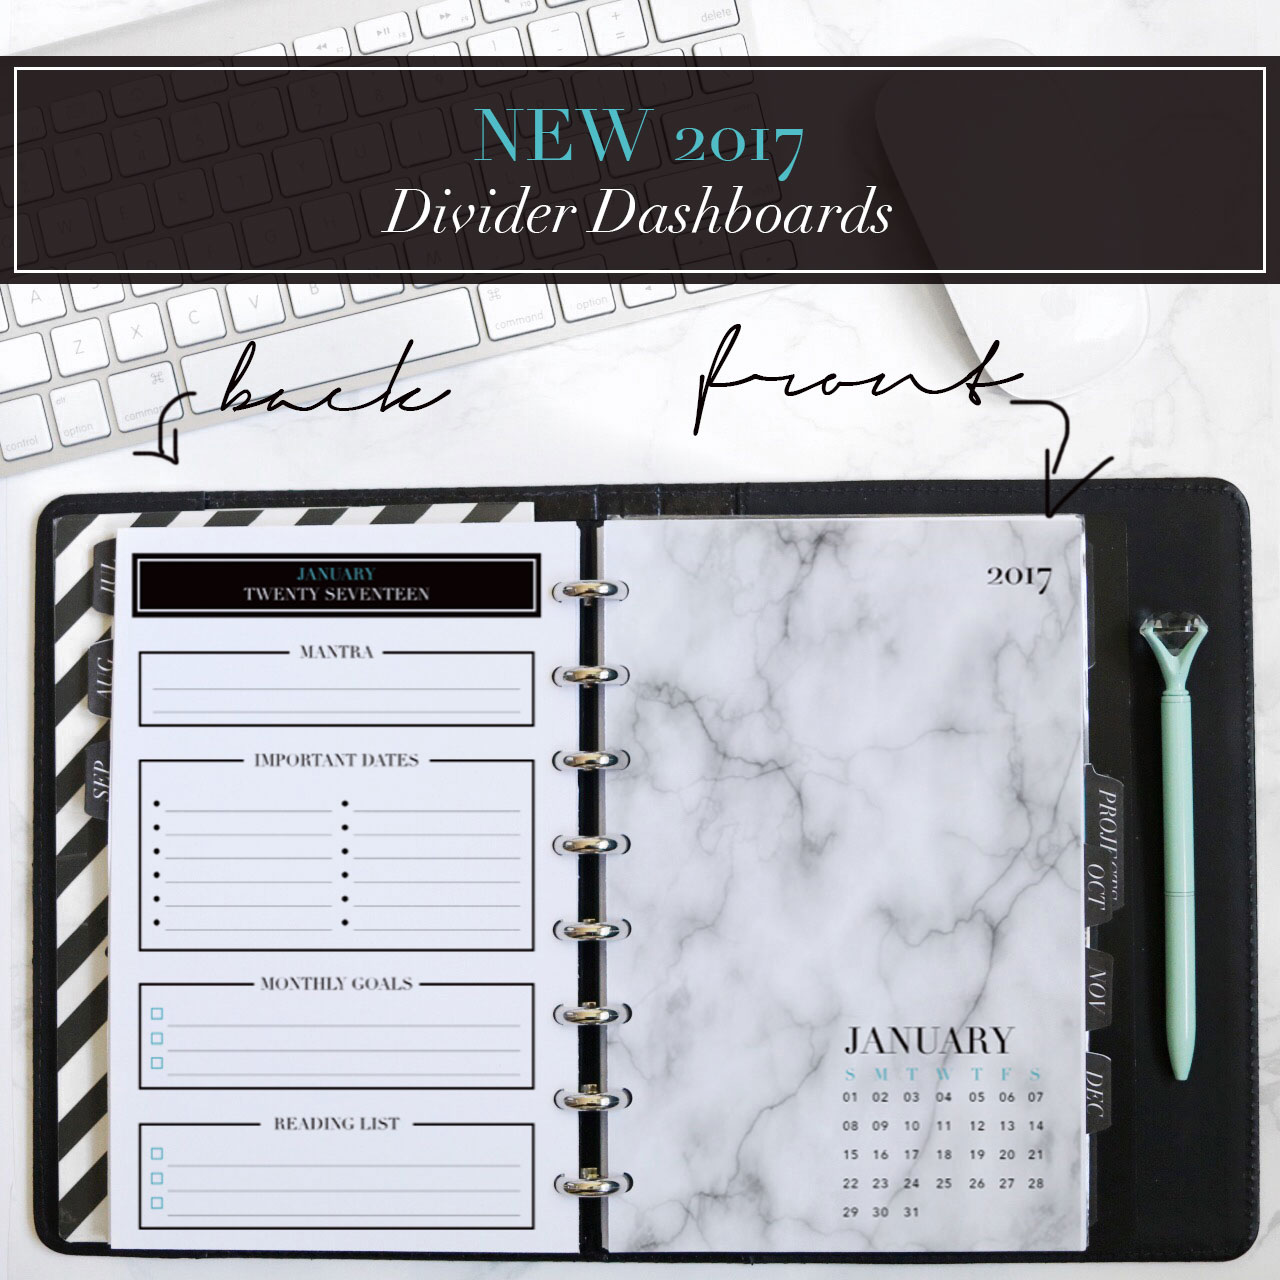
2. Use my planner much: Back in December I was so excited to start using my planner for the New Year, but once January came, I barely touched it. In fact, I had to force myself to use it at time to outline work I needed to do. Again, this all has to do with my own personal struggle with the month, and I know I will be back in my planner soon, but with no clear direction for how I was spending my time this month, it wasn’t necessary.
3. Finish any projects: I’m not sure if I regret this or if I’ve just accepted it, but I didn’t finish any projects this month. Now, I didn’t have any that were due, but it was weird for me not to complete something in a month.
What I Learned
1. January is a tough month: I think as the years go by, I am beginning to see that January is a tough month for me, and I bet others as well. I think after the high of the holidays in Q4, once the new year hits, I fall into a lull. I’ve always said that productivity is like a wave, it ebbs and flows, and for me, Janauary is just a low energy, low productivity month. It makes sense if you think about it- the start of anything is always the hardest part, why would the start of a year be any different?
2. I don’t want to keep doing what I’ve been doing: After all the soul searching I did this month, I think the biggest thing I realized is that I don’t want to keep doing what I’ve been doing with my life and business. I think after so many years of hustling to make my business work and pushing myself, I am seeing that I’ve built a pretty self-sustaining business. Despite doing very little public facing work this month, I still ended up earning a very good passive income, and that’s the point right? I built this business so that I would make money without having to do much. This month has proven to me that I can pull the reigns on the pace I’ve been keeping and focus on projects that will continue to support the ongoing growth of my passive income streams.
3. Uncertainty is normal: As a type A personality, I struggle with accepting uncertainty. I like to know what is going on and where I stand, but this month was a sort of limbo for me. It really upset me early on in the month, but once I realized that the uncertainty was a struggle I had to face by allowing it to just be, I just accepted it. There is still a lot of uncertainty clouding my mind right now, but I can’t let it upset me because it will end up wasting more of my time.
Again, I hope you have found this post insightful and if anything in particular stood out to you, feel free to tell me about it in the comments. I’d so love to know how your month has progressed, so feel free to share some details as well!
Of course, I love to see pictures of your planner inserts and wallpapers at home on your planners and tech gadgets! If you share a picture, please use #CharmedGTD so the whole community can see your setups and of course tag me @MissTrenchcoat as well in your pictures on Twitter & Instagram!
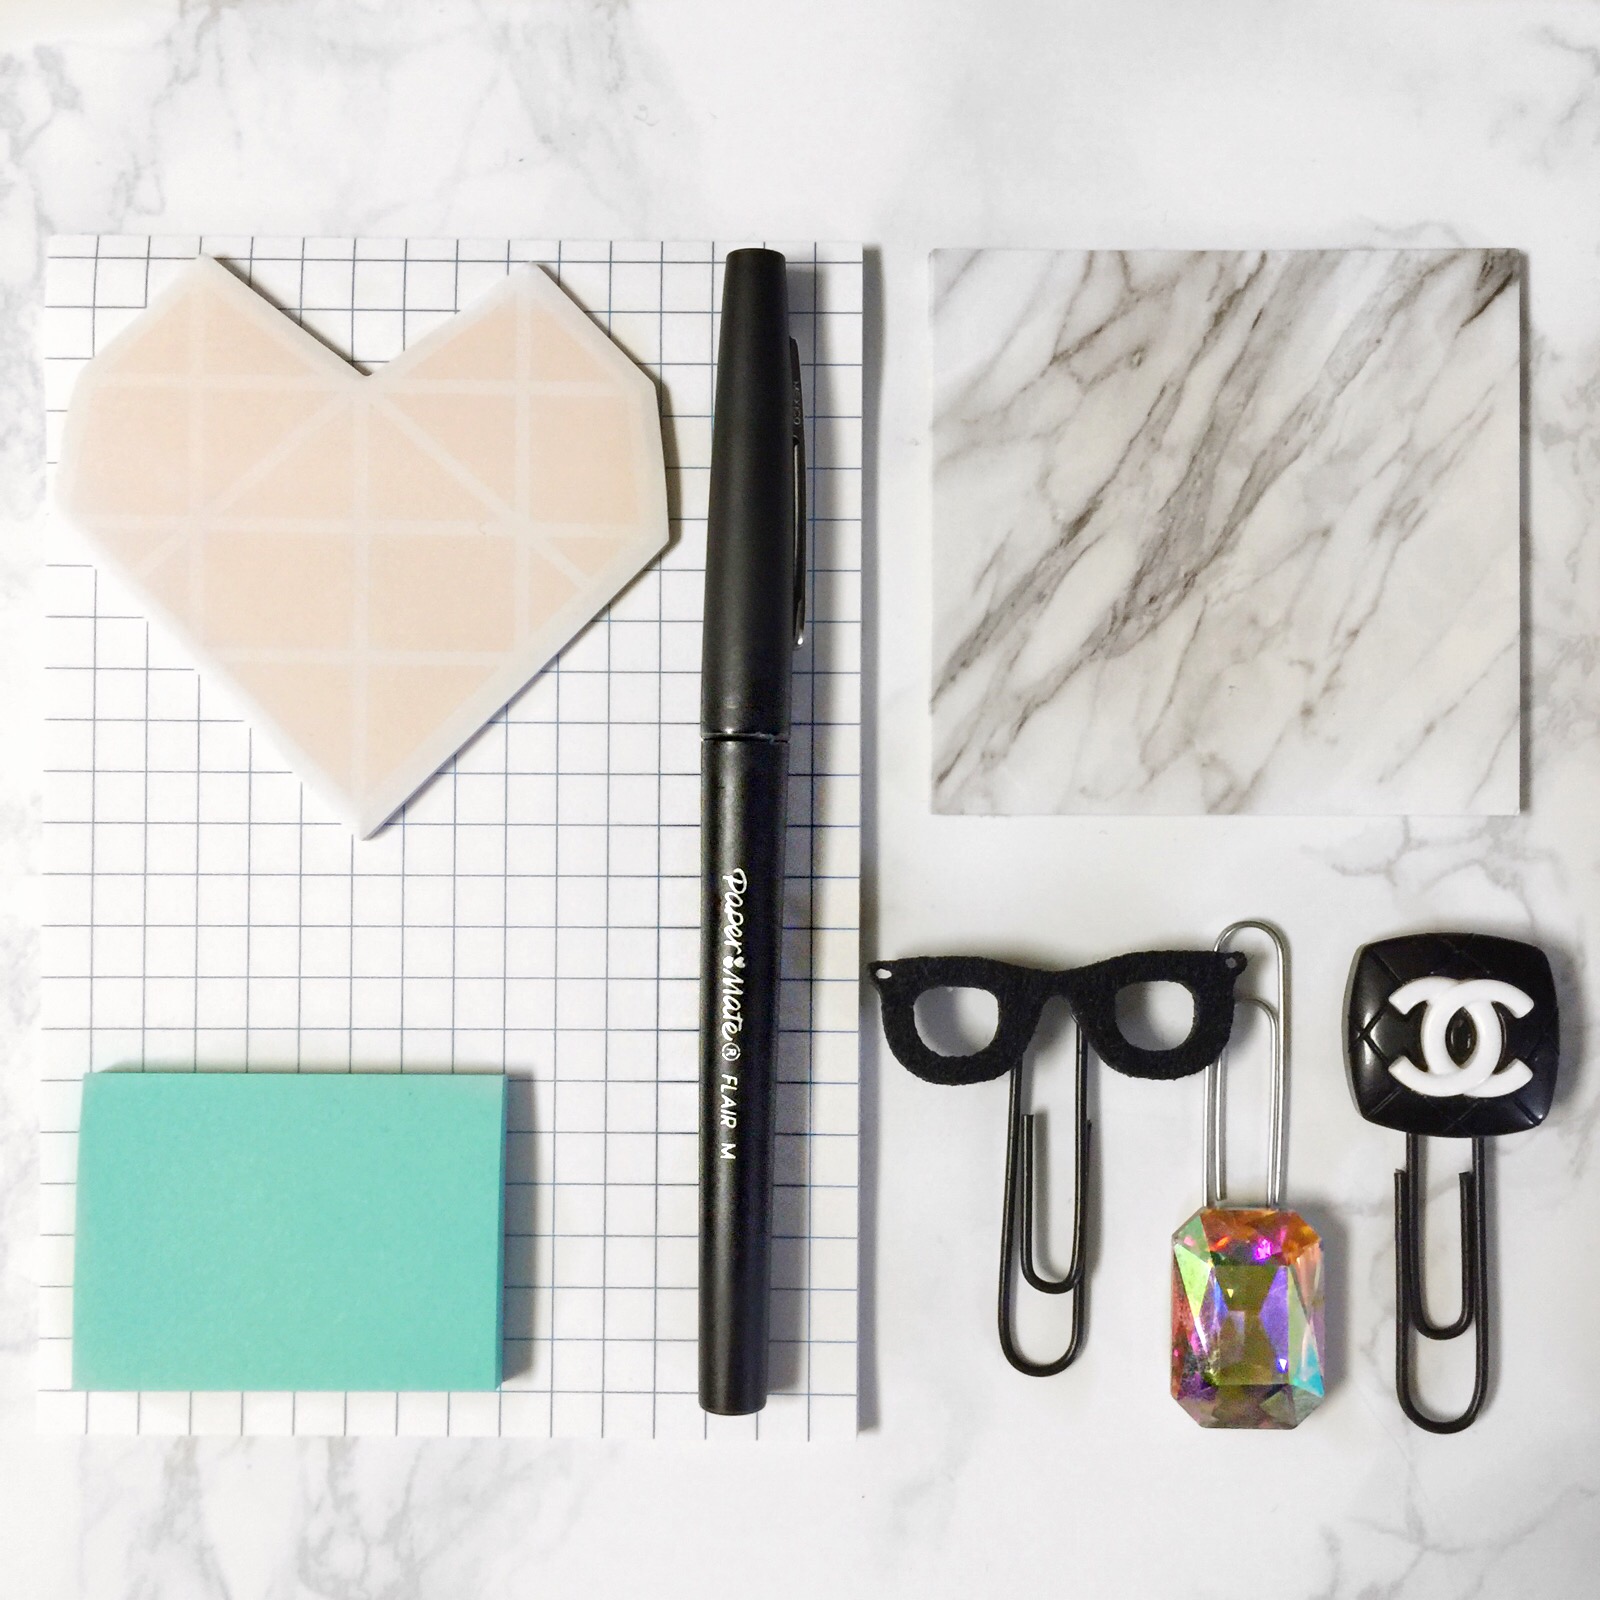
My Morning and Evening Routines (PLUS My Routine Essentials!)
Since I shared some ideas on developing your own Morning and Evening Routines yesterday, I thought it would be nice to share my personal routines with you, including some essential items that play an important role in keeping me in line on a daily basis. If you recall from yesterday, I believe it’s important for you to define a routine that works for you personally, and I hope yesterday’s post has given you some clarity. It always helps, however, to see examples from others, which is what I intend to do for you today. Without further ado, here are my routines!
Morning Routine
{7:30 am} Wake Up and Stretch: I normally wake up without an alarm at around 7:30 am as my husband is getting ready for work. When I wake up, I like to stretch a bit before I get out of bed and may reach for my phone to check messages and the news as well.
{7:40 am} Drink Water: I keep a tumbler of water next to my bed and will start sipping on it when I wake up, usually before I even get out of bed. I am always thirsty and so getting hydrated immediately is a big priority for me.
{7:45 am} Turn on Meditation or Sound machine App: As I get out of bed in the morning, I like to put on either a guided meditation or sound machine app to help me wake up my mind and start the day on a positive, inspired note.
{8:00 am} Make Bed: Once I’ve got my meditation on or once it’s complete (depending on how I feel that day), I will get out of bed and make it.
{8:05 am} Dress: Once my bed is made, I like to change out of my pj’s and into my outfit for the day. My daily uniform is usually comfortable leggings and a utility blouse, tunic or light sweater. I’ll also pop on a pair of house shoes or slippers because my home office has hard wood floors and I don’t like when my feet are cold!
{8:15 am} Morning Hygiene: Once I’m dressed I start my morning hygiene washing my face, brushing my teeth etc. On some days this is pretty quick and on others I will take more time to put on makeup and do my hair.
Evening Routine
{11:00 pm} Refill Water Tumbler: The first thing I do when I am getting ready for bed is to refill my water tumbler and bring it upstairs to my bedroom. Usually I head upstairs to end my evening and prep for bed between 10:30 – 11pm depending on what I’ve done that evening. On weekends, however, this can vary.
{11:05 pm} Evening Hygiene: Once I’m upstairs, I will start my evening hygiene practice which includes taking a shower or bath, removing my makeup, and cleansing. I take my showers at night so I can relax, get into bed nice and clean, and fall asleep faster.
{11:30 pm} Self Care: Once I’m clean and in my robe, I like to do some sort of self-care activity before bed. This could be a home facial treatment, listening to a podcast or book on tape, or giving myself a face and neck massage. (mask, cream, haircare)
{11:45 pm} Pajamas & Hair Prep: Once I’m done my self-care (or after a little while if I’ve turned on a book or podcast) I switch into my pajamas and prep my hair for bed. Since I have very long hair, I must either braid it or put it into a high bun on the top of my head to keep it tidy while I’m sleeping. If not, it makes it uncomfortable for me to sleep because my hair goes all the way down my back and makes it hard for me to move around and get comfortable.
{11:50 pm} Essential Oils & Crystals: Right before I get into bed I will turn on my essential oil diffuser and arrange some crystals on my bedside table. They are always on the side table, however, I like to make sure that everything is tidy and that the crystals aren’t being covered so I get the optimal affect of having them by my side as I sleep!
{12:00 am} ASMR Video & Eye Mask: I like to be in bed ready to sleep by no later than midnight. Once my oils are on and I’m in bed, I will put on a night mask to help me sleep as I am very sensitive to light, and if I need it (which I do most nights) I will turn on an ASMR video with my earbuds on to help me drift asleep.
In order to make this post a maximum benefit to others, I would love if you would share your morning or evening routine in the comments so we can see some more examples that could possibly help others in the community develop their own routines. I hope you won’t hesitate to leave us your thoughts and actions below!
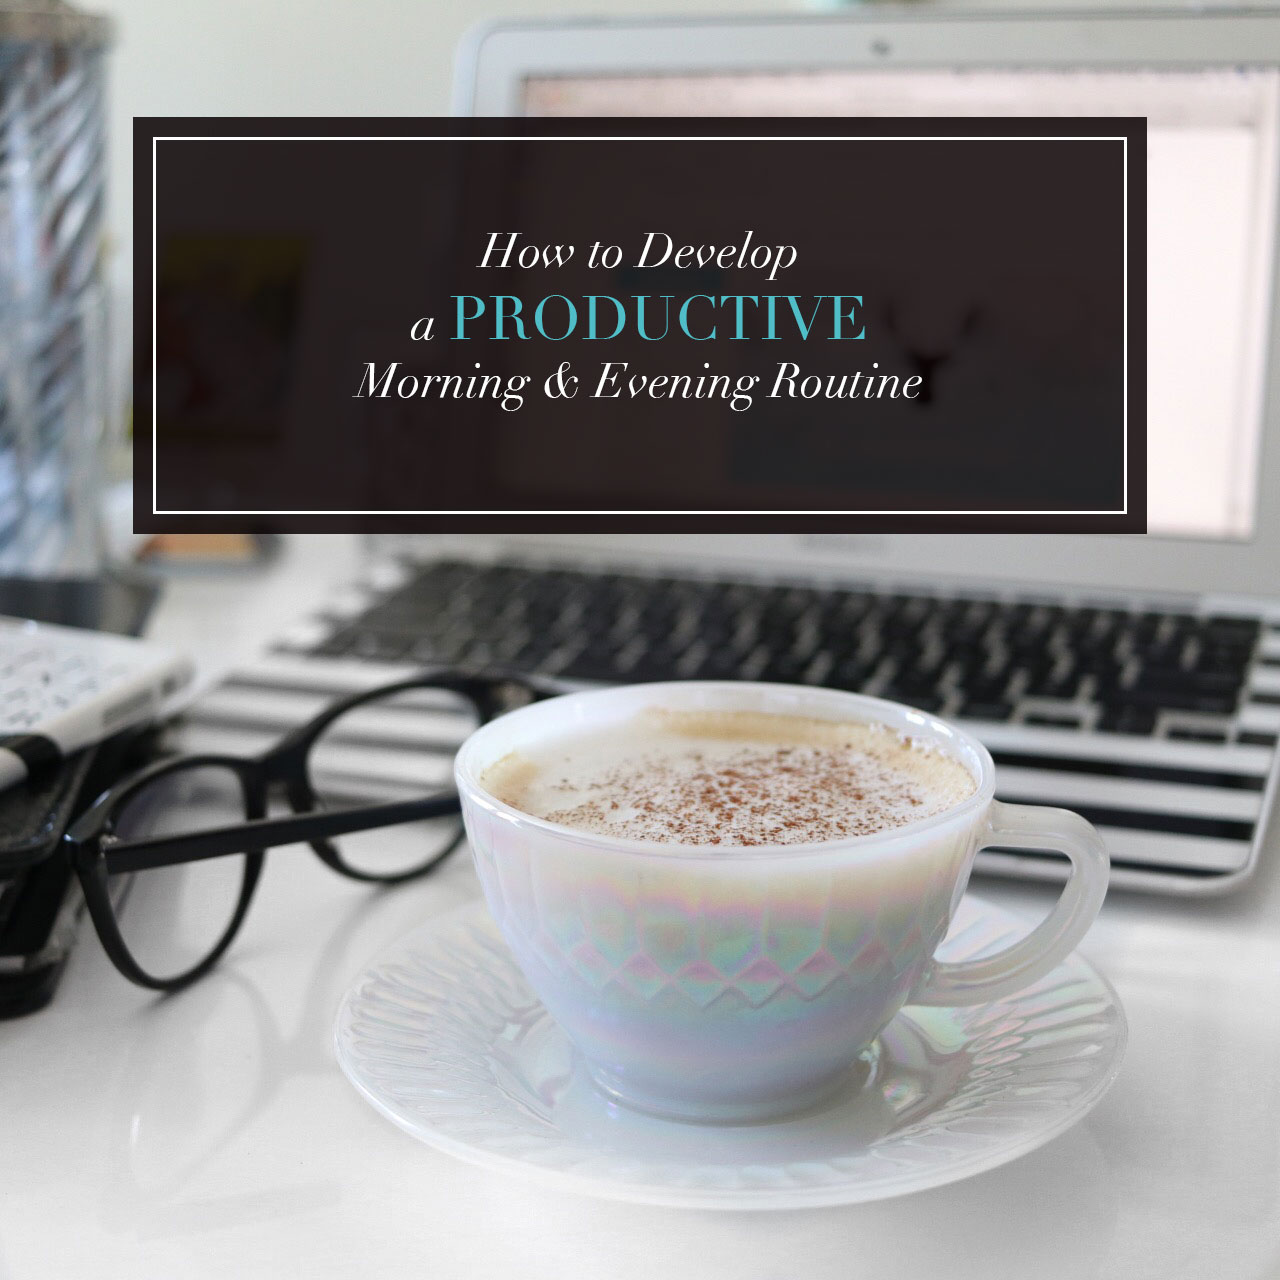
How to Develop a Productive Morning & Evening Routine
All of us have a morning and evening routine, whether or not we want to acknowledge it. As humans we tend to do the same things repetitively and automatically, but this doesn’t mean we are doing the right things or the most productive things. Learning to control our habits and routines is a crucial step to living a more productive life, but this process doesn’t have to be complicated or require us to add a bunch of different to dos to our lists. My philosophy on routine building is to start with what you are currently doing, eliminate the unnecessary and swap time wasting tasks for productive ones. So let’s get started helping you develop your own defined and productive morning and evening routines!
What do your morning routine and evening routines look like right now?
Think about all the things you do in the morning between the time you wake up and leave for (or begin) work and then all the things you do in the evening in order to prepare yourself for sleep. Make a list to help you work out all the details, but most importantly, ask yourself why you do each item. I don’t doubt that the majority of tasks on your list are important, but, I do question whether everything you do is necessary to be completed in the morning before you begin the bulk of your day. Some examples of common unnecessary tasks performed in the morning and evening include:
Preparing/Planning meals: unless you’re cooking breakfast or setting up dinner in the crock pot to cook while you go to work, your morning is not the time you should be meal prepping, nor is your evening. Ideally, your lunch should already be prepped and in the refrigerator waiting for you and if you’ve waited until the morning of to decide what dinner is going to be, you have significantly increased the chances that no matter what the answer is, the result is going to be take out. Try prepping the meals for the next day while you prepare dinner so you are using your time in the kitchen wisely.
Choosing clothes: These should have been laid out the evening before, not the morning of.
Working out: Despite all we hear that working out in the morning is the best thing ever, there isn’t much scientific research to back that up and some research has found that working out in the morning when your cortisol levels are naturally at their highest doesn’t work well for some people. Likewise, nothing makes it harder to sleep than a late night workout before bed, so plan for your physical activity during peak daylight hours if you are really interested in improving your health.
Cleaning up: The habit of leaving messes to sit until the morning is one that you desperately need to break, but that doesn’t mean you should stay up late doing chores. Try to pick up after yourself during the day and you’ll save yourself a lot of time and trouble.
Completing work tasks: If it really can’t wait until you get to work, you’ve dropped the ball. Try not to spend your evenings or mornings on tasks that belong to your 9-5.
Watching TV: News is one thing, but waking up and turning on the tv or falling asleep with the tv on is another terrible time wasting habit that can cause morning stress or evening restlessness. Same goes for your computer and tech gadgets. I won’t say you can’t check your phone before bed or when you awaken, but don’t let it keep you up or keep you from getting out of bed on time.
What’s missing from your morning or evening?
As we evaluate what we are currently doing as part of our unofficial morning and evening routines and what unnecessary tasks need to go, we also need to put thought into what we are missing that may need to be added. The purpose of a morning routine is to help you start your day with a framework of success, and the purpose of an evening routine is to help you end your day peacefully. So what aren’t you doing right now that could support those ends and furthermore what could you choose to do in the morning or evening to move you closer towards success with your goals. Sometimes there are specific actions we can take in our mornings or evenings to help support our goals, but other times just the simplification of our routines and the elimination of wasteful habits can be the best way for us to support goals. Here is a list of tasks to give you an idea of things you could add to your morning or evening routines.
Prayer
Meditation
Stretching
Hydration
Breakfast
Journaling
Self Care
Music
Reading
Gratitude
Affirmations
What does a productive morning or evening routine consist of?
A productive morning or evening routine will look different for each person, but if you can outline a simple routine for starting and ending your day and strive to stick to it, you will find that your mornings become less stressful and your evenings become more restful. Here are a few tips on what to do and not to do when building your routines.
Do This
Subtract before you Add: Before you consider adding any activities to your routines, make sure to take away some things first by rescheduling those tasks to different parts of your day or eliminate them completely.
Use Common Sense: You know your needs and energy level in the morning, so don’t mess around with what really matters to you and helps you to set your day up for success. I am a believer that even inessential tasks can be important if they significantly affect your mood and outlook on the day.
Create Boundaries: Your morning and evenings are pinnacle parts of your day that should be protected so that you can start and end your day properly. Put boundaries on other people and certain tasks, even if that means setting yourself some rules, so you respect whatever time you can devote to setting up and ending your day productively.
Don’t Do This
Wake Up Earlier or Go to Sleep Later: Unless you really have zero time to complete even a basic morning or evening routine, don’t feel pressure to force yourself to change your sleeping pattern. Yes, we all wish we woke up earlier, but what we want in theory and what our bodies need in practice are not always the same. Your routines should fit into your life by swapping time wasters with more productive tasks, not by changing your schedule entirely.
Take on Too Much New: There are a lot of opinions on what you should do in the morning and evening to set yourself up for a productive and successful day, but it’s not your responsibility to try them all out. Eliminating time wasting behavior will be difficult enough to manage in the morning and evening without adding the complication of adding new tasks as well. I think a simple 10 minute routine can be as productive and set you up for as much success as a whole 60 minute routine.
Aim for Perfection: When it comes to developing a new morning or evening routine (or both!) you can’t expect that you will stick to the routine 100% of the time. I think setting a goal of completing your routine in it’s entirety 3 days a week is a good start. Working up to 5 days or your workdays would be excellent. And don’t forget, you can take time off from your routines or create different ones for the weekend and that’s perfectly acceptable as well. Don’t set yourself an unnecessary standard for these routines because it is literally too early and too late in the day to expect perfection. You are only human after all!
I sincerely hope this post stimulated some ideas for you to develop your own morning and evening routine. If so, I’d love to hear about it down in the comments!
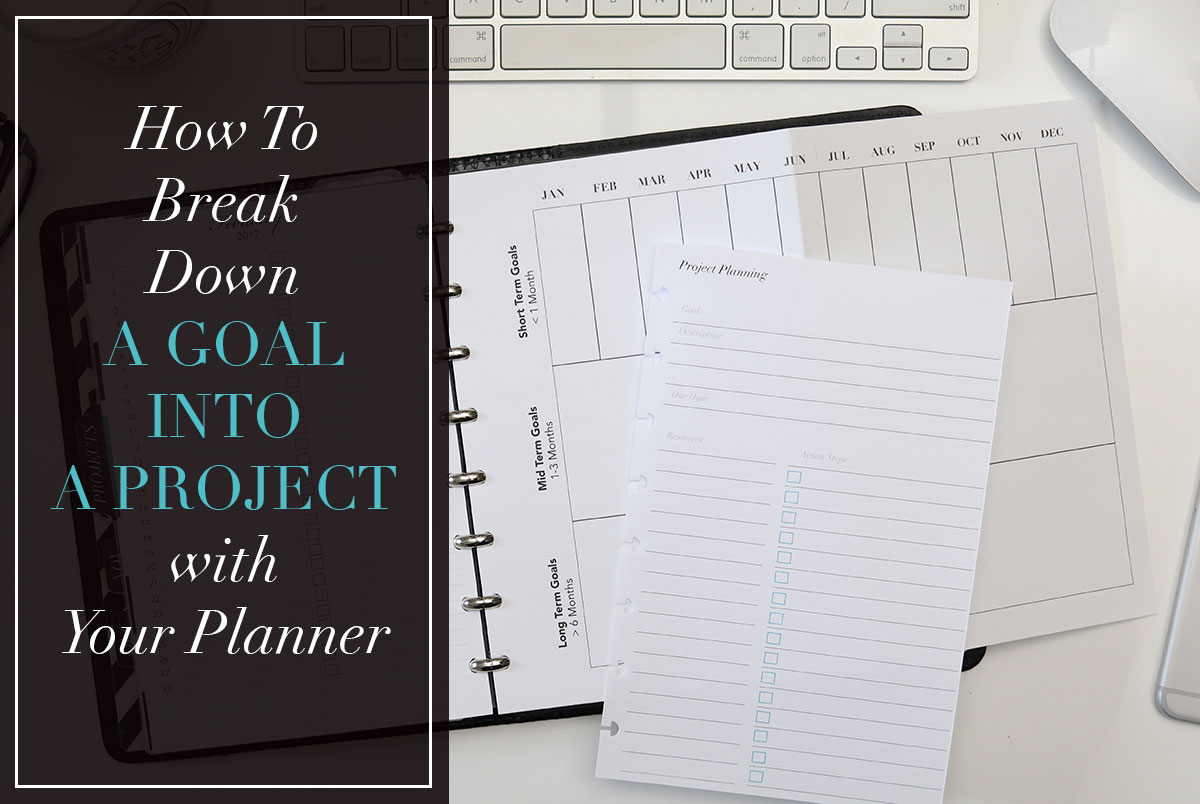
How to Break Down a Goal into a Project With Your Planner!
Since we are now in the very beginning of January and I know many of you are probably pondering resolutions for the year as well as any projects and other goals you want to accomplish throughout 2017, I thought now would be the perfect time to share with you all my project planning and goal tracking process. As you may already know, I currently use my A5/Half Letter Charmed Life Planner inserts in a disc bound system to house and organize all my plans, projects and goals for the year. You may even be familiar already with my printable project planning bundle that I sell in my shop and designed specifically to help myself (and others!) outline and monitor their projects in a productive way. If you haven’t seen my project planning bundle yet, feel free to check it out for yourself.
Now, when it comes to projects and goals, I think people tend to approach each of these items differently because they do tend to be different in nature. When it comes to projects, I view them as a collection or series of tasks necessary to complete in order to come to a desired outcome. In my opinion, projects usually arise as a result of external factors in our lives that prompt us to undertake these tasks. For example, you may find that the majority of your projects come from places like work, your household or even community needs. Since projects are often externally driven, I believe that we often feel a lot of pressure or stress to complete these tasks because usually someone other than ourselves is counting on the completion of the project. Goals on the other hand are things we as individuals work towards with the hopes of accomplishing. I find that goals are usually internally driven and very personal in nature and because of this, I believe we often put our own goals aside or on the back burner to other projects because the completion of our goals only affect us on a personal level. Therefore, I find that goals are usually the first thing to fall to the wayside when life gets busy because they can sometimes feel like something of a selfish pursuit. The truth of the matter is, that both projects and goals should be approached with the same system of organization in order to identify, plan and execute them to completion. No matter whether you are working on a project for work or trying to reach the goal of running a marathon, the same basic planning structure applies and neither a project nor a goal is any less valid no matter the factors surrounding it’s existence!
Okay, so let’s move on to the nuts & bolts of my project planning system. This isn’t any sort of revolutionary system by any means, and I certainly can’t take credit for doing anything other than developing it to fit my own needs, but it does work very well for me, and I thought if it works for me, it could work for you!
The Process
Step 1: Brainstorming
The first part of my project planning system is brainstorming. This shouldn’t be confused with brain dumping, because in a brain dump you are simply moving information stored in your mind onto paper (or another trusted input system) in order to store the information, reflect and review later. Brainstorming is like the opposite of a brain dump, because with a brainstorm you start with an empty mind and actively populate ideas. In order to do so, it can often help to first complete a brain dump so that your mind isn’t focused on holding on to any other ideas or plans already stored there, and you can focus simply on the act of creating ideas.
Tip 1: Define your problem
When you begin a brainstorm it is important to ask yourself what you are trying to achieve or what problem you are trying to solve. You need to be specific here and think about the who, what, where, when, why and how of your problem so that you can approach it from every direction.
Tip 2: Envision the ideal outcome
When brainstorming, it is important to know what the ideal outcome is for your problem. We are talking best case scenarios only! Don’t negotiate your ideal down to something diluted, but focus on exactly what it is that you want to happen. Don’t be afraid to dream big. As one of my favorite quotes says “Reach for the Stars, for even if you fail, you’ll land amongst the Heavens.” When you are brainstorming it’s a great idea to think like an overachiever! I follow this rule of thumb myself and I never fail to produce great things even if I don’t quite make it as far as I dared.
Tip 3: Track all thoughts
Start writing down any idea that comes to mind, no matter how small, how right or how wrong it sounds. I suggest doing this with sticky notes or index cards, because these will help you to organize all your thoughts later.
Tip 4: Brainstorm early & often
It’s never too early to brainstorm solutions to a problem that may have just arisen or even to brainstorm solutions to problems that you are anticipating. The more time you spend brainstorming and the more sessions you undertake, the better your ideas will get and the more prepared you will be to undertake the project!
Step 2: Organizing plans and ideas
Once you have spent a sufficient time brainstorming, it’s time to organize your ideas! If you used sticky notes or note cards as I suggested, this process will be easier for you, but make sure to keep a few extra supplies around because you may still have some more though processing to do!
Tip 1: Lay it all out in front of you
Literally, lay all your cards with ideas and plans and information in front of you and take a good hard look at everything.
Tip 2: Discover the Hierarchy of Ideas
Once you have spent time reviewing your ideas, you will start to notice a natural hierarchy of ideas emerge from your notes. You will see ideas you like, ideas you don’t like and you can begin the organization process by grouping these items into a logical order. Ask yourself as you do this if you see any gaps in information, if so, pull out another sticky note or index card and fill in the blank!
Tip 3: Do not discard any ideas
It is very important that during this process you do not discard any ideas, no matter how bad they may seem. Why? Sometimes good ideas can spring forth from bad ideas. Often time I find that by looking at the wrong answer, your mind naturally comes to understand what the right answer is, almost like a process of elimination. When you know what doesn’t work, you have eliminated a possibility and can therefore focus on what does work! Another reason to keep around those seemingly bad ideas is because although an idea may be bad for one project, it may actually work for another or give you a great idea for a totally different project. While you’re brainstorming, you seriously have no clue what is going to pop up but your brain gave you the idea for a reason, so give it some time before you decide that it’s not worth pursuing.
Tip 4: Give your ideas time to process
Project planning and organizing ideas isn’t something that should be rushed. I say to brainstorm early and often for a reason, because thoughts need time to process and stew in your mind. Even after your ideas have been organized into their proper hierarchy and gaps have been filled, you still never know what inspiration is going to pop up once you give your ideas time to grow. So, how do you know when you have given enough time to your ideas so you can begin to project plan? Well, I find that there are two things that happen to me when I am ready to move on to the next phase in this process. First off, I find that I begin to feel confidence in my ideas. It’s like a gut check with me, if I feel uneasy with my ideas, they need more time, but if I start feeling confident and excited, I know it’s time to move forward. Finally, when I begin to see that my ideas are following a very logical order, I know it’s time to move on because my ideas make sense, and that is really what you want from this process.
Step 3: Planning
Once your ideas are in order, you can proceed with the actually planning portion of the project planning system. Novel, ain’t it?
Tip 1: Process your ideas into actions
Once you have all your good ideas in front of you, you need to process them into actual actionable items. After all, a project plan is nothing if you don’t have actions associated with your ideas.
Tip 2: Fill out a project planning page
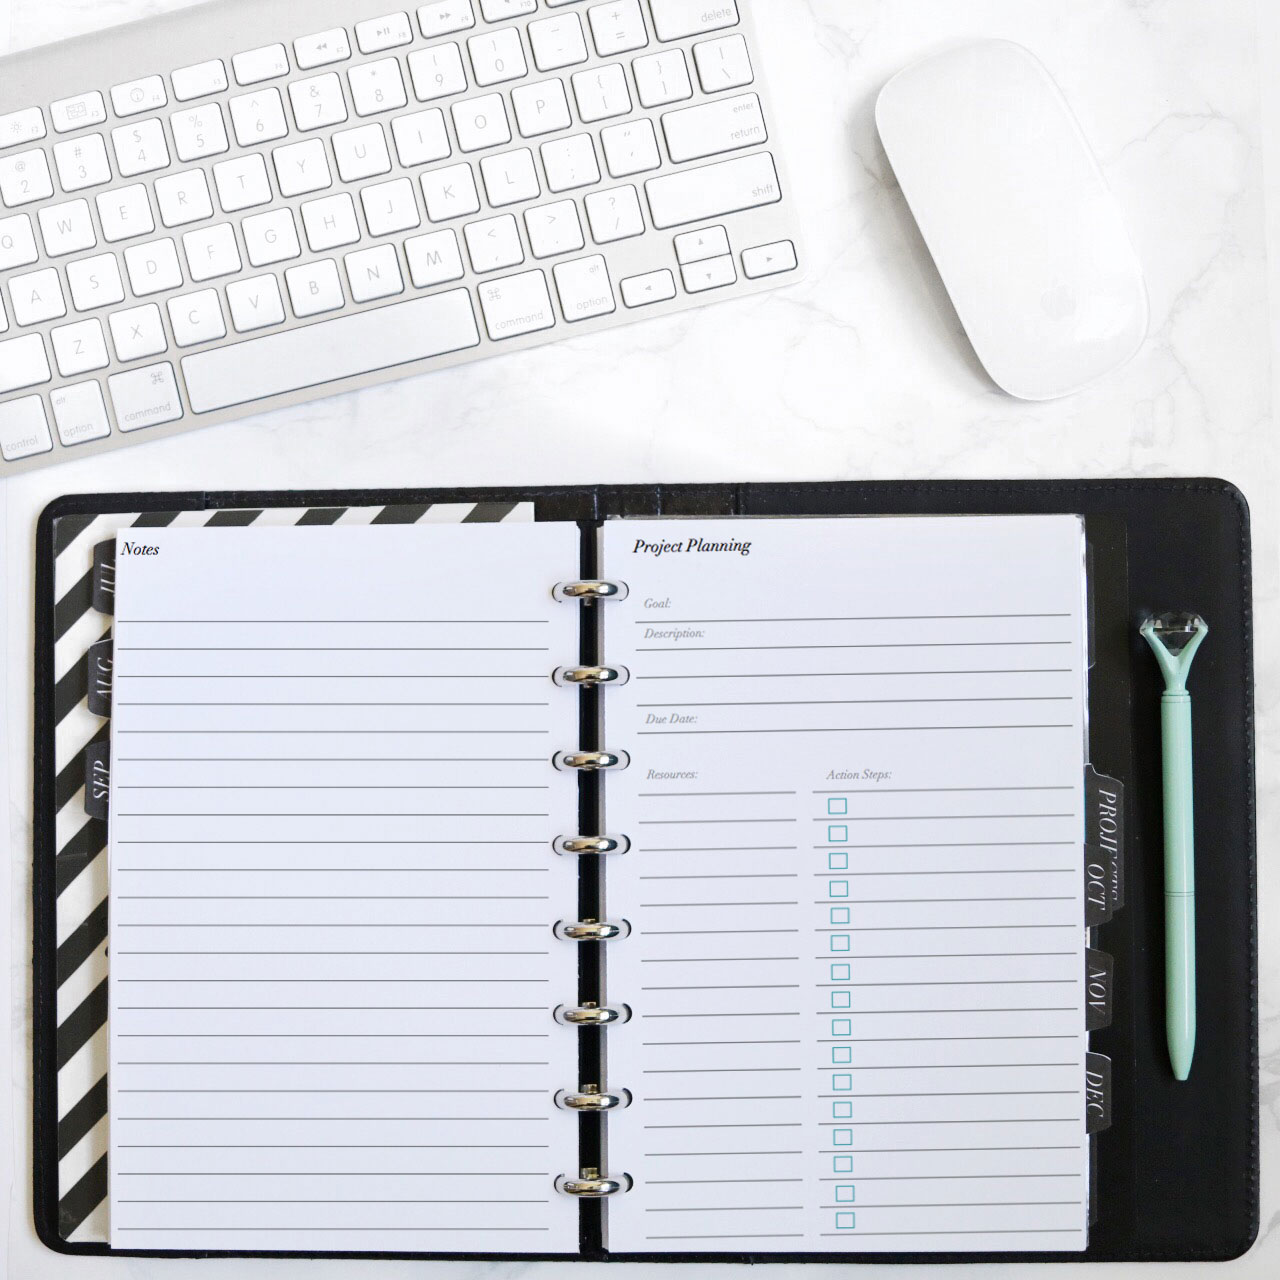
I like to keep track of my projects with a project planning page because it provides a nice overview of your project at a glance. The project planning pages I use come from a set on my shop that are sized for a Filofax, either personal or A5! The project planning page houses all the important information regarding the project.
Tip 3: Note deadlines and timeframes
On the action list of the project planning page, I make sure to note deadlines for tasks as well as provide a general time frame for their completion. This helps me when it comes time to undertake a task to understand the time commitment required.
Tip 4: Keep track of resources
When it comes to project planning, we often need outside resources or other materials to reference in order to complete tasks. The project planning pages I use have a special section for this so I can list out everything I need to reference or anyone I need to contact or work with to complete tasks.
Tip 5: Move projects to the Yearly tracker
My project planning bundle also includes a yearly tracker broken down by month of the year as well as spaces for short-term, mid-term and long-term goals. I consider a short-term goal to be something that can be completed in 1 month, a mid-term goal to be something I can complete in 1-3 months and a long-term goal to be something I need 6 months or more to complete. Once my projects are outlined in the project planning pages, I move them into my yearly tracker in their appropriate time frame so I can see everything I have going on in my life, project wise, throughout the course of the year.
Step 4: Implementation
Once your project or goal is planned out and organized, the most important part is still ahead of you and that is actually getting things done!
Tip 1: Schedule action steps into your calendar
I use a specific month at a glance insert to track my project tasks. This page (which is available alone in my shop or as part of the project planning bundle) is broken down into two parts. On one side of the page are the days of the month listed out one per line, and on the alternate side is a column of task boxes. I use the dated side to track tasks that have a specific due date or deadline and the side with the check boxes to list out all other tasks that belong to that month. That way when it is time for me to work on a project, I have a list of my next actions ready to go and I don’t have to spend any extra time looking up what I have to do! When an item is completed from this list, I check it off on the monthly page as well as on the project planning page.
Tip 2: Transfer tasks to a weekly or daily spread as needed
Sometimes tasks are very important and I need to make sure I don’t miss them, so I will move them onto my weekly pages to ensure completion. This is just an additional step I take that helps me to plan my workload for the week. Normally I will either add these items to a specific day that they need to be done on or leave them as a general task to be completed at some point during the week. Either way, having it front in center on my weekly view keeps it on the top of my list!
So that is my project planning and goal tracking system in a nutshell. This is quite a long post, so I won’t keep you any longer. If you didn’t happen to make it through the whole post, don’t worry, I did make a YouTube video on the subject as well to go along with this post in case you preferred to watch me in action instead of read a long form article!
Rules. We like to make them, we like to break them, and whether or not you know it, we all live by a set of rules we have already written for ourselves subconsciously. Successful people are aware of their rules, and in fact, intentionally craft and monitor them to ensure that they are consistently operating at a high level and making progress towards their greatest purpose in life. The other week, I wrote about getting started with personal development for those who are new to the concept. In that post, that you can read here, I discussed how the first step to developing yourself on a personal level is to audit yourself and your current situation in life. Today, I want to share with you a list of 10 Rules for Living a Charmed Life that I myself and many of the world’s most successful individuals follow. As you read through these rules, audit your life and think about subconscious rules you may live by that conflict with any of these. You may find that areas of your life that aren’t going as planned may result from following the wrong rules.
Rule #1: Live Within Your Means
The most basic financial principle and recipe for a balanced life of more happiness and less stress is to spend less than you earn.
Rule #2: Design Your Ideal Life
You are the master of your own destiny and it is up to you to take control of your life choices to build the life you want.
Rule #3: Be Present
You achieve a powerful sense of focus when you are able to keep your mind on the present moment by not thinking about passed actions or worrying about future ones.
Rule #4: Practice Gratitude
One who practices gratitude regularly will learn that they are, in fact, the luckiest person in the world.
Rule #5: Follow Your Passion
If you are looking to find meaning for your life and joy in your work, the best course of action is to follow your passion.
Rule #6: Create Your Own Opportunity
Not everyone is given the same opportunities in life, but you can make your own when you make a plan and work to execute.
Rule #7: Make Your Own Luck
If you want something to happen, you need to be willing to make it happen.
Rule #8: Love Yourself First
No one will ever be as important to your life as you are, so make sure you take care of yourself first and foremost.
Rule #9: Surround Yourself with Friends & Family
No one is alone in this world no matter how much they believe they are. There is a community around you willing to support you whether that is the family you are born into or the family you create for yourself.
Rule #10: Love Fearlessly
There is no greater risk with any greater reward than to love.
How to Theme Your Work Days to Optimize Productivity
Most of us have a never ending stream of tasks and activities we perform at work and struggle to get ahead on our to do lists. If you are jumping from task to task blindly you are wasting precious time and mental energy. Although some of our work may be varied, I bet that you have some repetitive tasks or projects that could be managed so that you get more work done in less time and help you do better work or produce higher results. No, I’m not talking about batching your work, although I a way that this part of todays topic. I’m talking about theming your workdays. Having a plan for each day of your work week to tackle similar items or spend dedicated blocks of time on important projects without interruption so you have the breathing room to do your best work. As you may already know from watching my Work Week Vlogs, I have been theming my work days since I went full time for my business, but this was a practice I also regularly employed in previous positions that helped me do excellent work, beat my deadlines and demonstrate myself as a capable employee who was able to take on bigger and better positions. So, let me teach you a simple process you can use to create a themed work week with virtually any job position!
What Does it Mean to Theme Your Work Days and Why is it More Productive?
If this is a new concept to you, theming your work days means that you are designating a specific day of the week to complete a specific task or project. For example, in my themed work week Monday is dedicated to writing blog posts. Now, writing blog posts won’t be ALL I do on a Monday, but it’s my focus for the day so that I am batching this work. When we batch work, we know that we save time because we are doing a specific activity repetitively and not jumping from different types of tasks which causes a time lapse when we need to stop doing one thing and change mental direction and focus to start another thing.
Think about a production plant where workers down a line are each doing one specific task over and over. It’s more efficient to work this way from a productivity standpoint because the worker remains focused on one thing, and it almost becomes an automated process for the worker. One summer I worked in a data processing facility and spent eight hours (with breaks of course) at a computer typing information from paper forms into a computer program that gathered and tracked the data. I’d start the day with a stack of forms and as I completed my work new stacks would be delivered to my work station. I did one series of tasks over and over robotically, in a room with many other data entry workers and we processed a lot of information very efficiently! Although some of us may have a job like this where we do one specific task or series of tasks over and over all day, most of us have more varied positions that give us the flexibility to choose what we will work on from various tasks we have been assigned. Because there is this strong element of choice and self determination, jobs like this make us feel less like a robot, but also trigger some of our most basic human flaws.
Our inability to prioritize can cause issues with deadlines, the lack of structure can cause us to waste time thinking about what to do next, and fear of failure can cause us to procrastinate on certain tasks. All of these basic human flaws waste both time and mental energy because we are jumping from task to task without focus. In addition to that, when we work without focus, not only are we wasting time and mental energy, but the quality of our work falls. Focus is an important part of productivity and finding a way to create structure in your work both inside and outside of the office can lead you to do more work in less time and truly work smarter, not harder!
How to Theme Your Work Days (even if you think you can’t)
If you are thinking that theming your work days sounds like a nice idea but that your job is different and can’t fit into a themed week, consider these steps.
Step 1: Keep a list of all the tasks and projects you complete each day and compile them for a week or two. The list doesn’t need to be detailed and it can be kept on a separate sheet, your computer or in your planner, but just make sure to make a quick note of all the work you do each day and the general time frame for when you worked on it.
Step 2: Review your list at the end of the tracked time period with a pile of sticky notes and a pen. Review your list first for tasks related to dedicated projects and write down the project on a sticky note with a few bullets underneath for different related tasks and mark down the number of days and total estimated hours you worked on that project. For example, if you worked on a presentation for an upcoming meeting and you ran some reports, sent some emails to get information, built a slide deck and created handouts your sticky note may read:
AOP Presentation
Reports
Emails
Slide deck
Handouts
(3 Days, 4 Hours)
Step 3: Review your list for tasks you did more than once and write the task on a sticky note with the number of times you completed it and total estimated hours spent. These tasks do not necessary need to be identical, but the same general task. For example, if you ran multiple reports in the week that is one item, but the fact that the reports may have varied in terms of parameters doesn’t necessarily matter. The idea is that you were doing a task that could be batched. Make sure to cross out tasks from your list as you make a sticky note so you don’t duplicate.
Step 4: Create a hierarchy in your sticky notes by laying them out on your desk or on a wall so you can get a sense of your work. Layout all your projects together, and then the additional non project related reoccurring tasks can be ordered by frequency so you can see what work you did over and over.
Step 5:Make a sticky note for each day you work (example, Monday, Tuesday, Wednesday etc) and stick them in a row to act as a header to a column. If you work 5 days a week, you should have 5 labeled columns. Looking at your work from step 4 think about how you could have mapped out your work from the previous week(s) more efficiently if you had assigned tasks to specific days. Start transferring tasks and projects from the hierarchy to the new daily column system, placing tasks and projects under the days they would have best fit. This is your chance to go back to the past and rework how things should have been done now that your week is over and you know what was accomplished and what perhaps wasn’t. Consider your reorganized week and determine if you can structure any of your days according to an optimized theme.
Not every task will fit perfectly into this map, but that isn’t the point. The point of the exercise is to visualize your work to see if patterns emerge for any days once you reviewed and laid out your week optimally now that it’s over. You may see that Monday would be a great day for you to run all your reports because optimally once they were out of your way, you could immediately move into completing other subsequent tasks or projects. You may also see that you can push certain work off to the end of the week because other tasks have priority.
Keep in mind through this activity that theming your work days doesn’t mean that all you can do on a certain day is a certain task. Remember when I said that Monday I write blog posts but that won’t be all the work I do? That’s because inevitably I need to reply to emails, place orders, make calls, and perhaps even tie up loose ends on a project as well. By setting blogging as my theme for Monday, however, I am providing myself a structure and telling myself that I will block out time in my schedule for my blog posts to be completed. Depending on your week, you may be able to dedicate a block of two hours on Monday to reports, and then spend the rest of your day doing your work as you normally would. You don’t need to have every moment of the day planned, but having some structure in place for when you will perform certain tasks can help you automate your work day and optimize it productively!
I would love to know if this concept of theming your work days is something you are interested in trying or have tried in the past. Let me know your experience and feel free to provide additional insight in the comments of this post so we can all learn from each other!
A Simple Guide to Planning Your Purchases for the Year
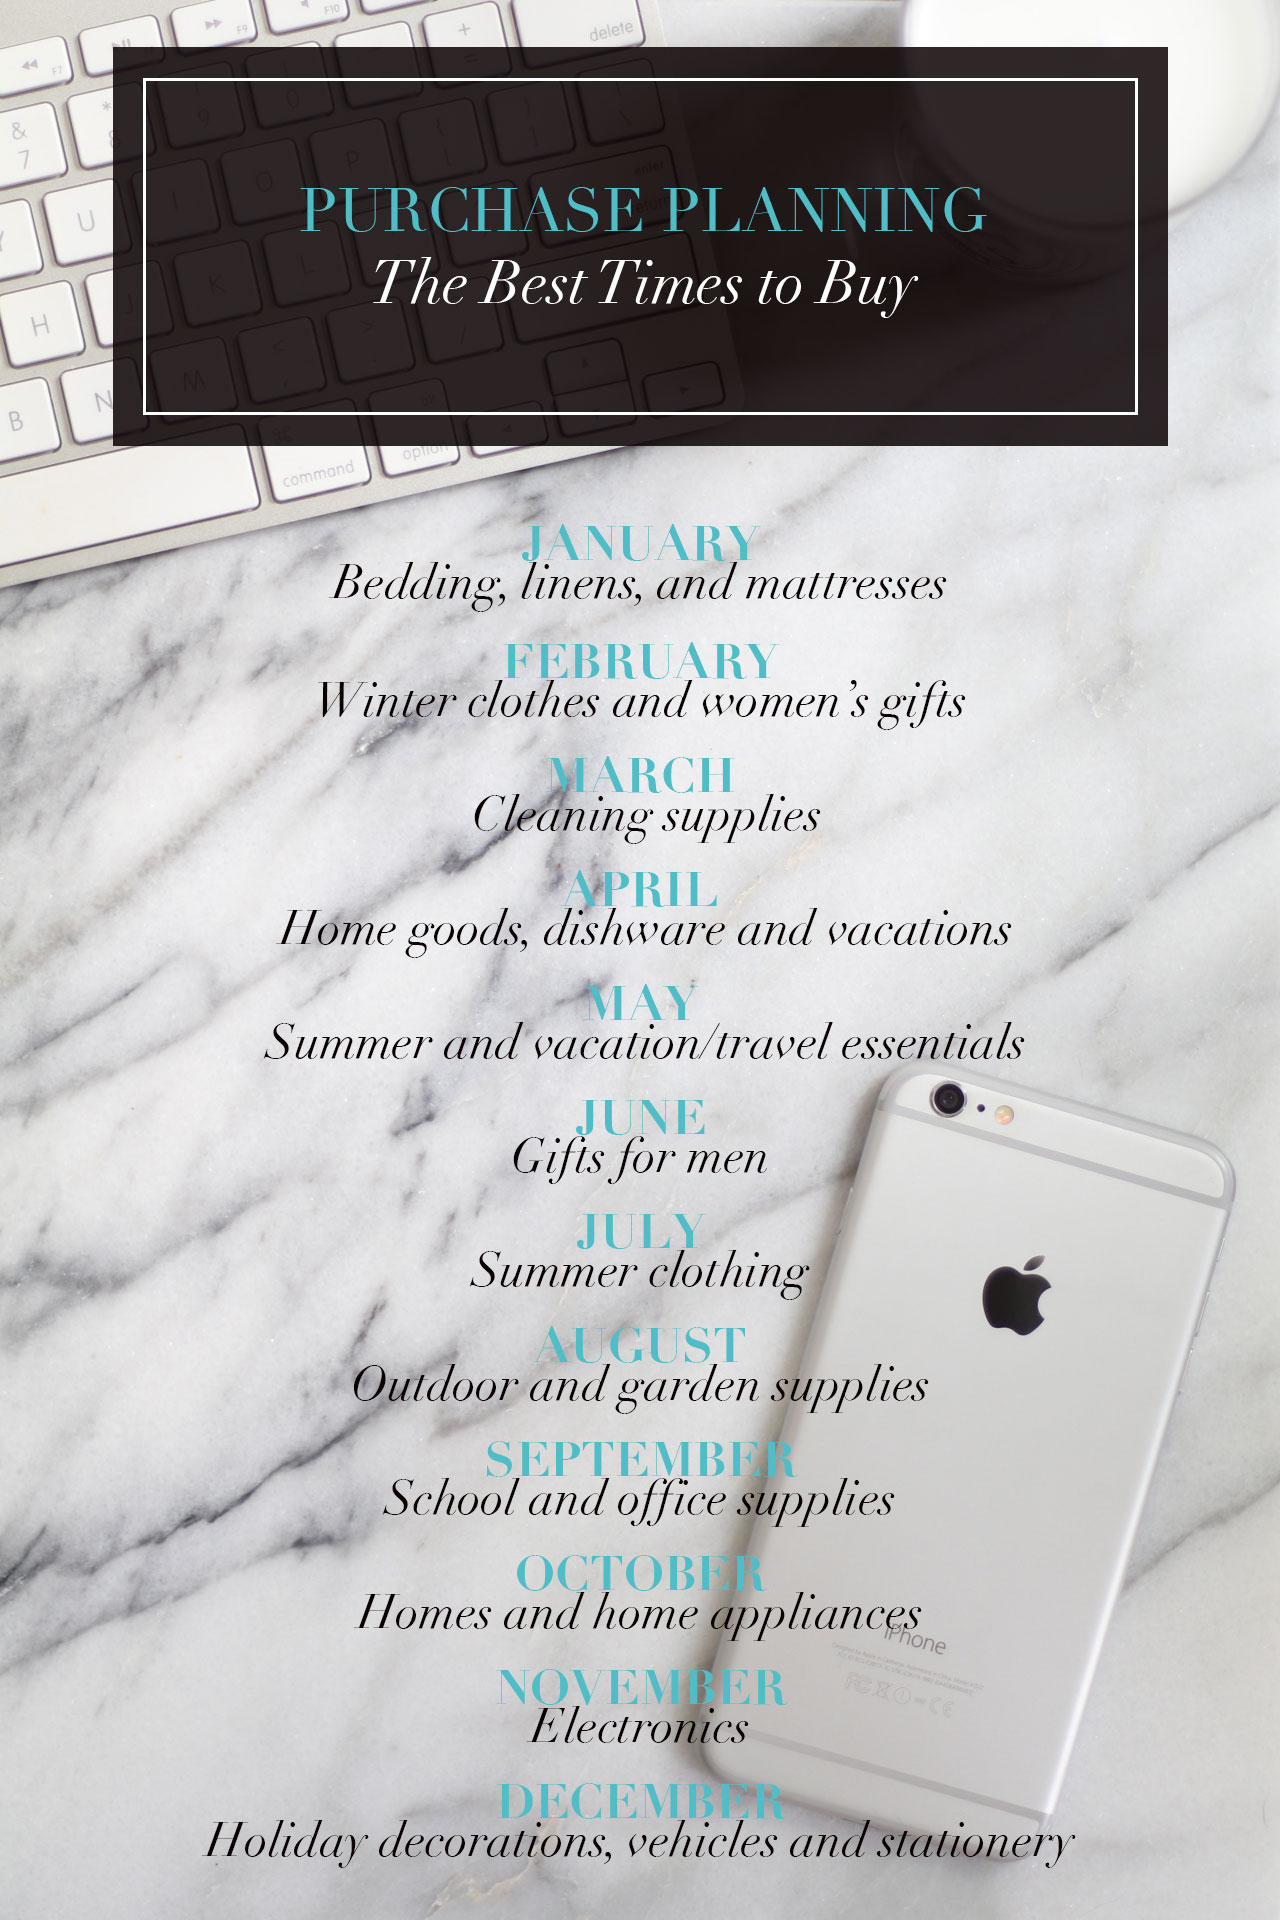
When it comes to yearly planning, I think one major area of our lives we often forget to include are our yearly purchases. If you’re like me, I tend to buy things as I need them and find it hard to plan purchases ahead of time, especially for the whole year, but we all know that there are just certain times that are better for buying different things because prices can fluctuate throughout the year. If we can do a little bit of planning and put some forethought into certain purchases we may make during the year, however, we can end up saving ourselves a good amount of money. So I’ve put together this simple guide by month to help you map out purchases you may need to make during the year.
January: Bedding, linens, and mattresses
February: Winter clothes and women’s gifts
March: Cleaning supplies
April: Home goods, dishware and vacations
May: Summer and vacation/travel essentials
June: Gifts for men
July: Summer clothing
August: Outdoor and garden supplies
September: School and office supplies
October: Homes and home appliances
November: Electronics
December: Holiday decorations, vehicles and stationery
Obviously, this list is not extensive, but it’s a great way to start planning for purchases you may need to make. Obviously, in terms of seasons, this list is partial to the northern hemisphere and particularly towards US holidays, but if you have any other tips or purchases you are thinking about this year that you’d like feedback on, leave a comment down below!
7 Ways to Optimize Your Workspace for Productivity
One of the easiest ways to support your productivity during your workday is to ensure that you have your workspace set up properly and optimized to support your needs and comfort as you are busy getting things done! Although each of our workspace situations may vary, if you work at a desk for a majority of your day these tips should help inspire you to set your workspace up for productivity to make you a more efficient and successful worker!
Workspace Optimization #1: Use a Large Desk
If you work at a desk, the best way to ensure you are able to easily accomplish your work is to use desk that is large enough for your work. Have you ever tried working at a desk that was too small? It’s absolute hell and a total productivity killer. I don’t want to make excuses for anyone who has a messy desk, but when your desk is too small, it becomes difficult for you to pull out all the materials you need to work without having to constantly remove items from your desk. Even if you work on a computer all day, inevitably you will have some physical items that you need to touch while you work. Notebooks, paperwork, a phone, reference binders, and more are a normal part of most of our days in the office, and if you are a crafter or creative artist, you need even more space on your desk to lay out your tools to work comfortably. If you are feeling cramped at your desk, consider upgrading to a larger desk or adding a second desk to create an L shaped workspace giving you enough surface area for everything you need to get the job done!
Workspace Optimization #2: Choose a Functional Office Chair
For years I opted to use a tufted dining chair for my office because I liked the way it looked, but it was such a bother getting myself comfortable and moving around at my desk. Eventually, I opted for a more office appropriate swivel chair on wheels with a nice high back to support me comfortably as I work. I found the most attractive one I could within my price range, and ended up with this model, and it has been an absolute dream to sit in! A functional office chair like mine gives me the ability to move seamlessly around my workspace, to adjust the height of my chair so I am not straining, and to sit comfortably for longer periods of time.
Workspace Optimization #3: Obey the Laws of Workspace Ergonomics
Another way to optimize your desk area for your complete comfort is to consider your workspace ergonomics. In order to prevent eye, arm or back strain, set your computer and chair up so you are looking straight at the screen with your hands resting comfortably on the keyboard. You should be able to sit up straight comfortably, with your back supported, arms resting naturally on the desk, and neck straight so that you don’t have to hunch over to work. Since I use a laptop, I have a few different risers that I use in different situations to accomplish this. I use this laptop riser along with my external keyboard when designing but I’ve recently acquired this simpler riser that lifts just the back of my laptop during long periods of writing. To learn more about setting up your workspace ergonomically, read this article.
Workspace Optimization #4: Keep Frequently Used Items within Arms Reach
Again, I don’t advocate a cluttered workspace where you leave everything out on your desk, but I do think you need to make sure your frequently used items are within arms reach and everything else is properly stored away. This will obviously vary from person to person, but I keep writing utensils, sticky notes, notebooks, notepads, my planner, my printer, and more all around my immediate area. Some items are left out on my desk, others are kept in my desk drawers and of course, I have a credenza immediately behind me so that I can swivel around in my chair and grab papers off the printer or access an item stored inside.
Workspace Optimization #5: Create a Comfortable Workspace Atmosphere
If you have ever worked in a big office, you may have noticed that the temperature is usually kept pretty cool year round and the lighting usually has something of a blue cast to it. In terms of creating a workspace atmosphere that supports productivity, it’s essential to work in a room that is cool, not too cold and not too warm, and to use bright daylight lights. These choices are deliberate because your employer is trying to make sure you are kept wide awake during the workday! A cool temperature helps to keep our bodies awake and alert, instead of warm and cozy which can trigger drowsiness. Using bright lighting is another way to keep workers awake as well as prevent eyestrain, as “daylight” lighting triggers our bodies to remain awake while helping improve our eyesight. If you work from home, its pretty easy to keep the temperature within that cool zone, but make sure you also switch out the lights in your office for daylight bulbs as most homes default to soft white bulbs that are less optimized for work!
Workspace Optimization #6: Motivate Yourself with Aromatherapy
Workspace Optimization #7: Create Focus with Music
Again, this is a suggestion that may not fit every workspace scenario, but I find that one of the best ways to get focused on my work is to have some music or background noise playing. I prefer classical music or white noise to combat the quiet of my home office during the day, but if you work in an office and find that odd noises here and there disrupt you, you may want to give this optimization a try as well. Sound has a powerful way of subconsciously motivating us to work and specifically helps us focus when we are creating our own bubble of sound around us.
I hope this has inspired you to optimize your workspace for productivity! I’d love to hear about which optimizations you may already use or want to put into place in the future, so leave me a comment down below!
The New Year has begun and most of us are starting our first full week of work for the year, myself included! Can you believe, I still don’t have my goals for the year properly worked out? I know, I know, so unlike me, but it’s not for a lack of trying, I promise. I’ve worked out most of my business goals and projects- that is usually the easy part for me in my goal setting process and how I spent a majority of my work time in December, but on a personal development level, I’m struggling to make heads or tails of what I want to come for the year. So, I’m going back to basics this week, breaking out my You Got This Workbook, and following my streamlined procedure for setting my goals! You’d think I’d have this process down by now, but realistically, goal setting is only something I do on a yearly basis so it’s helpful for me to have the goal setting process codified as a system to review, even if I DID right the book on it! If you don’t have my You Got This Workbook, it’s my Strategic Goal Setting and Planning Guide to Help You Achieve Your Goals and Organize Your Life and you can get your copy of this digital PDF workbook here. If not, today I want to share you with you the simple process outlined in the book to get you started working out how you will make this Your Best Year Yet!
Step 1: Figure Out What You Want
The first step to goal setting is always understanding what you want, and I will warn you, this is one of the hardest parts of the goal setting process for me, as well as many others I’ve spoken to! While some of us wake up knowing exactly what we want from life, others find identifying their passions or desires difficult. It’s no surprise really, we live in a world of immediate gratification, where hustle and busy-ness are hailed as the pinnacle of human achievement. Identifying your passions and true desires requires stillness and quiet time in reflection to get outside ourselves and see a big picture for our lives. Does this mean you will need to plan out everything for your life long term? Certainly not, but the more you can identify about the life you want to live, the more inspiration you will have to begin designing your ideal life and identifying the specific goals and projects you will set to make that life a reality.
TRY THIS:Meditate on your life, taking inventory of your current life, what you have and don’t have, and what lifetime achievements you’ve hit or have yet to meet until you can make a list of the goals you are interested in achieving.
Step 2: Focus on Timing
Once you have identified what you want to achieve in your life, for either the near future or long term, the next step in the goal setting process is to get focused on what you will do this year to move your goals forward. After step 1, you most likely have a long list of things you want to do or achieve and the worst thing you can do is take the list as-is and start on everything. In order to achieve goals and success, you need FOCUS. This means you will need to take that list of goals you have and deciding when in your life you want them to happen. According to renowned success coach Tony Robbins “most people overestimate how much they can do in a year and underestimate how much they can do in ten years.” Although you may approach your goal setting process with a sense of urgency, you need to be realistic about what you will be able to do in the coming year. Take it slow and steady, choose the essential goals that you can realistically achieve this year and then break out your other goals and dreams into time frames for your life. There is a time and a place for everything in life, so think about where your goals belong in terms of the order you should achieve things and which time period in your life would be the best time to achieve which goal.
TRY THIS:List out your goals into a logical order of events. Don’t worry yourself too much about expectations in terms of when people “normally” achieve x in their life, unless age is truly a factor to consider. For example, for a woman having children can only occur within a specific time frame naturally, unless you are open to adoption which widens that scope. Achieving a college education can happen at any age of life, but it would be necessary for you to achieve a specific degree before you can reach a specific career goal related to it.
Step 3: Make a Plan
Now that you have identified what you will focus on for this coming year, the next step in this goal setting process is to make a plan for how you will achieve the goals you’ve set this year. Keep in mind that you can very well start on goals this year that you don’t intend to finish this year, as some goals (like going to college) take years to achieve. In order to achieve anything, however, you need to make a plan for how you will get from where you are right now to success with your goal. Personally, I try to keep my plans as simple as possible. Another common mistake I see people make with their goals is that they try to throw every solution at the goal and do more than is necessary, which ends up leading to overwhelm and failure to achieve the goal. If you have no clue how to achieve something or how to simplify the process, find someone with experience and ask them how they did it! They will most likely be able to give you feedback on the steps and direction you should take with your goal and give you information on things they did that was a waste of time for them. The more research you can do to make a simple plan to achieve success, the more likely it is that you will reach your goals!
TRY THIS:Turn your goals into project plans and break out as many steps as you can think of to track your goal and progress. This will be a customizable roadmap you can use to stay on track. You Got This includes key project planning pages you can use to break down your goals and detailed instructions for completing this process but you can also use my project planning bundle if you want to keep your projects in your planner as I do!
Step 4: Make a Change
Many goals we set for ourselves require us to make some changes in our life to support them. For example, if you set a goal for weight loss, it means you need to make lifestyle changes that help you avoid temptation and stay on track with healthy habits. For each goal, think about what changes you need to make in your life to support the success of that goal. After all, our habits define us and it’s the little things we do or don’t do each day that determine if we will be successful in practically everything in life. Don’t think you need to change your whole life and every habit or routine, but evaluate how changing your actions could support the achievement of a goal.
TRY THIS:Consider what one change you can make in your life or habits right now that will support your success with one of your goals. If you can think of more than one, really focus in on choosing one essential change that will make the biggest impact on whether or not you are successful.
Step 5: Execute!
Now, the hard part (second only to step 1) actually making it happen and executing on your plans. The easiest way to achieve anything in life is to have a good plan and solid work ethic- other than that, there really aren’t many shortcuts you can take. Before you achieve anything in life- any goal, any project, anything worth having really- it seems impossible, but don’t let the work ahead of you scare you. Small steps accumulate into significant progress. If you can commit to doing something everyday to move you closer to your goal, even just a simple little task, before long you will see progress. The best advice I have for you at this point is to focus on the next task on the list, instead of reviewing the whole list on a regular basis. If you can focus on what you are doing next, instead of worrying about the next ten things after that, you are less likely to loose motivation and actually get the work done!
TRY THIS:Build yourself an arsenal of motivation and inspiration. Follow specific accounts on Instagram or Twitter, put inspirational quotes around your workspace or make a vision board! Whatever you can do to keep yourself focused on the outcome and not the work, the more likely you are to achieve that big, scary goal!