Month: July 2017

Discbound Planners 101: How to Get Started Using a Discbound System

How to Get Started Using a Discbound Planner System

Discbound Planners 101: How to Get Started Using a Discbound System

For quite some time now, my planner binding method of choice has been the discbound system. If you are not familiar with the disc binding concept, it is similar to the idea of a spiral notebook, but instead of a solid metal spiral holding the notebook together, you have metal or plastic discs that can pop in and out of a cover. These discs being removable means that you can add and remove paper to your disc bound system as you like, so long as the paper has been punched with a disc binding punch. I love the custom planner I created with the help of the discbound systems, so today I would like to share some key information and resources with you to help you get started creating your own custom planner system using discbound notebooks and binding accessories.

The BEST Features of a Discbound System

1. Customization: The main reason I love using a discbound system as my planner is because it is completely customizable. I can create my own custom planner inside the binding and add and remove items on a whim. I find the disc binding to be very secure, but also easy for you to add and remove elements at the same time.

2. Interchangeability: The next feature I love about discbound system is that they are interchangeable for the most part. Below I will outline some of the most popular discbound planner systems to give you an idea of the options available, but with each system the discs, refills, accessories are interchangeable so you can pick and choose what you want to use from one collection or another to build your perfect system.

3. Flexibility: The final feature I love about discbound systems is that they fold over onto themselves like a spiral bound notebook. I love this flexibility because I am someone who does like to fold a notebook over to write. Although my personal discbound planner is kept inside a notebook cover, I frequently remove my planner portion from the cover to write in it, and of course I fold the system over like a notebook when I do!

The Most Popular Disc Bound Systems

As I mentioned earlier, there are a number of discbound planner systems out on the market currently. Here is a list below with clickable links to help you browse some of the most popular systems to find the right elements to help you build your perfect system.

1. Arc from Staples

2. Levenger Circa

3. MAMBI Happy Planner from Michael’s, Hobby Lobby etc.

4. TUL from Office Depot

5. IQ 360 from Walmart

6. Martha Stewart for Avery from Staples

Disc Bound Planner Essentials

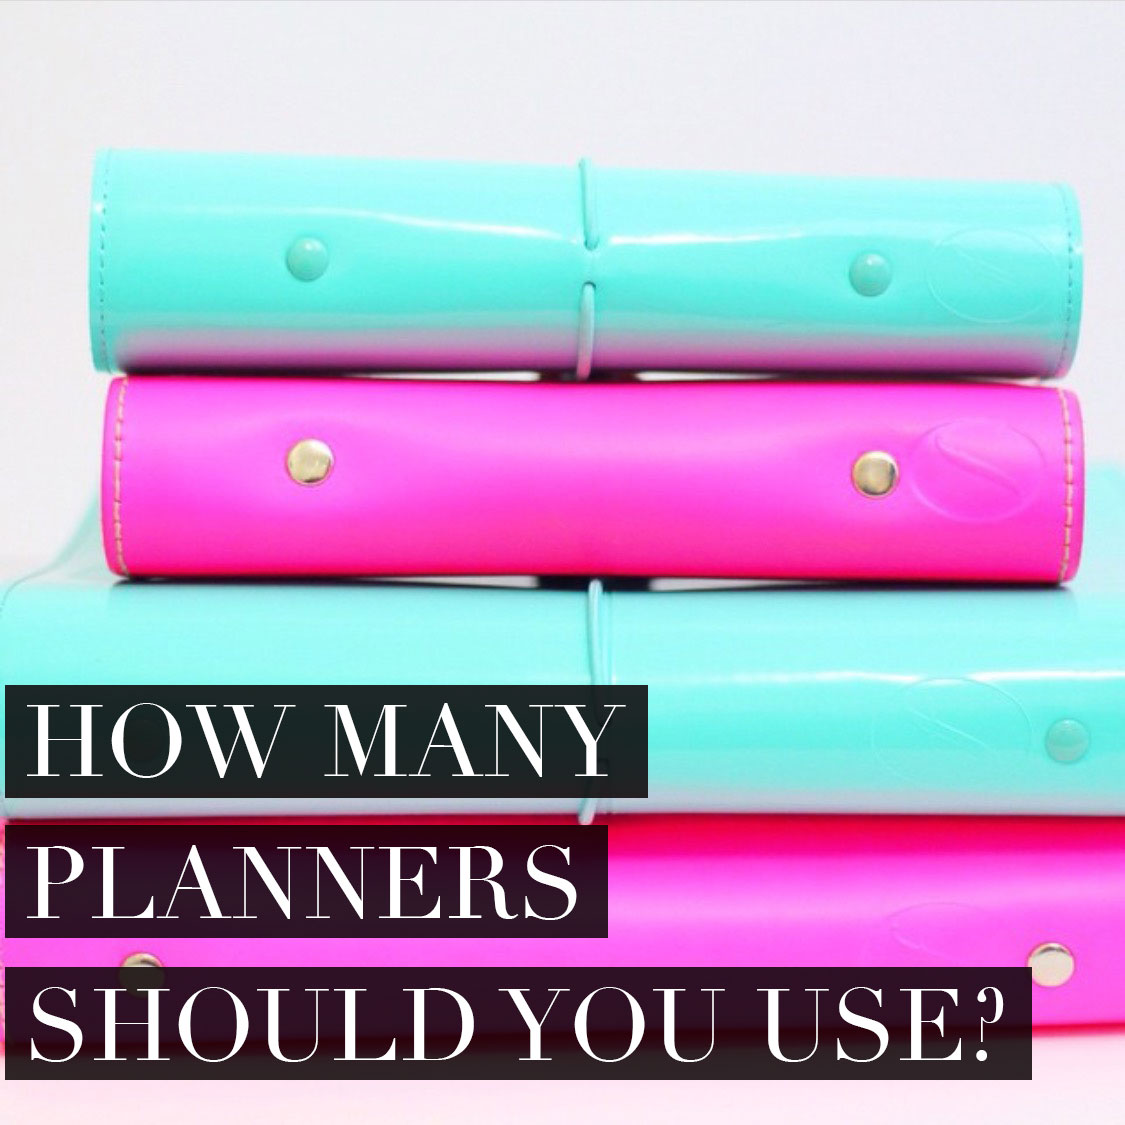
1. Discs: The major element of a discbound system are the discs themselves. Across the different branded systems you can find a variety of sizes, colors and materials like plastic or aluminum.

2. Front/Back Covers: Each different branded system for discbound has a variety of different binding covers from thin plastic covers that make simple notebooks to thick leather covers with built in organization elements. Even Etsy and Amazon sellers now make personalized or custom covers for discbound systems, so you can find a style that fits your personal preference.

3. Punch: Of course, if you are interested in creating a customizable system like me, you are going to need to get a discbound punch. I recommend getting one from the system you use most. I personally use the Arc version and love it because although it is a bit larger, it has wonderful guides to help you punch a variety of sizes of paper.

4. Inserts/Refills: Another very necessary element of a discbound system are the inserts or refills you use. Now, as you may already know, I use the Functional Planning Bundle of inserts from my own shop to create my planner system, but most of the major brands also sell calendar, project planning and note taking pages and refills, so if you are not into creating a custom planner with printable inserts like I do, you do have some options. More and more, however, I see that sellers on Etsy are also giving the option to purchase pre-printed and pre-punched discbound compatible inserts, so you have that option as well. You could also use another set of inserts and punch them with your discbound punch as well, if you are looking for something very specific that might not yet be available. I’d recommend checking on size compatibility for your inserts with the system you are using before proceeding with this option.

5. Notebook Cover: Although there are a variety of discbound system covers as mentioned earlier, I also use a leather notebook cover to protect my system. My cover comes from Gigi New York, and is no longer available, but I have also removed the rings from a Filofax to create a cover for my discbound system and with some searching, you can find other notebook cover options online through places like Amazon and Etsy.

How to Create a Custom Planner with the Disc Bound System

If you are interested in a creating your own custom planner using the discbound system, here is a video tutorial I created that walks you through the very simple process. Definitely check out this video and the links I’ve left in this article to help you find the different elements of your ideal planner system so that you can build a planner that is all your own and custom to your needs!

I hope this information has been helpful to you as you evaluate the discbound planner system for yourself. If you have any other questions about the system, feel free to leave me a comment and I’ll do my best to help you get the information you need to create your perfect planner system!

xoxo,

3 Rules for Naming Your Business

3 Rules for Naming Your Business

3 Rules for Naming Your Business

One of the most frequently asked business questions I receive revolves around how or what to name your business. I can understand why, names are important. Your business name could make or break your business. A good name can evoke solid brand recognition and a bad one can cause confusion or even legal trouble. I’m sure there is plenty of advice I could give you on naming your business that would most likely cause you indecision and make the process more difficult for you, so today I want to keep things simple and share three major rules to follow when naming your business.

Rule #1: Choose a name that is available

This first rule sounds like common knowledge, but let me tell you, I see examples of people using unavailable names for businesses all the time. So, I’ll keep this black and white for you- if you want to use a name for your business you MUST do your due diligence to ensure it is not the same or similar to another existing business that operates within your industry. Google the heck out of the name you want to use and check for social media handles as well. Using the same name as another business is problematic because it puts you in a situation where you could be in legal trouble, and using a name that is similar to another business is an issue for your branding because it causes confusion. I have seen examples of businesses that have used names that are similar or variants of another more popular existing business, and although I don’t know for sure that all the business owners where trying to piggy back on the success of the original, that is definitely something people do and it always, ALWAYS ends up hurting the variant business while boosting your competition. Choose an original name and if you are in any doubt over whether your name is too similar to another business, go back to the drawing board. No name, no matter how seemingly perfect, is worth the headache and hassle that results if it’s not wholly original.

Rule #2: Choose a name that is relevant

Again, I think this seems like a common knowledge rule but I suppose the concept of relevancy is subjective. When choosing your business name you want to make sure the name you select is relevant to the products or services your business sells. Names that are “inside jokes,” convoluted or infer a meaning that is not in line with your products WILL confuse people. How do you know if a name is relevant to your business? Ask people. Literally tell people the name of your business and ask them to guess what the business does or sells. Don’t tell them ahead of time what your business does, make sure they are going in blind when they give your opinion or else you could get mixed messages. Now, there are some examples of business naming techniques that are not necessarily relevant but still work. For example if you come up with a business name that is an original word or term (think Uber) or if you use your name for your business (and the business revolves around you or your services) those situations are common and acceptable.

Rule #3: Choose a name that is flexible

Once you have a name that is available and also relevant, you then need to double check that the name is flexible enough to apply even if your business expanded. Sometimes business’ start off small with just a small niche of products and then over time grow into new niches and new markets. No matter whether or not you ever intend for your business to expand in the future, do a flexibility check on the name. Think about some different business directions you could move into with the name of your business remaining relevant. If you do have plans for your business in the future, it’s definitely important that you think about how your name would be affected by that growth and plan for that ahead of time.

Now that you know these key rules, there is one more piece of advice I have for you when it comes to naming your business- don’t overthink it! I know this post may have a serious tone that could cause some of you to hesitate on naming their business and therefore hesitate on moving forward with your business but the truth is that there really is no perfect business name and if you do make a mistake naming your business it’s not the end of the world, or your business, in most cases. You can change your business name in the future if success causes a necessity- I’d say that’s a good problem to have. And if you use a name that doesn’t work and your business doesn’t take off, you can change it and try again with no one much the wiser. For most of you out there, you won’t even fall under either of those two situations and you will be able to make due with whatever business name you started with. Yes, your business name is important, but there are so many more important things that will reflect on your business like quality of products, customer service and overall branding. So don’t sweat it if you can’t come up with a genius business name, because most of the business world makes it work without a knockout name!

I hope these rules have given you some valuable advice as you move forward with naming your business. Of course, once you get your name worked out the real work begins if you intend to create a successful brand and business. So if you need more strategies and advice for creating a business, particularly an online business, I welcome you to sign up for my FREE On-Demand Video Training ENTREPRENEURSHIP IS THE NEW BLACK. This training is jam packed with key information and strategies for you to use as you build your business online!

xoxo,

The Only 3 Productivity Tips You Need to Know!

The Only 3 Productivity Tips You Need to Know

The Only 3 Productivity Tips You Need to Know

I talk about productivity a lot- and I share a lot of different tips, techniques, strategies- you name it! For someone just starting out, however, I realize too much information can sometimes be a bad thing, which is why I gave it some thought and narrowed down my top productivity tips to these key 3 things you should do if you want to get more productive. So if you are someone, right now, starting at zero on the productivity scale, meaning you don’t actively think about or pursue ways to increase your productivity, these three tips are going to help you get started working smarter, not harder!

1. Use a Planner

Yep- of course this is my first tip! It doesn’t have to be a paper planner, use whatever system works for you, digital, physical, a filofax, your iPhone calendar. The point is that in order to be productive, you first need to get in the habit of planning. When we use a planner and think about our days, weeks and months ahead of time, we are able to be more effective and efficient with our work. That doesn’t mean all your days will always go according to plan- in fact, they most likely won’t- but having a general idea of what you need to do and have all your plans and ideas mapped out in a system can help you do more of what matters and spend less time on what doesn’t!

2. Set a Daily Top 3

The Daily Top 3 is a productivity concept I love because it’s all about getting focused. Essentially, each day (or evening before) you will choose three things on your to do list that are priority items. These can be items with a deadline, things that need to be accomplished before other sequential tasks or just something important to you personally. You list out these three individual tasks and try to finish all three during the day, the sooner the better! I know we all have more than three things to do in a day, but forcing yourself to choose just three that are priority for a single day forces us to focus in on what really matters and teaches us how to sort through our messy task list for items that will truly impact our days.

3. Create White Space

So this is probably a tip that you would never expect a productivity guru to share with you, especially not in a top three list of the most important strategies but creating white space, essentially planning to do nothing, is too important. When you create white space in your day by setting aside time in your schedule to do nothing, you end up becoming more productive in a few ways. First of all, if you plan for some white space in your day and you have tasks that end up taking longer than expected, that white space can be used to buffer other items on your list so you don’t end up with tasks that need to be carried over to the next day. Second, studies have shown that people who have free time are more creative and produce better work. Why? Because when you can give yourself time to just do nothing, think and relax, you are able to dive deeper on your thoughts and come up with more creative ideas and solutions for your work. When we are forced to quickly complete a task, we usually rush and create a less than desirable result, but if we had time in our day to think about our work, we can come up with better solutions and better outcomes!

If you enjoyed these tips and would like to learn more about planning and productivity, I highly recommend signing up for my FREE Planner Peace Master Class. This video class will teach you my fundamentals of planning and productivity so you can get started using your planner of choice to organize your life and work smarter, not harder!

I hope these three tips give you a good foundation for productivity in your life. I would love to hear how you are integrating these ideas currently into your daily routine or if you have other must-have productivity tips you think might be more important, I’d love for you to share in the comments!

xoxo,

SaveSave

My Current Favorite Planner Supplies

My Current Favorite Planner Supplies

My Current Favorite Planner Supplies

As a frequent planner user, I find that I am always changing up little bits of my system from my planner cover, to my inserts and of course my many planner supples and accessories! No matter how much I change up, however, I always find that there are a few favorite planner supples that I rely on over and over again. If you watch my YouTube videos on planners or follow me on Instagram, these may be items you see frequently inside my planner, so if you’ve ever wondered what they are and where you can get your hands on them, here is a quick reference list for you!

  1. Staples Arc Customizable Durable Poly Notebook: If you’ve seen any of my planner set up videos from recent years, you know that I use and love the Staples Arc Discbound system of notebooks to bind my planner inserts. I use one of their standard black notebooks, remove the Arc notepaper and add my own Charmed Life Planner Inserts and then this simple, lightweight notebook cover slips inside one of my planner covers for extra security and functionality.

  2. Russell+Hazel Sticky Notepad Set (Marble): I am a sucker for sticky notes AND marble print, so when you combine those together, it’s a no brainer for me. You’ll always find a number of these throughout my planner pages with extra notes, details and phone numbers and I like to keep a stack of them in the back of my planner inside a zip pocket so I have them with me on the go as well!
  3. Sweet Water Decor Boss Lady Pen: I feel like the pen you keep in your planner is a major choice. Not only does it need to write well and be the proper point width for your writing preference, but I think it also needs to look good. I love this beautiful turquoise Boss Lady Pen because it fits with my branding and I love the extra reminder in my planner that I am in charge of my life, business and plans!
  4. Post It Notes 1.5″ x 2″: Like the marble sticky notes, post-it notes are a frequent supply found in my planner, but specifically I love the 1.5″ x 2″ size because its compatible with the vertical square boxes found in many planners like the Erin Condren Life Planner, MAMBI Happy Planner, and of course, my Charmed Life Planner! These little sticky notes fit perfectly in my planner columns so they integrate nicely for adding notes to my days without using a huge post it that takes up space across numerous days.
  5. Empire Building Favorites Notebook: Along with my discoid planner, I like to keep a spiral notebook in my planner cover for extra notes that may be more permanent or need to be referenced again in the future. But I’m soo picky when it comes to notebooks, I always want that perfectly inspiring quote on my cover with the perfect chic blend of my favorite colors and patterns. Which is why I end up designing my own! Yep- this lovely notebook has a cover designed by yours truly, so if this check list of my favorite things resonates with you, definitely check it out!

I’d love to hear about your current favorite planner supplies as well, so please make sure to leave me a comment below and let me know what you love to use in your planner!

xoxo,


SaveSave

How to Use Instagram Stories to Grow Your Brand & Business?

How to Use Instagram Stories to Grow Your Brand and Business

How to Use Instagram Stories to Grow Your Brand & Business?

If you’ve been a follower of mine for a while, you know that Instagram is one of the main platforms I use to grow and promote my business online. I’ve written before about how I made $1,000 in one day from a single picture, and I’ve explained my best tips for growing  your following, but today I want to tackle a new topic, the Instagram Story! For those of you who aren’t familiar, your Instagram Story is a live “in the moment” timeline separate from your standard Instagram feed. In your standard feed, you post pictures and videos with tags and descriptions that remain as a permanent part of your account unless deleted, but the Instagram Story feature is a short-term snapchat like feed where pictures and videos disappear after 24 hours and the maximum video length is 15 seconds. You access your Instagram Story through the camera icon on the top left side of your home feed and can view the Stories of those you follow at the top of your home feed or by tapping on their profile picture if its highlighted with an orange circle. Now, Instagram is always changing and updating and their Stories feature has probably received some of the most interesting updates of all in recent months. So I’d like to share some practical strategies related to these updates!

>> CLICK HERE TO FOLLOW ME ON INSTAGRAM @MISSTRENCHCOAT! <<

(It’s a great way to thank me for my awesome strategies and helpful advice!)

What to Share on Instagram Stories vs the Standard Feed?

One major question that online marketers and business owners ask often is what you share on your Story vs your feed. Since the two have different parameters, it’s important to optimize the content you are putting on each. As you know from my previous posts on IG, the standard feed requires high quality images, styled photos and carefully edited promotional videos that fall in line with your branding and business products, services and goals. The Story, however, is a place where you can have a bit more fun, show the behind the scenes of your brand and business and worry less about quality and more about sharing your brand story. On the IG Story feature, I’d recommend sharing content from other platforms like blog posts and youtube videos- just a quick shot of the content with a call to action for your audience to check it out. Video footage of your workspace, projects or processes that gives your audience a peek behind the scenes is also a productive use of the feed. Since your posts to the IG Story only last 24 hours, it’s also a great place to make quick announcements, run sales, poll your audience with a quick question or share a bit more of your personality through images and videos that show your audience sides of you, your brand and your biz that they might not see interacting with your more formal content. Selfies utilizing the Stories’ SnapChat like filters, videos of your daily routines, or even quick product shots throughout the day can help boost your business without seeming like spam in the more temporary format of the feed.

How to Grow your following via Instagram Stories?

The great thing about Instagram Stories that other short term photo and video sharing platforms like SnapChat lack is the integration of discovery through your Story. Unless you specifically change your IG Story settings, your story is visible to the public, not just those that follow you. You do have the ability to block specific individuals from viewing your story, but overall, when you keep your story public, it helps increase discoverability if you optimize the content on your Story. You can do this by using text hashtags and geotags in your IG Story posts as often as possible. When you do so, these tags integrate your story into feeds that other users are searching through for Stories in their area or via hashtags which are the default search feature of content on Instagram. You should only use one or two of these features at a time, and of course, always use relevant hashtags and geotags in your Story posts, but when you do, you increase the likelihood of your Story being discovered by other users searching for topics similar to the content you are sharing.

How to Monetize your Instagram Story?

For a few years now, Instagram has unfortunately built up a reputation as being unfriendly to online business and marketers. Yes, it’s a fast growing platform that has helped many build their brands however, it always lacked a direct linking feature that would help convert your Instagram followers into customers. In terms of the standard IG Feed, their is just one single place you can put an active clickable link, and that is in your profile. I’ve talked about getting around this with short links in post descriptions, but since no links within the description are clickable, it makes conversions more difficult as followers need to physically type in the link address instead of clicking to move to a webpage. However, Instagram Stories has recently updated to give you the ability to add a link to your Story posts! When you take a picture or video in the IG Story feature, you will see an icon of a chain link on the upper tool bar that allows you to any webpage. Users then need to swipe up on your IG Story post and the link is opened within a browser inside the app. This seriously changes the game for business on Instagram because you can now link directly to your product and service pages, opt-ins, or content on other platforms, giving you a much stronger conversion than ever before.

I hope these strategies have given you some additional insight in how to use Instagram and specifically it’s Story feature to grow your brand and business online. If you enjoyed these strategies and would like to learn more about growing a successful brand online, I welcome you to sign up for my FREE On-Demand Training called Entrepreneurship is the New Black! This training is jam packed with information and strategy for you to make the most of your online platforms, including Instagram to support the development of your brand or business online!

xoxo,

How to Perform a Mid Year Review?

How to Perform a Mid Year Review

Since we are now at the mid way point of the year, this is the perfect time to perform a Mid Year Review to check up on your progress for the year and ensure you are making headway on your plans and goals. I recently published a video outlining my four step process for performing a mid year review, so I recommend that you check out the video linked below to learn the process and get you motivated and ready to review the first half of your year. I’d also like to outline the four steps below as a quick reference guide for you as you undertake the process for yourself!

Click the video linked above to watch the Mid Year Review Process!

Step #1: Perform a Brain Dump

If you are not already familiar, a brain dump is a process you undertake where you write down all the information, ideas and thoughts you are storing in your mind. Here is a link to a video on how to perform a brain dump if you aren’t sure of the process. The brain dump is step one of the Mid Year Review process because it gives us an opportunity to clear out our mental clutter so that we can use our brain to process information regarding the tasks and plans we will evaluate during the review process.

Step #2: Reconcile Old Tasks

The next step in the mid year review process is to reconcile old tasks, meaning that you should go through your planner for the first half of the year and make sure you have checked off any tasks you have already completed and migrate any incomplete tasks forward. This is an important part of the mid year review process because it gives us an opportunity to see how much we actually accomplished which can be very motivating if you believe you haven’t made as much progress on goals or work you had planned out at the start of the year. This is also helpful because it helps you to see what work you have left to do in order to accomplish goals by the years end.

Step #3: Review Goals and Plans

Next, you are going to want to review the goals and plans you set out at the start of the year to ensure they are still relevant. Often times things change throughout the year, so if you need to remove a goal or change some details of a plan, this is your opportunity to do so. You can also take this time to add new plans that might make more sense to helping you end the year strong if that is what you need to do!

Step #4:  Redefine Your Targets

Once you have reviewed your goals and plans, and perhaps made some necessary changes, its time to redefine targets for those goals. This means you may need to rewrite project plans, change expected targets and redefine certain tasks, but this is an important step to ensuring that you have reasonable expectations for accomplishing the big picture goals and plans you outlined for your year!

If you go through this process and find that you need more help setting goals and outlining project plans, I would highly recommend that you check out my You Got This Master Class! The You Got This Master Class is a video lecture and workbook that outline my goal setting and project planning process in detail and includes numerous activities and worksheets to help you set your goals, define your projects and organize your life so that executing on what matters becomes second nature!

xoxo,

How Many Planners Should I Use?

How Many Planners Should I Use to Optimize Productivity?

I’m always surprised that one of the most frequently asked questions I receive from my community revolves around how many planners one should use to optimize their productivity. To me, the answer is pretty obvious, but I think within the planner community there are so many options for planners and different uses for planners that many of us begin to suffer from shiny object syndrome and want to use all the planners and have a dedicated planner for different aspects of our lives. The thing is though, we all have the same 24 hours in a day and we all have just this one life right now to plan for, so separating aspects of our lives into multiple different planners seems counterintuitive to me.

Check out my recent video on the topic linked above and make sure to subscribe on YouTube for more!

The rule I like to use is one planner, one life! That’s right! I think each of us only needs ONE planner to get the job done, organize our schedule and keep on top of our tasks. Why? Well, I think it’s important to keep all of our information for what we need to do and where we are expected to be in one place. When we separate out our calendar or our tasks into different planners we end up only seeing one portion of our life and obligations at a time, thus missing the big picture. This can cause us to overload our schedule with too many tasks or appointments, since we don’t see a full picture of our days, weeks and months. I think many of us already struggle with putting too much on our to do lists, so streamlining into a single planner system, if you are using multiple planners, should help you get more realistic with the expectations you set for your day.

Now, I do believe their are circumstances where using more than one planner is reasonable. If you are someone who works outside the home and your work stays at work, clearly separate from your personal life, then it makes sense to me to have a second planner for your job that you leave at work! This also stands in the event that you have a job where you keep sensitive information or appointments regularly and may need to keep a separate work planner for legal or privacy reasons. I also believe you can use more than one planner IF you get clear on the difference between a binder and a planner. Now, for example, I use a Filofax binder to house my planning system, but you could use a Filofax binder as a journal or to store reference information- it doesn’t just work as a planner cover! So, if you are using more than one binder and one is dedicated to your schedule and tasks, and the others are being used to house specific information or for other purposes, than using more than one is fine. The point is just that you don’t want to separate out information that pertain to your schedule and tasks because it will ultimately overwhelm you to have that information in more than one place.

I know many people bring up the fact that they use more than one planner because they like to use a smaller, more compact planner to travel with outside the home or work, and they might use a larger desk style planner to stay at home. To me, this scenario is baffling because ultimately you are duplicating information which isn’t optimizing your work, just causing you to do more! If you are someone who needs a smaller planner to travel out and about with, my recommendation would be to then keep your schedule and tasks in the smaller planner, and then use the larger binder for extraneous information that you don’t need away from the home or office. Yes, using a smaller planner may mean you can’t store a full year of inserts at one time, BUT ultimately, I believe it will help you to see the bigger picture on your short term items so that you are keeping on top of your schedule and tasks.

If you are using a single planner system and still struggling to get your schedule and tasks organized, I have a great FREE resource you won’t want to miss. I have created a Functional Planning eCourse that will teach you the ins and outs of my Functional Planning process and how to make the most of the 24 hours in your day with just one single planner! Click here to sign up for the FREE eCourse which will be delivered by email on a weekly basis!

So I hope this gives you some food for thought if you are wondering how many planners to use. Of course, I am not the be all and end all on this matter, so if you are using more than one planner successfully outside of the scenarios I discussed, let me know how you manage it and what systems you are using.

xoxo,