Of course, I love to see pictures of your planner inserts and wallpapers at home on your planners and tech gadgets! If you share a picture, please use #CharmedGTD so the whole community can see your setups and of course tag me @MissTrenchcoat as well in your pictures on Twitter & Instagram!
How to Use Functional Planning for a Busy Work Week
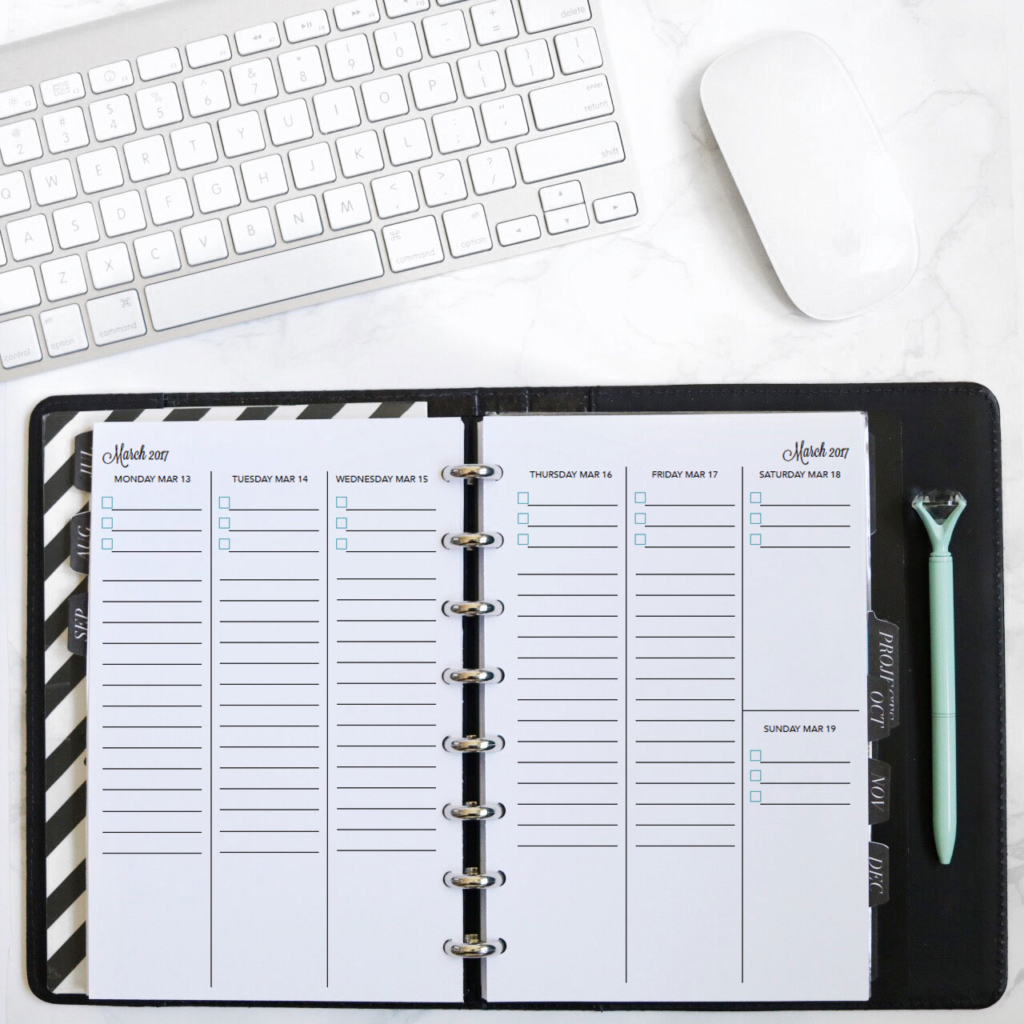
For the last few weeks, I have been prepping for the upgrade launch of my new webinar ENTREPRENEURSHIP IS THE NEW BLACK, so naturally, I’ve had quite a bit to handle and very little room to waste time. So, of course, I’ve been using my functional planning method inside my Charmed Life Planner to ensure I have a game plan for each day. Yesterday on my YouTube channel, I shared a video walking you through how I functionally plan during busy work weeks. The video gives you a birds eye view of my planning process and thought process for how I will lay out my tasks for a full week. Now, if you are familiar with my functional planning process, you know I don’t normally lay out all my plans for a full week at one time, I prefer to take it day by day, but during busy weeks I find it necessary to lay everything out so there is no room for error. That doesn’t mean that I don’t allow for wiggle room in my schedule, just in case, but it means that I’d prefer to walk into my week with it set up for me to just knock out tasks and projects without having to plan and replan on the daily.
If you haven’t watched the video yet, I recommend checking it out! The following are some major points that the video covers if you want a summary of what you will see:
• Functionally Planning for a whole week begins with setting my Top 5. These are the 5 projects I need to complete or make progress on during the week because they are priority items.
• Next comes the Secondary or “Other” to do list. Of course, there are always tasks outside of my Top 5 that need my attention during the week and listing these out keeps me on track so I don’t forget anything else that may be important. Although these tasks may not be part of my highest priority projects, I do make an effort to complete as many as possible.
• Daily Top 3. In order to functionally plan and create mental focus for my workday, I set a daily top 3. These are 3 individual tasks that are the highest priority for the day. Generally these are project based tasks that must be completed in order for me to move on to future tasks in a project, but they can sometimes be tasks from my secondary to do list as well.
• Organize special information in open boxes. The Charmed Life Planner layout that I use for A5/Half Letter includes a blank open space at the bottom of each daily list. I use this space to break down special information, lists or project details that belong together. I find this is the best way to ensure I keep relevant information in the same place for tracking and completion.
• Build in white space. You will notice in the video that I do not fill up every inch of my planner before the week begins, I like to leave white space for me to add other information that may pop up during the week. I also make sure to balance my top 3 list so that I am mixing more time consuming tasks with some easier “lay-ups” as we can call them. This ensures I don’t over do it with my top 3 and end up with too much on my plate.
• Other weekly prep. In the video I also explain another weekly prep ritual I’ve been using, especially during busy weeks and that is meal prep. I will prep my lunches and dinners for the week ahead so I don’t need to think about them during the work week when I may be too busy to bother with cooking. It’s too easy for us to just autopilot to take out or skipping meals when we are busy and a bit of meal planning and prep before the week begins is the perfect solution.
I hope you enjoy the Plan with Me and my functional planning process. I’d love to know what you thought of the video and what points stood out to you. Let me know in the comments below!
Of course, I love to see pictures of your planner inserts and wallpapers at home on your planners and tech gadgets! If you share a picture, please use #CharmedGTD so the whole community can see your setups and of course tag me @MissTrenchcoat as well in your pictures on Twitter & Instagram!
How to Break Down a Goal into a Project With Your Planner!
Since we are now in the very beginning of January and I know many of you are probably pondering resolutions for the year as well as any projects and other goals you want to accomplish throughout 2017, I thought now would be the perfect time to share with you all my project planning and goal tracking process. As you may already know, I currently use my A5/Half Letter Charmed Life Planner inserts in a disc bound system to house and organize all my plans, projects and goals for the year. You may even be familiar already with my printable project planning bundle that I sell in my shop and designed specifically to help myself (and others!) outline and monitor their projects in a productive way. If you haven’t seen my project planning bundle yet, feel free to check it out for yourself.
Now, when it comes to projects and goals, I think people tend to approach each of these items differently because they do tend to be different in nature. When it comes to projects, I view them as a collection or series of tasks necessary to complete in order to come to a desired outcome. In my opinion, projects usually arise as a result of external factors in our lives that prompt us to undertake these tasks. For example, you may find that the majority of your projects come from places like work, your household or even community needs. Since projects are often externally driven, I believe that we often feel a lot of pressure or stress to complete these tasks because usually someone other than ourselves is counting on the completion of the project. Goals on the other hand are things we as individuals work towards with the hopes of accomplishing. I find that goals are usually internally driven and very personal in nature and because of this, I believe we often put our own goals aside or on the back burner to other projects because the completion of our goals only affect us on a personal level. Therefore, I find that goals are usually the first thing to fall to the wayside when life gets busy because they can sometimes feel like something of a selfish pursuit. The truth of the matter is, that both projects and goals should be approached with the same system of organization in order to identify, plan and execute them to completion. No matter whether you are working on a project for work or trying to reach the goal of running a marathon, the same basic planning structure applies and neither a project nor a goal is any less valid no matter the factors surrounding it’s existence!
Okay, so let’s move on to the nuts & bolts of my project planning system. This isn’t any sort of revolutionary system by any means, and I certainly can’t take credit for doing anything other than developing it to fit my own needs, but it does work very well for me, and I thought if it works for me, it could work for you!
The Process
Step 1: Brainstorming
The first part of my project planning system is brainstorming. This shouldn’t be confused with brain dumping, because in a brain dump you are simply moving information stored in your mind onto paper (or another trusted input system) in order to store the information, reflect and review later. Brainstorming is like the opposite of a brain dump, because with a brainstorm you start with an empty mind and actively populate ideas. In order to do so, it can often help to first complete a brain dump so that your mind isn’t focused on holding on to any other ideas or plans already stored there, and you can focus simply on the act of creating ideas.
Tip 1: Define your problem
When you begin a brainstorm it is important to ask yourself what you are trying to achieve or what problem you are trying to solve. You need to be specific here and think about the who, what, where, when, why and how of your problem so that you can approach it from every direction.
Tip 2: Envision the ideal outcome
When brainstorming, it is important to know what the ideal outcome is for your problem. We are talking best case scenarios only! Don’t negotiate your ideal down to something diluted, but focus on exactly what it is that you want to happen. Don’t be afraid to dream big. As one of my favorite quotes says “Reach for the Stars, for even if you fail, you’ll land amongst the Heavens.” When you are brainstorming it’s a great idea to think like an overachiever! I follow this rule of thumb myself and I never fail to produce great things even if I don’t quite make it as far as I dared.
Tip 3: Track all thoughts
Start writing down any idea that comes to mind, no matter how small, how right or how wrong it sounds. I suggest doing this with sticky notes or index cards, because these will help you to organize all your thoughts later.
Tip 4: Brainstorm early & often
It’s never too early to brainstorm solutions to a problem that may have just arisen or even to brainstorm solutions to problems that you are anticipating. The more time you spend brainstorming and the more sessions you undertake, the better your ideas will get and the more prepared you will be to undertake the project!
Step 2: Organizing plans and ideas
Once you have spent a sufficient time brainstorming, it’s time to organize your ideas! If you used sticky notes or note cards as I suggested, this process will be easier for you, but make sure to keep a few extra supplies around because you may still have some more though processing to do!
Tip 1: Lay it all out in front of you
Literally, lay all your cards with ideas and plans and information in front of you and take a good hard look at everything.
Tip 2: Discover the Hierarchy of Ideas
Once you have spent time reviewing your ideas, you will start to notice a natural hierarchy of ideas emerge from your notes. You will see ideas you like, ideas you don’t like and you can begin the organization process by grouping these items into a logical order. Ask yourself as you do this if you see any gaps in information, if so, pull out another sticky note or index card and fill in the blank!
Tip 3: Do not discard any ideas
It is very important that during this process you do not discard any ideas, no matter how bad they may seem. Why? Sometimes good ideas can spring forth from bad ideas. Often time I find that by looking at the wrong answer, your mind naturally comes to understand what the right answer is, almost like a process of elimination. When you know what doesn’t work, you have eliminated a possibility and can therefore focus on what does work! Another reason to keep around those seemingly bad ideas is because although an idea may be bad for one project, it may actually work for another or give you a great idea for a totally different project. While you’re brainstorming, you seriously have no clue what is going to pop up but your brain gave you the idea for a reason, so give it some time before you decide that it’s not worth pursuing.
Tip 4: Give your ideas time to process
Project planning and organizing ideas isn’t something that should be rushed. I say to brainstorm early and often for a reason, because thoughts need time to process and stew in your mind. Even after your ideas have been organized into their proper hierarchy and gaps have been filled, you still never know what inspiration is going to pop up once you give your ideas time to grow. So, how do you know when you have given enough time to your ideas so you can begin to project plan? Well, I find that there are two things that happen to me when I am ready to move on to the next phase in this process. First off, I find that I begin to feel confidence in my ideas. It’s like a gut check with me, if I feel uneasy with my ideas, they need more time, but if I start feeling confident and excited, I know it’s time to move forward. Finally, when I begin to see that my ideas are following a very logical order, I know it’s time to move on because my ideas make sense, and that is really what you want from this process.
Step 3: Planning
Once your ideas are in order, you can proceed with the actually planning portion of the project planning system. Novel, ain’t it?
Tip 1: Process your ideas into actions
Once you have all your good ideas in front of you, you need to process them into actual actionable items. After all, a project plan is nothing if you don’t have actions associated with your ideas.
Tip 2: Fill out a project planning page
I like to keep track of my projects with a project planning page because it provides a nice overview of your project at a glance. The project planning pages I use come from a set on my shop that are sized for a Filofax, either personal or A5! The project planning page houses all the important information regarding the project.
Tip 3: Note deadlines and timeframes
On the action list of the project planning page, I make sure to note deadlines for tasks as well as provide a general time frame for their completion. This helps me when it comes time to undertake a task to understand the time commitment required.
Tip 4: Keep track of resources
When it comes to project planning, we often need outside resources or other materials to reference in order to complete tasks. The project planning pages I use have a special section for this so I can list out everything I need to reference or anyone I need to contact or work with to complete tasks.
Tip 5: Move projects to the Yearly tracker
My project planning bundle also includes a yearly tracker broken down by month of the year as well as spaces for short-term, mid-term and long-term goals. I consider a short-term goal to be something that can be completed in 1 month, a mid-term goal to be something I can complete in 1-3 months and a long-term goal to be something I need 6 months or more to complete. Once my projects are outlined in the project planning pages, I move them into my yearly tracker in their appropriate time frame so I can see everything I have going on in my life, project wise, throughout the course of the year.
Step 4: Implementation
Once your project or goal is planned out and organized, the most important part is still ahead of you and that is actually getting things done!
Tip 1: Schedule action steps into your calendar
I use a specific month at a glance insert to track my project tasks. This page (which is available alone in my shop or as part of the project planning bundle) is broken down into two parts. On one side of the page are the days of the month listed out one per line, and on the alternate side is a column of task boxes. I use the dated side to track tasks that have a specific due date or deadline and the side with the check boxes to list out all other tasks that belong to that month. That way when it is time for me to work on a project, I have a list of my next actions ready to go and I don’t have to spend any extra time looking up what I have to do! When an item is completed from this list, I check it off on the monthly page as well as on the project planning page.
Tip 2: Transfer tasks to a weekly or daily spread as needed
Sometimes tasks are very important and I need to make sure I don’t miss them, so I will move them onto my weekly pages to ensure completion. This is just an additional step I take that helps me to plan my workload for the week. Normally I will either add these items to a specific day that they need to be done on or leave them as a general task to be completed at some point during the week. Either way, having it front in center on my weekly view keeps it on the top of my list!
So that is my project planning and goal tracking system in a nutshell. This is quite a long post, so I won’t keep you any longer. If you didn’t happen to make it through the whole post, don’t worry, I did make a YouTube video on the subject as well to go along with this post in case you preferred to watch me in action instead of read a long form article!
A Simple Guide to Planning Your Purchases for the Year
When it comes to yearly planning, I think one major area of our lives we often forget to include are our yearly purchases. If you’re like me, I tend to buy things as I need them and find it hard to plan purchases ahead of time, especially for the whole year, but we all know that there are just certain times that are better for buying different things because prices can fluctuate throughout the year. If we can do a little bit of planning and put some forethought into certain purchases we may make during the year, however, we can end up saving ourselves a good amount of money. So I’ve put together this simple guide by month to help you map out purchases you may need to make during the year.
January: Bedding, linens, and mattresses
February: Winter clothes and women’s gifts
March: Cleaning supplies
April: Home goods, dishware and vacations
May: Summer and vacation/travel essentials
June: Gifts for men
July: Summer clothing
August: Outdoor and garden supplies
September: School and office supplies
October: Homes and home appliances
November: Electronics
December: Holiday decorations, vehicles and stationery
Obviously, this list is not extensive, but it’s a great way to start planning for purchases you may need to make. Obviously, in terms of seasons, this list is partial to the northern hemisphere and particularly towards US holidays, but if you have any other tips or purchases you are thinking about this year that you’d like feedback on, leave a comment down below!