Blogging 101: Advanced Hardware & Software

Advanced-Hardware-software

Blogging 101 is a 10 part series where I share my tips and tricks for creating and growing a blog from scratch. This is the sixth installment in the series, and you can find more information on the topics of this series here.

Last week I discussed the basic hardware and software elements you would need to start a blog sufficiently. Now, its time for me to dig a little deeper and talk about some items you may want to think about if you plan to be a dedicated blogger! Of course, owning or using any of these items may not make you the worlds best blogger, but to me, these things are extras that can either help you save additional time and energy or help you stand out from other blogs out there in cyber space! Let’s begin!

Hardware

In our last installment, I explained that a blogger needs a decent camera and briefly brought up the subject of a DSLR. Now, while I fully believe that having a decent point and shoot can take your photos pretty far if you’re a student of photography and composition, having a DSLR can make capturing beautiful images even simpler. Personally, I do not yet own a DSLR, mostly because I am stubborn and have been able to get by with some good photography skills and having photoshop around doesn’t hurt, but a DSLR camera would make quite a difference in my photo’s. There is definitely a learning curve to using a DSLR and a great expense, not only for the camera itself, but for the lenses in particular, but it can make a world of difference. I’m not saying that bowing a DSLR and a decent lens kit will turn a newbie photographer into a pro, but the quality that a DSLR can product is noticeably superior to many point and shoot cameras, so if you can afford one or have a particular interest in taking beautiful photos for your blog, I suggest getting one and learning as much as you can about how to use it!

Now, to go along with your DSLR, or really any camera that you are using, I suggest a studio lighting kit. I use this one because its relatively inexpensive and it definitely makes a difference in my photo’s, even on my old point and shoot! If you know anything about photography, you know lighting is extremely important, so unless you live in a glass house with crystal clear lighting, get yourself a kit!

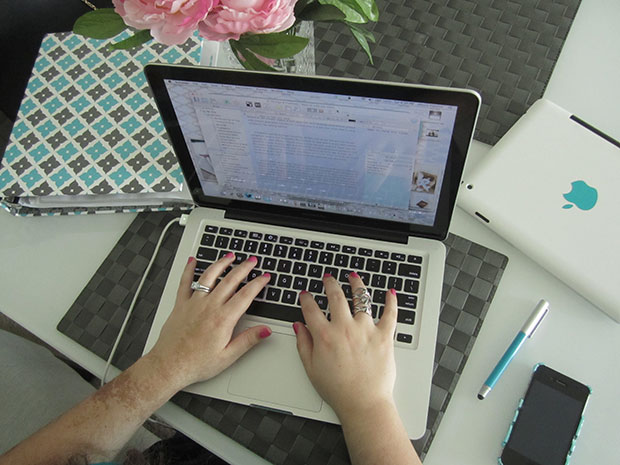
The final little extra that I really enjoy having around is a Wacom Tablet. I whip mine out whenever I have a lot of work to do in Adobe Photoshop because it really helps to have more precise control of the program with the tablet and pen input system. It also takes a little getting use to, but I find that it makes me a little quicker and gives me more flexibility while I am working with my images and designs!

Software

The first additional piece of software that suggest for a more advanced blogger is video editing software. There are lots of different programs out there depending on your operating system, but I think it can make all the difference when it comes to new and original content for your blog. Now, you may be thinking “but I’m not a vlogger and I don’t do video” but thinking that way really limits the possibilities for you to connect with your audience. Every blog could do with a little video content once in a while in strategic places, so having some sort of video editing software is necessary. I use iMovie on my mac because, well, it works really well and it’s simple and easy to use, but there are other programs out there like Final Cut and Adobe Premier Pro that work on a PC as well. You don’t need to have the most expensive program out on the market, but you do need to have something that will help you create and edit polished videos for your site!

Another piece of additional software I would recommend having on your computer is some sort of task management software. Why? Because running a blog is a lot of work and bloggers often have lots of balls in the air with projects, posts, videos and more! I think it’s all fine and well to have an analog project management system where you put pen to paper, but when it comes down to it, you need something on your computer because that is where you are writing posts, uploading pictures and editing your content. Again, there are tons of different types of programs depending on your operating system from basically free to moderately expensive. I use a mac program called iGTD, but there are many programs out there as well as web-based organization applications like Remember the Milk and Wunderlist that you can access from any web connected device.

The final piece of advanced software I recommend for bloggers is Mail Chimp. Mail Chimp is an email marketing service that makes sending well designed emails and newsletters simple! Many bloggers use email lists as a means to promote their blog through newsletters and frequent updates that keep their audience engaged and coming back for more, and Mail Chimp helps to streamline that often hectic process!

So, what did you think of these advanced extras? Do you implement any of these on your site or in your blogging routine? What are some other advanced programs or pieces of hardware you would suggest for bloggers? Let us know in the comments below!

5 Uses for Washi Tape

5-Uses-for-Washi-Tape

You Guys! Recently, I have acquired an embarrassingly large collection of washi tape. Yep! I am Alexis and I am a washi-aholic! So, in order to legitimize my rather absurd number of rolls, I use it every chance I get! Here are a few ways that I like to use washi in my planners:

  1. Add color to a bording divider, page marker or tab.
  2. Mask mistakes written in pen in your planner.
  3. Reinforce your punched pages.
  4. Tape on notes or non-stick decorations.
  5. Add an impermanent note to your calendar when you don’t want to commit.

How do you use washi tape in your planner? Have you found any other uses that I haven’t mentioned above? If so, please leave your suggestions in the comments!

Spring Tech Wallpapers

Spring-Tech-Wallpapers

You may remember that back in January I had created a set of tech wallpapers to kickstart the year! It was honestly so inspiring for me to create those images to share with you all and I decided that I had to do it again. I would LOVE to do this every quarter to sort of kick off each new season, so I have gone ahead and created a new design for you all inspired by spring! Spring means so many things to different people, but to me it will always be the time of year for boating! It’s just warm enough to spend time on the water, and still windy enough to get a nice breeze in your sails, so these wallpapers are meant to inspire you to explore and set sail in your own lives!

Shore-Background
Right click the image to download the desktop wallpaper at full resolution!
Shore-iPad-Background
Right click the image to download the iPad background in full resolution!
shore-iphone-wallpaper
Right click the image to download the iPhone wallpaper in full resolution!

So, what do you think? Will these wallpapers help keep your eyes focused on the horizon ahead? I sincerely hope so! Enjoy!

Blogging 101: Software and Hardware Basics

software-and-hardware-basics

Blogging 101 is a 10 part series where I share my tips and tricks for creating and growing a blog from scratch. This is the fifth installment in the series, and you can find more information on the topics of this series here.

Since I began this Blogging 101 series, I have covered a lot of fun motivational topics to help you get started blogging, and now its time for some utilitarian type posts. This week I am geeking out to talk to you about the software and hardware you are going to need to get started. Good thing is, if you are reading this, you most likely have much of what I am going to suggest. Then next week, I will be going in-depth with a list of some more advanced items you may want to pick up if you are hoping to bump up your blog and produce some major content. But for now, as promised, the basics!

The first thing you will need is {dun, Dun, DUN!) a computer! Yes, I said this was going to start out pretty easy! So, you need a computer, and pretty much any one will do! I use a Macbook Air, before than a Macbook Pro and when I first started I was using the original White Macbook, but those were just the machines I had. You can certainly use a windows machine if that’s what you have, and wait for it, even a tablet if that’s all you have! Since all you’re doing it writing and uploading pictures, there are a variety of options available to you!

The next item you will need is a word processor! Not sure what a word processor is? Think Microsoft Word or Apple’s Pages. A word processor is a piece of software where you can write and edit… anything! I use a program called Scrivener that I have written about before. Check out this post if you would like to use Scrivener on your computer in conjunction with your iPad! Scrivener is a unique program because it was meant for writing books and longer pieces like articles and term papers, but if you write a lot, it’s a wonderful way to organize your work!

Next, you will need a camera, preferably with some sort of video capability as well! You could use a smartphone, I frequently use my iPhone 5 to take photos and video, but I also use a regular point and shoot. My point and shoot is an older Canon Powershot, nothing fancy, but it takes great photos, has lots of options and controls for taking photos, as well as a 720 HD video capture feature! You could use a DSLR if you have one, I will go more in-depth on that in the next installment of this series, but a camera is a camera and as long as it can take a decent shot, it will definitely do!

The final item you will need is some form of image editing software. Most computers do not come with this sort of software installed, but there are plenty of options available to you based on your operating system. On my Mac I use Photoshop CS6, but there are plenty of options available like Adobe Photoshop Lightroom, Apple’s Aperture, Corel Paintshop, and even a great free photo editor that I used to use called GIMP. There are also plenty of iOS and smartphone applications that do this that are relatively cheap and I rely on a few of those for my iPhone photos, but those will be discussed in another post!

For now, that is everything you need to get started in my opinion! If there is anything else you have questions about please feel free to leave a comment about it below. Remember, next week I will be discussing some extra hardware and software items that you may be interested in using if you want to go above and beyond!

Filofax Organization Tips

Filofax-Organization-Tips

It’s no secret that I have been totally obsessed with Filofax’s for the last few weeks ever since I ordered my Kikki K Planner! In case you haven’t noticed, I call any and all of these 6 ring binder systems “Filofax’s” even though the term Filofax is a specific brand. It just helps me mentally distinguish between these 6 ring binders and other types of bound and spiral planners and agendas available. On top of my large Kikki K binder that is the equivalent to the A5 Filofax size, I also have a personal sized Kate Spade planner as well that has taken on the bulk of my day to day organization. Since I now work out of two Filo’s, I have been amassing different tips and tricks that I have found helpful as a new user. Here are some of the tips I use on a day to day basis to help keep my system organized!

  1. Use old gift cards to easily store lengths of washi tape in the card slots of your Filofax. Simply wrap the tape around the card a few times and you can have a sample of washi with you at all times.
  2. Use A-Z tabs to organize notes by topic for easy access. I do this in my Kate Spade planner and it helps me when filing and referring back to important notes or lists.
  3. Use colored printer paper as scrap paper that will easily stand out against the white and creme of your regular inserts. It’s more affordable than using up Filofax or any other branded note paper.
  4. Use sticky notes or page flags to enter in tentative plans to your calendar before committing to them in ink. This has been a lifesaver for me because my plans change all the time and I hate having to scratch things out.
  5. Mark frequent reoccurring events with color coding dots. I tend to use them in my month on two page view, but you can use them however you see fit!
  6. Tabs and dividers do not have to be arranged down the right side of your binder. Top and even, bottom tabs are also helpful ways to break up your sections and different information.
  7. If you want to keep your work and personal calendars separate, try using more than one calendar style, one for each so everything has a place.
  8. Create your own divided files for any large pockets in your Filofax using notecards or card stock. This will help to keep stickers, coupons, cash and more safety organized and contained.
  9. Using a full sip Filofax as a wallet/planner combo is a great way to minimize the bulk in your bag! My Kate Spade planner is a full zip and sometimes I will run to the store with just my planner and a few cards stashed inside along with any shopping lists or reminders!
  10. Using a multicolor pen can help you color code without having to carry around multiple pens. The Pilot Hi-Tec C Coleto Pens even have pencil inserts.
  11. Use a magnetic paperclip or binder clip to hold together past calendar pages to keep them contained. This also makes it easy to flip to the first clear page.
  12. Wrangle loose or small items in a clear zip lock pocket (usually sold separately).
  13. If you don’t decorate on the go, leave stickers and excess supplies at home. Don’t feel the need to carry around excess stationary just because its pretty.
  14. If you have handwritten notes that you refer back to often, type them up to save space and punch them into your Filofax (you can print smaller than you write).
  15. Archive notes and calendar pages often if you don’t need them with you. You can use a secondary Filofax to store archived pages or even a box.

I hope you have learned something new from some of these tips. Which tips are your favorite and which other tips do you rely on to keep your Filofax planner system organized? Please feel free to share them in the comments below!

How to Feel Fabulous!

How-to-feel-fabulous

True story– for the past week, I have not been feeling too hot. I’ve been hit with a wave of migraines out of left field and it has me feeling pretty down. So, what’s a girl to do? Well, for me the answer is turn my frown upside down and do whatever I can to make myself feel fabulous! So, I gave it some thought and decided on a few things that I can do to make myself feel like a million bucks. Here is my list, short and sweet!

1. Get dolled up: Sometimes just the act of doing my hair and makeup and putting on a nice outfit makes me feel fabulous because I look fabulous.

2. Wear a fashionable turban: I am completely sure that turban style head wraps are the most fabulous accessory a woman can wear (think Greta Garbo or Elizabeth Taylor). To me it screams old hollywood, full on globetrotting glamour and worldly elegance.

3. Use an obnoxious phone case: Any one of these should do! Look, if you want to feel fabulous, you need to exude fabulousness (is that a word?) and extravagance in every detail!

4. Put on some heels and learn to strut: I take this one from old hollywood starlets as well! Start walking around slow and steady like you own the room. Try it out in front of a mirror and start putting it into practice. Having a distinct walk is completely fabulous!

5. Stand tall, sit up tall, rest with your hands on your hips: Nothing says you mean business like the hands on your hips pose! Actually, this tip is something that’s been scientifically proven to make you feel more confident, and to me, confidence=fabulous! So, stand up tall, sit up tall, like you’re bigger than your actual body, and you will start to notice some fabulous positive vibes soon enough!

So, what do you like to do to make yourself feel fabulous when you need it most? Do you practice these sorts of techniques daily or only when you feel like you need a mood booster? Tell me what you think in the comments!

How to Extend your iPhone’s Battery Life

How-to-extend-your-iPhone's-battery-life

Nearly as soon as Apple released its recent iOS update, 7.1, complaints began rolling in that the iPhone’s battery life was being depleted to quickly. This is a common theme with iOS updates recently, and while we as the end users cannot control the way the operating system manages battery life, there are a few things we can do to help keep battery drain from usage to a minimum.

1. Keep your iPhone’s brightness at a third or less: Although there are times when we need to up our brightness (like in full sunlight), for the most part we can function pretty well with our iPhone’s screen turned down to the lower third of the spectrum, which will also help to keep our battery full longer.

2. Reduce motion in your system preferences: If you go to system> general> accessibility, you will find an option to “Reduce Motion.” This controls the iPhone’s visual animations and 3D effect of the app icons, known as the parallax effect. If you turn this option “on” the visual effects will be turned down thus saving precious battery life.

3. Turn off Bluetooth if you aren’t using it: Many of us use Bluetooth enabled devices in conjunction with our iPhone’s, but get in the habit of turning your Bluetooth off when you are not. Leaving the Bluetooth function on, even when devices are not connected, can drain the battery.

4. Shut down apps that are running in the background: I know most of us use tons of apps on our iPhones, but its important to shut down apps when they are not in use to cut down on battery drain. If you do not know how to do this, double-click on your home button with the iPhone screen on and you will be able to scroll left and right through your open apps. Swipe the app preview up to turn it off completely so it is not running in the background.

5. Keep a backup charger or portable external battery with you in case of emergency: iOS updates are frequently being released and issues with the iPhone’s battery drain issues are pretty much never-ending. Make sure you keep a charging solution or external battery with you for those emergency situations when your battery is getting dangerously low while you are out and about. I love these backup battery solutions from ban.do!

Do you have issues with the battery life of your iPhone? Do you already use some or all of these battery saving tips, and yet still have problems keeping your battery alive? Let me know in the comments below!

Blogging 101: Content is King

Content-is-King

Blogging 101 is a 10 part series where I share my tips and tricks for creating and growing a blog from scratch. This is the third installment in the series, and you can find more information on the topics of this series here.

Although I will be giving you tips and tricks throughout this blogging series, there is one single factor that will determine the success of your blog and that is your content. No matter what your blog looks like, or what the name of your blog is, or what camera you use to take your photos, its your posts that will attract your readers and keep them coming back for more. Now, I know that many of you reading this may not be looking to create the next million dollar blog, but whatever your goals are for blogging, your content is the key to fulfilling them!

When it comes to developing great content consistently, you really need to understand a few things. First, you need to know what great content looks like. Think about it, which sorts of posts do you like to read? You probably like posts that incorporate beautiful pictures with well thought out text. You probably like posts that have been well researched with thorough explanations and relevant information. You know, I read a lot of blogs and different blog posts, even ones with topics that I am not necessarily interested in, and can you guess why? Because when blogs post good content, its hard not to want to read it. Even topics that aren’t exactly up my ally can become interesting when well written and well presented.

The second thing you need to understand about good content is that it doesn’t have to be complicated. There is a difference between well thought out and complicated. Posts don’t need to be thousands of words or filled with tons of pictures or cover topics that require hours and hours of library research in order to be considered good content. As long as your content is well thought out, meaning that all your points or information is presented clearly and your post is written with a clear structure, your readers will find value in it.

The final thing you need to understand about good content is that it is relevant. Now, relevancy is like a grey scale from black to white. On one end you have posts that are about very specific topics and events, and on the other hand you have posts that are “evergreen” meaning that they are relevant at any time. For example, a topical post about the release of a new iPhone should really be published the same day or week as the event itself when many people will be searching for information on it. You wouldn’t want to write about the release of the iPhone 5s now that its March and the phone has been out for nearly half a year. Even if you did write that post in a timely manner, after all the excitement about the new iPhone has died down, that post may not be as popular in the future. As for “evergreen” content, those posts may be things like a recipe for your grandmothers apple pie or a post teaching your favorite hairstyle. Both of those topics are things that could be relevant at any time and people may be searching for either of those on a daily basis! Of course, there are other examples that fill in that grey area between posts that need to be timely and posts that are “evergreen” and great blogs have a nice mix of all of them. Try to think about your content and focus on writing posts that are relevant. When you write about topics that people are interested in and are searching for, you will develop a consistent readership.

What type of content do you find you like to read most often? Thinking about what you read in terms of relevancy, do you find you read more topical and timely posts or “evergreen” content? Understanding relevancy, identifying good content and writing structured posts are three skills that bloggers need to develop into a second nature, so test your skills while you read other posts and blogs and try to exercise and hone your skills!

What do my Blog Colors Mean?

what-do-blog-colors-mean

Since this week’s installment of my Blogging 101 series was all about Choosing a Platform and Identity for your blog, I decided that I should probably talk to you today about my blog color scheme and what it means and conveys for my blog and its “brand.” Look, I am by no means a branding expert, but one thing I do know about branding is that you can do all you can to produce a certain image to your audience, but ultimately your brand is decided by them! It’s sort of a funny thing, trying to control other people’s opinions, but that is where consistency comes into play. Having a consistent look and feel to your blog and social media posts really helps to establish the vision of your brand that you want to convey to your audience. As you can tell by looking around, I have a pretty specific color scheme for my blog and the colors I have chosen are significant for a reason.

So, take a look around. What colors do you see as being most prevalent in my blog? If you said teal & grey, than hooray for me, because those are the colors I want to stand out to you on my blog! I have chosen the colors teal & grey for a reason. Not only are they some of my favorite colors, but they also mean specific things that I hope transfer to your minds when you visit or think about my blog. But, how do these colors affect the way you feel about my blog?

It all has to do with, wait for it… Color Theory! Now, don’t be afraid, I am not going to go all Art and Design 101 on you, but basically in society certain colors convey certain meanings and for me, teal & grey convey a specific message to you (hopefully!) whether you realize it or not. Teal or turquoise, as the case may be, supposedly conveys an image of femininity and sophistication. Grey, on the other hand, conveys a sense of security, reliability and intelligence.  Since I write about lifestyle, career advice and issues that are geared towards women, I want my readers to feel a sense of reliability and intelligence in my writing. I also want them (you) to feel like this is a safe place as a sophisticated woman to share opinions with other like-minded women. These colors don’t just convey a message that I want to portray to the internet, but they also help me to attract the right reader to my site. After all, if I am writing for women but attracting only men, my message is lost!

Okay, so I have gone and explained to you what my blog color scheme means, but what good does that do you if your blog is blue and peach? Well, I can’t go into each and every color and what they all mean here, but I have a very handy one pager with the basic meanings behind colors pinned for you to review here. If you are still deciding on your color scheme for your blog, use this resource to help you design a blog that conveys a message that reflects your blog and your ideal reader! If you already have a blog, use this resource to see if your current color scheme is saying what you need it to say and attracting who you need it to attract! You may find that you need to make some adjustments to your color scheme if you aren’t projecting exactly what you desire to the internet!

So, did the colors work? You tell me? Are you a woman, either in college or with an advanced education who considers themselves to be sophisticated, intelligent and career minded? If you don’t fit that demographic specifically, don’t worry, it doesn’t mean you are in the wrong place! Although I write for a specific ideal of a reader, that doesn’t mean that someone outside that sphere wouldn’t also find my blog useful. Remember, none of this is an exact science. So, let me know in the comments below if you fit my mold or if you’re outside the box a little! Either way I’m glad you’re here adding value to this community!

5 of the Craziest iPhone Cases Ever!

5-Craziest-iPhone-cases

Look, if you have been reading this blog for a while, you know I love iPhone cases, and here’s the YouTube video to prove it! But seriously, I love a good iPhone case, but even a crazy iPhone case lady such as myself has some limits. So, I have found you 5 of the craziest iPhone cases I have ever seen, because, well, technology! By the way, if any of you own one of these cases, I am by no way saying you are crazy, just that your iPhone case may be a little over the top and I sorta love you for it! Here goes.

1. Fur laden, jewel encrusted iPhone case fit for an Ice Queen: Holy Smokes! Is it weird that I want to own this case? Okay, I get it, you’re thinking this isn’t real fur… wrong-O! It’s real alright, so just make sure your red paint toting friends from Peta don’t catch you with this one! At least it will keep your hand warm.

2. Little mini toy covered case that a toddler would die over: This is like a flashback to my childhood when I used to turn my toy chest upside down and swim through a pile of toys and dolls to find exactly what I wanted to play with… except it’s a phone case. It’s certainly visually stimulating to look at this, but I have no clue how one actually holds this, you’d think little mini bunny ears may pinch the skin a bit, right? Look, I definitely want it, but it’s a little too pricey to justify!

3. I clearly own a diamond mine but I totally don’t, case: Excessive bling and I have a love-hate relationship. Like most women (and dogs) I love sparkly things! I just don’t love feeling like a faker for having a case covered in diamonds, that if real, only Kim Kardashian and Kayne West have the money to own. Also, I am pretty sure I would constantly have anxiety that I would hold my phone to hard and loose a jewel, but so it goes.

4. Delicious, looks good enough to eat, but don’t because the polymer will slowly poison you, case: Cases like this are such a tease and I have too much of sugar addiction to actually own this one because I would be stopping at the grocery store every 5 minutes to order cookies and donuts and then die of a sugar coma. All because of a case. Seriously. I want to eat it!

5. Hello Kitty or any other oversized character case: Wait a minute! I actually own this one! Okay, so in truth, these cases are a little ridiculously unpractical, but they are also sorta like an adult version of a dolly! I think this case is adorable beyond compare and I have no shame in owning one which is why I make sure to switch it out for a simpler, more appropriate case for when I have to talk to people and stuff. Like, in real life!

So, which of the above cases is the craziest to you? Do you own any of these crazy iPhone cases? Let me know in the comments below. No judgment here! Also, all the images used above were sourced from their corresponding links. I don’t own any of the images, nor was I contacted or compensated by any of the shop owners I have linked to. This post is purely my own opinion and links are available for your reference if you do happen to want to buy any of the cases!