Okay, so I know Rolodex is a really dated term, but I think you still get the idea of the post! Since I interact with a large number of people in my day-to-day work, it is really crucial for me to set up my contacts list on my phone in a way that will help me remember everyone in a professional way! People love it when you truly recognize and remember them, even if you have only met once a month or two ago! It really helps develop strong ties with your customers, colleges and basically any other person in your life that you may run into regularly! So, I thought I would review with you all my process for setting up my contacts list that helps me to be more of a savvy business professional!
1. Confirm the spelling of all names, never assume: You have no idea how many ways a name can be spelt, and after meeting with someone briefly you may not know that their name is spelt with an “i” instead of a “y” and so on! I try to make it a point to have my contacts spell their names out for me (or to give me a business card with their info) so that I can track them properly. It may not mean much to you, but think about how annoying it can be to deal with someone who can’t spell your name right! Bonus points if you can also include a phonetic spelling if the name is a harder one to pronounce!
2. Take a picture or grab one-off Facebook or LinkedIn: Since most of us store contacts in our phones and have the ability to assign a picture to a contact, USE THAT FEATURE! It may feel awkward the first few times you have to ask for a photo, but get over that and get it put into your phone! Most people won’t mind that your taking their pic after you explain that it helps you associate names to faces to have the picture in your contacts. Heck! They might even ask the same of you! If worse comes to worse and you miss the opportunity to snap a pic, do a quick google search and see if you can grab one from Facebook or LinkedIn. You have no idea how helpful it can be to have photos of people you interact with on an infrequent basis. It can save you from an embarrassing moment in the future!
3. Make a personal note: Most contact lists include a section for extra notes. Use it! Store 2-3 personal facts about your contact in this area so that the next time you meet with them, you have something personal you can refer back to. This may be your contacts favorite sports team, the college their kid goes to, or the name of their dog, but remembering these facts can help you look really organized and thoughtful to others!
4. Edit and Update: Contacts change frequently in any business! Make sure you keep the most up to date information and contacts in your Rolodex to ensure you are organized. Remove old contacts that have moved on, update personal facts in your notes section, and edit emails or phone numbers that may have changed on a frequent basis!
5. Use it or lose it: The most important part of having a contacts list or Rolodex is that you actually make use of it! If you aren’t referring back to the information you have stored, there is really no reason to keep the info to begin with. Your contacts list can be a treasure trove of information and a professionals dream or nightmare! Decide how you want to use yours and get to it!
What other tips and tricks to you use in your contacts list or Rolodex? Do you use a digital list on your phone or do you prefer a paper system of business cards and hand written contacts? Let us know in the comments below!
The thing that will never cease to amaze me about my Filofax, is the sheer size and scope of the community that revolves around planners. Weeks ago, when my curiosity was piqued yet again by Filofax and planner systems, I fell head first down the proverbial rabbit hole which is the universe of Filofax. Worldwide, these planners are a phenomena with endless websites, forums, Pinterest boards, Instagram accounts and even Facebook interest groups, all revolving around the topic of planners! The more I dug into the planners themselves, the array of inserts, accessories and yes, even planner charms (!), the more I felt an uncontrollable urge to join the club. So, I fell in love with a planner, and the rest as they say is history.
Since my planner arrived, and admittedly, even before it shipped, I was knee-deep in these sites and forums learning about the available means to customize my Filofax experience to my own needs and desires. I searched through hundreds (if not thousands) of pictures of Filofax set ups, analyzing how people arranged their tabs, how they set up their “dashboard” and how they decorated their planner. Remember, this isn’t just any leather-bound book filled with scribbles and scraps, this is MY LIFE inside these pages, so it was important that my Filofax reflect me and my tastes!
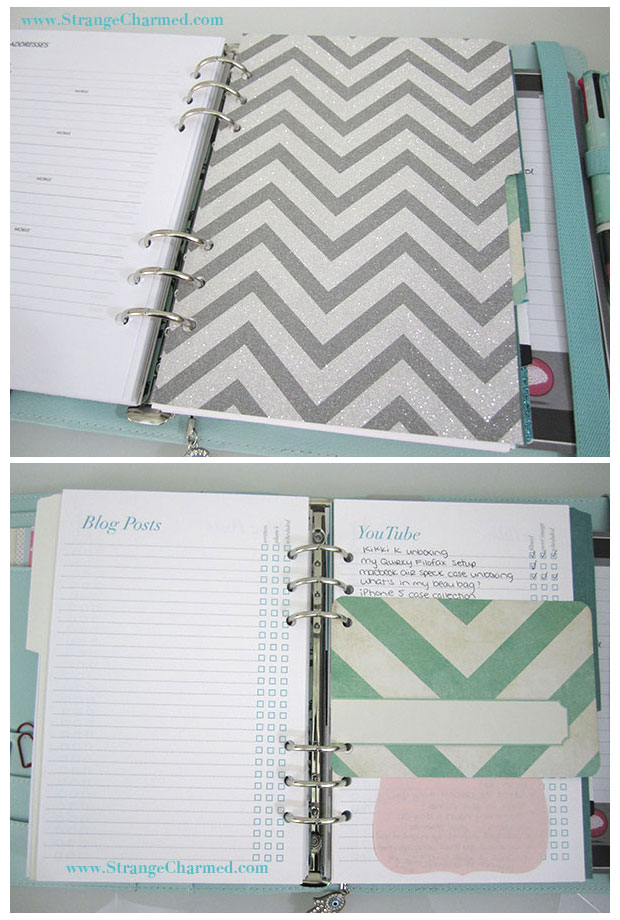
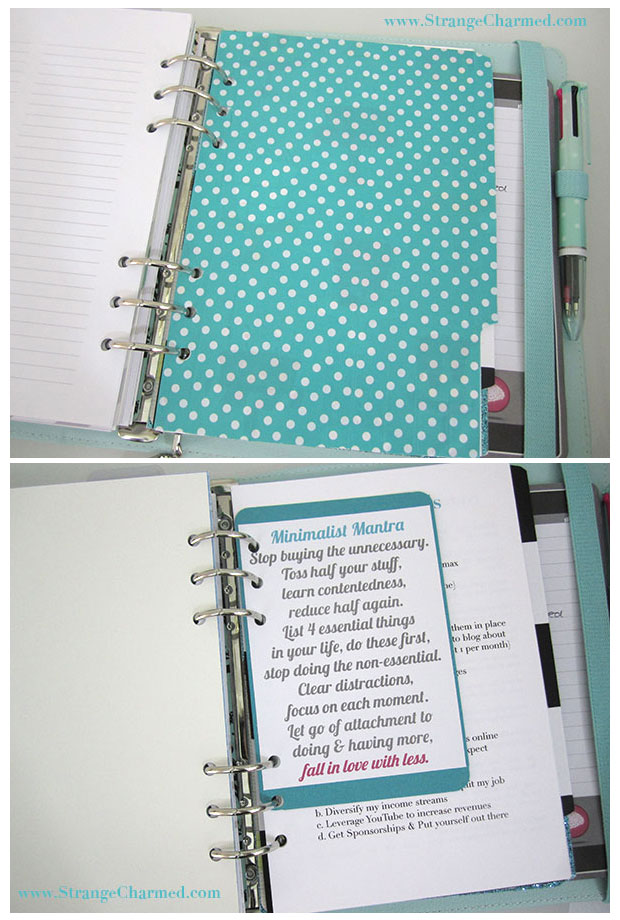
As my planner itself, I ended up buying the Large 2014 Kikki K Time Planner which is the equivalent of an A5 Filofax. It’s a beautiful mint/aqua color with gold polka dots. What drew me to this planner, other than the beautiful color and design, is that the planner closes via an elastic band which I really liked! I have a problem with planners that close with a zipper or have a button/magnetic closure because I feel like you have to be mindful of what you stuff inside or else the planner won’t close! With this elastic strap, I am confident that my planner will always be secure no matter how thick I stuff it! Now, I also went ahead and purchased some different supplies like stickers, page flags, a new matching pen (the Pilot Coleto 4 color pen in Mint with Black, Aqua, Pink, and Violet ink refills), washi tape, cute post-its, journaling cards, and pretty paper to make some new dividers! I also decided that I was crafty enough to try to create my own custom inserts and since my Kikki K didn’t come with a traditional fly-leaf, I made my own with some screen printed acrylic scrapbook paper! I recently also purchased a A5 6 Hole Punch from a seller overseas, and once that comes in, I won’t have to use my single hole punch that I am currently using! It does the job right now, but lining up the holes is a challenging task that I hope the 6 Hole Punch will simplify for me!
To give you an overview of my Filofax and how I choose to use it, let’s start with the different sections. I have my Filofax broken down by 6 dividers. The first is for my blog because my blog is probably the most important project in my life. I used to keep a loose printed editorial calendar, but now I have moved this into my planner. I use a month on 2 day spread that came with my Kikki K planner because I like the way it looks!
The next section is for my day job, and for this I use a week on two pages spread that came with the planner. Here I am able to list out meetings, events and reminders for work as well as other general life tasks. I also keep a few Expense and Address sheets within this section (marked off by Target page flags) for work!
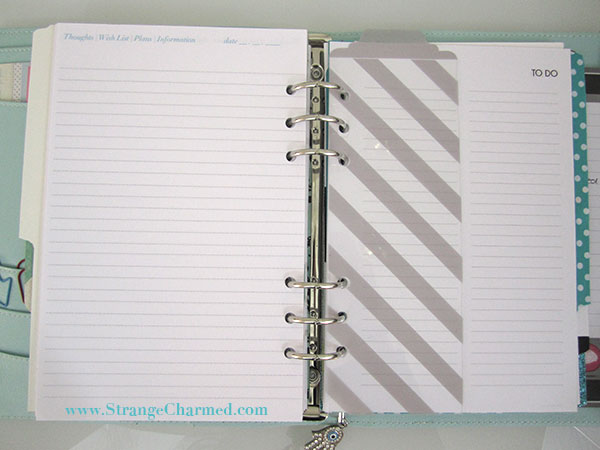
The fourth divider is called my “Capture” section, and here I am using some more custom-made inserts that help me keep track of my Thoughts, Wish Lists, Plans and any Information I may need to keep. I love these pages because I have a Date section and can circle the type of note I am entering so I can keep a variety of info in this section without it feeling out-of-place! This section also has another vertical divider that I got from Project Life and cut to size for my planner. It separates my custom capture pages from my person To Do lists (these pages came with the planner).
The fifth divider is for all my Inspiration! Here I keep any printed bits that keep me motivated, including my 2014 Goals, some Bible verses, prayers and even a Mini Workout!
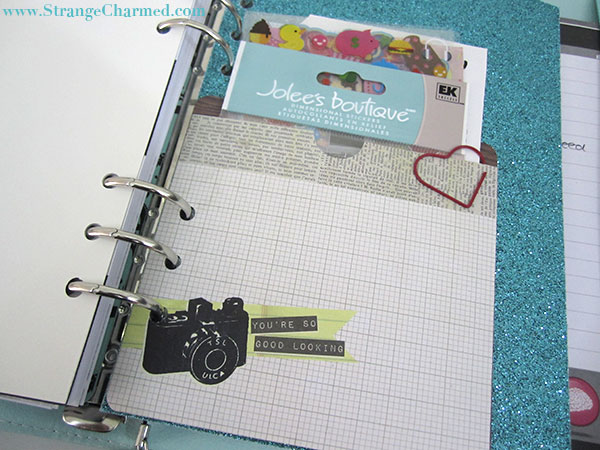
The final divided section is for miscellaneous items and right now it just has a punched pocket that holds all my decoration stickers! More items may find their way here eventually so this section is meant to grow!
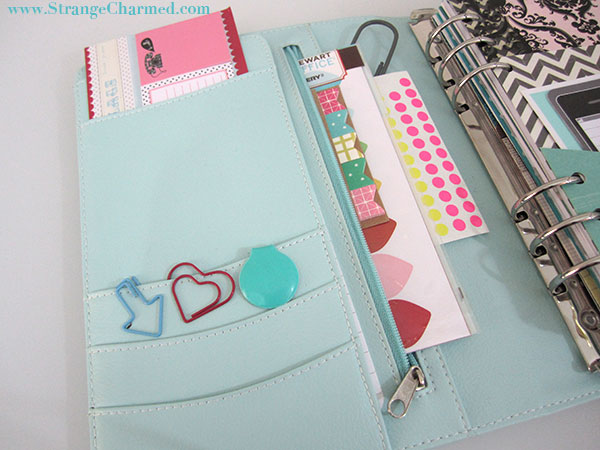
So, now that you have a general idea as to how I organize my Filofax, let’s get into the accessories and juicy details that I know you are all dying to hear! The front inner cover of my planner has a bunch of slots and pockets where I like to keep post its, paper clips, as well as some frequently used stickers. I love the interior zippered pocket of my planner because this is a great place to store page flags and anything that is loose and I don’t want to fall out!
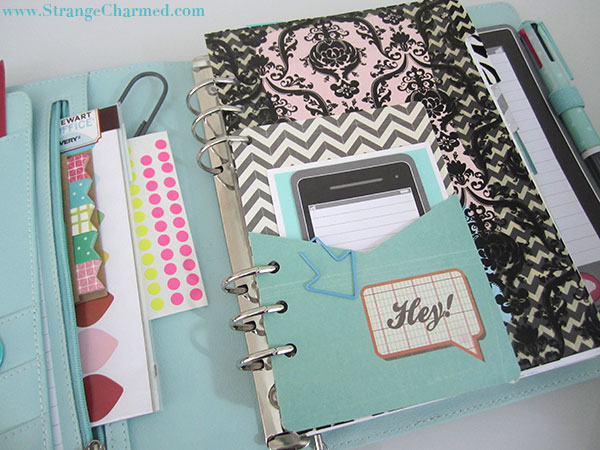
Also in the front of the planner, other than my custom fly-leaf, I have added a paper pocket where I keep my iPhone sticky notes. It came in a pack with the other pocket I mentioned above that stores my decoration stickers and I just love the personal touch these add to the planner. I originally wanted to use a zippered clear pocket, but the one I purchased from Staples did not fit my binder (so sad). So, these pockets are simple and custom punched and definitely hold all the bits that I need!
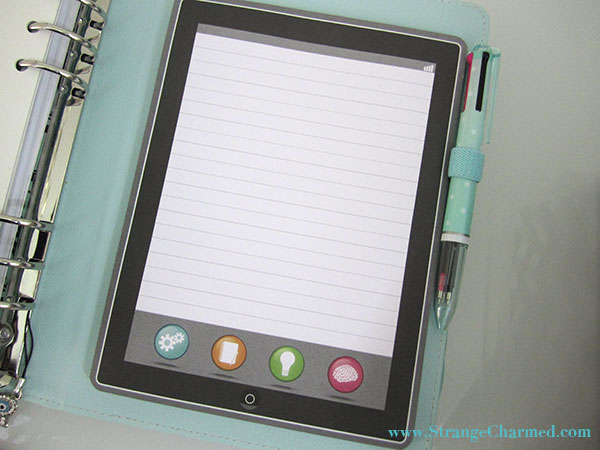
Finally, in the rear inner cover, my planner came with a nice sized notebook where I can jot quick notes and such. I ended up swapping this simple notepaper for my “iPad” style note tablet from Wal-Mart and I love the look of this so much! Of course, there is also a pen loop where I keep my mint Pilot Coleto 4 color pen as I mentioned above. I bought this from JetPens as it came highly recommended by other Filofax users. The 4 colors of ink that I chose make it easy for me to do a bit of color coding in my planner without having to carry lots of pens with me!
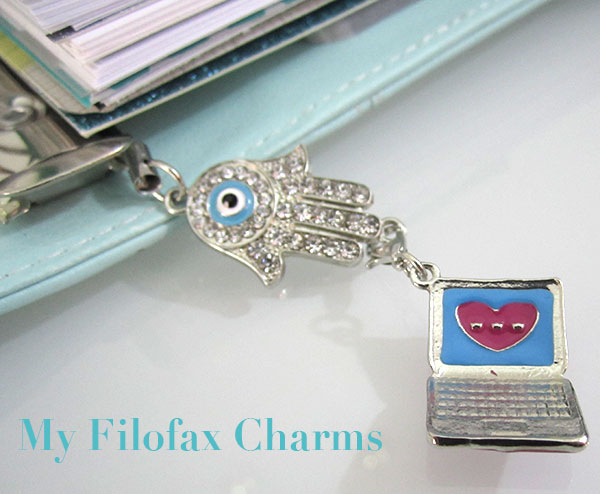
And, the final personal touch in my planner is my little planner charm which I love! Through my research online, I found that it was very common for people to put charms and such on their planners to decorate them and give them more personality. I decorated my Filofax with this custom charm I made using a Hand of Hamsa charm as well as a little laptop charm that I think screams ME!
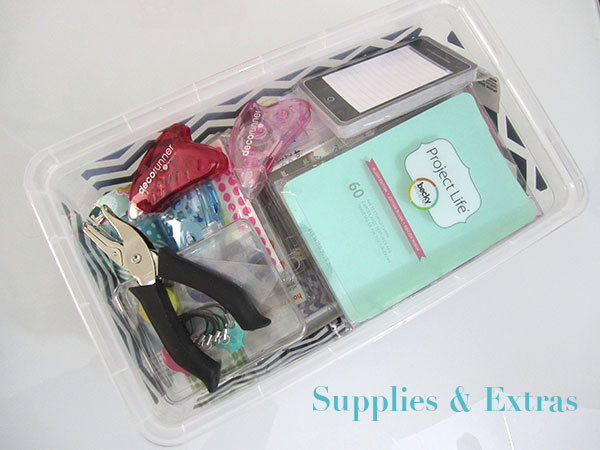
Outside of my planner itself, I also have a few rolls of cute washi tape, more stickers and extra journaling cards that I keep at home in a bin filled with extra goodies for my Filofax. As you can see, I have quite a bit of extras, some of which I purchased for my planner and some of which I have had in my personal stock for a while, but I find that having everything in one place makes finding refills and such much easier for me!
If any of you, my lovely readers, have a Filofax set up post or video or pictures out there on the internet, please please PLEASE link it below! I am obsessed with these things now (and if you’re here, I bet you are too) and I want this post to be almost like a reference of sorts for those who read it! Thanks!
5 Quirky Uses is a new periodic feature for Strange & Charmed. For each post, I will select an everyday item and suggest five alternate uses or ways to upcycle the item in a fun or unusual way. Keep up with these posts with the Quirky Uses category!
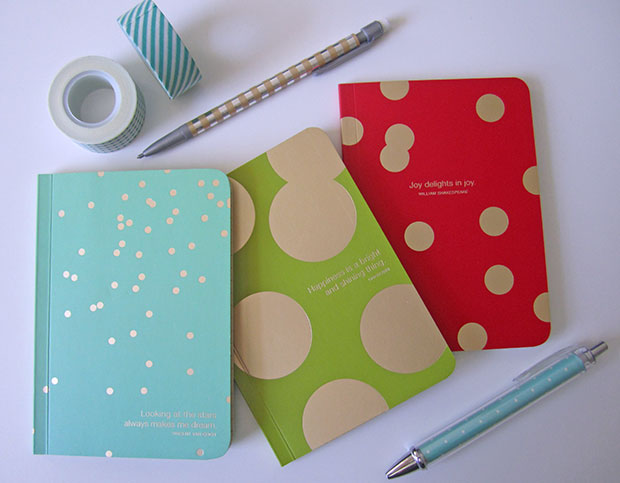
I have a ridiculous amount of notebooks laying around my home and for some reason I still feel the need to buy more every once in a while. If its cute and inexpensive, I pick it up! I blame Target dollar bins! Anywho, with zoo many notebooks just sitting there empty, I decided it was time to think of ways I can put them to good use. Here are 5 Quirky Uses for Notebooks that you may not have considered before!
Food and/or Workout Diary
Track Oil Changes and/or Car Maintenance
Gratitude Journal
Track major items in your home and their value in case of emergency
Keep track of children’s milestones or important life/relationship events
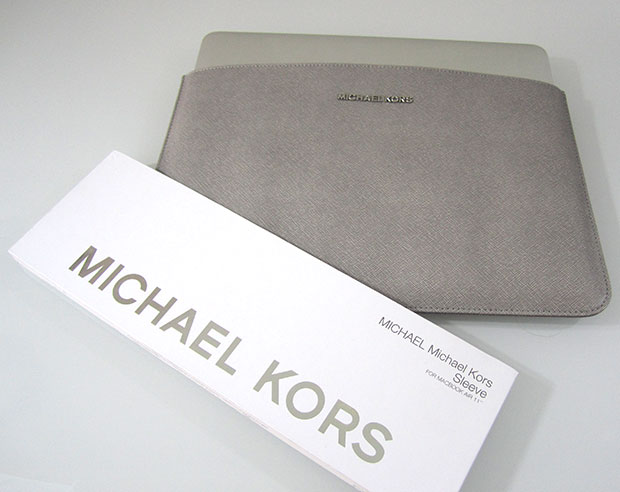
If you saw What I Got for Christmas, you know that I saved up and bought myself a new 11inch Macbook Air! I love this little machine, it really is perfect for that way I work and I couldn’t be happier with my purchase, but one thing that was nagging at me for a good long while was that I didn’t have a proper case for the computer! I know I could walk into practically any store and pick up a generic laptop sleeve pretty inexpensively, but I hate having generic accessories, especially for my gadgets! One problem I was having was that a lot of the nicer cases (cases that were designed with a woman in mind) didn’t come in 11inch versions. It looks like its a 13inch laptop world and us 11 inch Air users are just living in it! That aside, I noticed that a lot of my favorite designers who had previously designed tech cases for laptops now switched gears and designed cases for tablets instead! It was depressing!
So, eventually I just had to widen my net of female accessory designers and I eventually found a suitable sleeve from Michael Kors! To be honest, I am not the biggest Michael Kors fan. As with every designer, there is a type of woman he designs for and I just don’t think she’s me! However, I did really like his simple, yet elegant sleeve for the Macbook Air 11 inch. I believe this color is called pearl grey and its definitely a color I gravitate towards. The material is something they are calling a Saffiano PVC, which basically feels like coated leather, so its definitely durable and should be easy to spot clean if needed. The thing that really sold me on this sleeve was that the hardware and the interior lining of the sleeve are silver, which is my fave!!
Overall, this is a nice little tailored sleeve for the Macbook Air. It is available in both 11 inch and 13 inch sizes and it gives a nice cushion of protection to your laptop without being bulky. It’s definitely not a cheap case at $79.95, but if you’re looking for a more upscale case for your Macbook Air, you may want to check this one out!
Does anyone else out there have a nice designer case for their 11 inch Macbook Air? I would love to know which case you are using and how it’s working out for you! Let me know in the comments below!
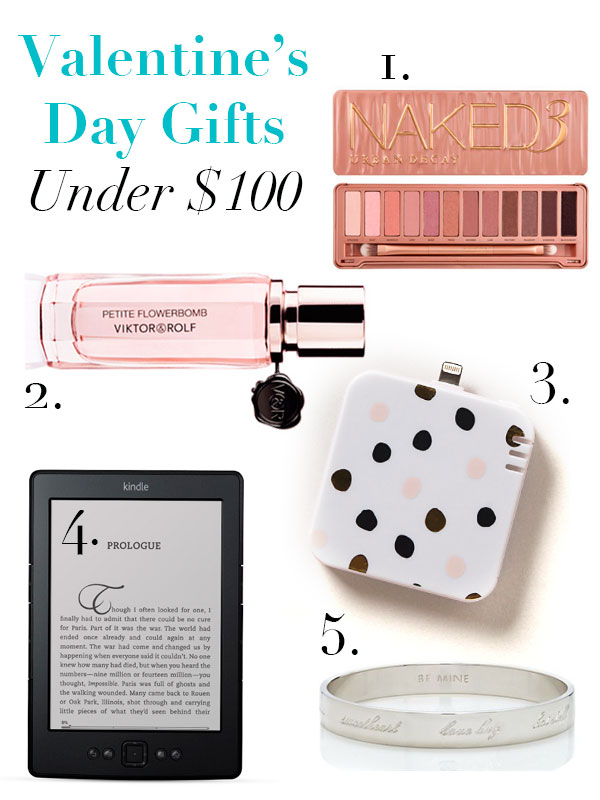
Valentine’s Day is right around the corner, guys and gals, so make sure you pick up something sweet for that special lady in your life! I know it can sometimes be daunting to choose that special gift for that special person in your life, so I have put together a few ideas at variety of price points all under $100. These range from practical to geeky to fancy, so there is something here for every lady!
1. Urban Decay’s Naked 3 Palette: This is the perfect gift for makeup lovers! It’s like the hot product right now, and its oh so Valentine’s Day themed with a variety of rosy hues that are sure to have your gal making amorous eyes at you in no time!
2. Victor & Rolf’s Flowerbomb Perfume: This is my new favorite scent and I think its a nice rounded perfume that a variety of women would be interested in! Since it’s a perfume, it comes in a variety of sizes and price points, but I think this petite flower bomb is adorable and just enough scent to have her remembering you for the months to come!
3. Anthropologie Mod Dot iPhone 5 Backup Charger: This is one of those practical gifts that nearly any lady could use as long as she has an iPhone 5, 5s or 5c! Everyone wishes they could get extra life out of their iPhone’s battery and your little gift may be the lifesaver that they remember!
4. Kindle: Bonus points to you if you load this up with Jane Austen Novels before you give it to her, but what lady wouldn’t love an ereader to cuddle up with at night before bed, or to join her in a nice long bubble bath, or heck, just to throw in her bag as company on a long day! It’s the gift that keeps on giving!
5. Kate Spade Valentine’s Day Bangle: I may not be the kind of girl that’s into jewelry but this idiom bangle is filled with sweet little sayings that even I couldn’t say no to. Think about it, its like a love letter that you wear on your wrist. I don’t know if it gets anymore romantic than that! And yes, it comes in gold!
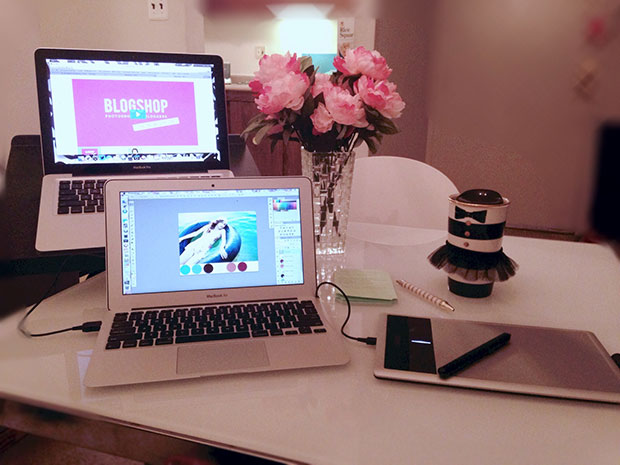
A few weekends ago, I took part in the first official online Blogshop class! Back in November or December, I had seen an update on Bri Emery’s blog {DesignLoveFest.com} that her infamous course teaching photoshop skills to bloggers was testing the waters with online courses. Normally, Blogshop, is an in-person two day workshop that costs around $700 dollars per person to attend. Earlier in 2013, when I came to the decision to attend Blogcademy (another two day in-person workshop, this one dedicated to helping bloggers create awesome blogs)I had to choose between Blogshop and Blogcademy because I just couldn’t afford both! So, when I saw that the initial test group for this online Blogshop course would only need to pay about $200 for the complete course online, I knew I had to jump on the opportunity.
Initially, I wasn’t 100% certain of what to expect from Blogshop. I had been using Photoshop for years and thought that I knew how to do everything I needed to know how to do. On top of that, my husband is a graphic designer, so usually when I don’t know how to do something, he does! Still, after watching a few of the Blogshop promotional videos and recaps, I began to get the impression that even those skilled in Photoshop would learn new tips and tricks to help them specifically with their blogs. So I went for it!
Now, after having finished the online course, which pretty much consisted of a solid 3.5 hours of video teaching and then breaks to work on our own examples, I can safely say that I did learn many new skills that will help me be a better blogger, however, a majority of the content I was already familiar to me and put to practice on my site. I was definitely glad that I got the chance to partake in this online course, because for me, its all about learning new skills and new ways to make my blog awesome, so the fact that a majority of the content wasn’t new to me really didn’t bother me because I did learn some pretty valuable skills that I don’t think I would have learned if it wasn’t for this course.
To give you guys an idea of what a seasoned Photoshop user learned from the course, I am going to list the 5 Things I Learned from Blogshop!
How to quickly (and easily) create a GIF!
How to add texture to text and just about anything else!
How to edit photo’s with masking (and achieve some really awesome affects)!
How to lighten and brighten my photo’s instantly (without the use of a Photoshop action)!
How to create a collage or mood board in Photoshop (bye bye Polyvore)!
Well, do any of those skills sound like something you would like to learn? I certainly didn’t even realize how monumental learning this skills would be for me personally! I can’t wait to start putting this knowledge to use on my own blog because not only did I learn new skills that will help me create better content, but everything I learned only took a few minutes to achieve. My mind was literally blown when I realized how quickly everything took once I understood the way certain tools worked!
So, you’re probably reading this waiting for the part where I tell you whether or not Blogshop is worth it for you? The answer is really up to you, and the IHeartBlogshop website does a better job than I at explaining what you will get out of the course, either in person or online! For me, I think I made the right choice with the online class where I picked up a few valuable skills I was missing that will really help me boost my blog! I do think there is something to be said for taking the in person course, however, where you really get a chance to network with other bloggers in your area and bounce ideas off each other! As for a Blogshop vs Blogcademy overview, I will be working on that for you guys, so expect that in the near future if you are on the fence whether to take Blogshop or Blogcademy (if you can only afford one)!
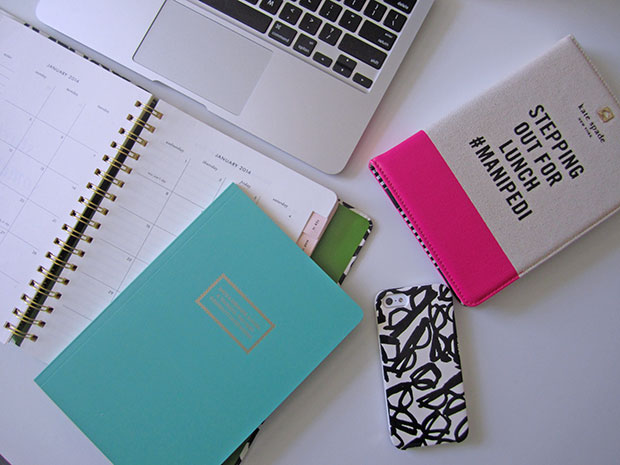
This has really been quite the interesting week so far! Monday I had off for MLK Day, which was a nice little three day weekend that of course flew by! Yesterday, my area was hit with a major snow storm that supposedly dropped something like 16 inches of snow in my area (crazy!) and today I have another snow day at home with the hubster which is awesome! So, I know I don’t normally post on Wednesday, but I have been playing around with some different content and made this awesome little GIF of my Kate Spade iPhone 5 cases that I just had to share with you guys! I kept thinking I wanted to save this for something special, but by golly, today is something special!
Anywho! I hope you enjoy the GIF and if you too are working from home or get a full blown snow day (yay!) here are a few other recent posts of mine that I suggest you catch up on while you are stuck at home all warm and cozy in your pj’s and your fluffy socks!
Hope you guys enjoy the snow day if you have one or just have a fabulous day in general if you live in an area with fairer weather! Let me know how you’re spending your day either way in the comments below! See you all tomorrow with our regularly scheduled posts!
Some time ago, I stumbled upon the book WordPress for Beginnersand ended up a purchasing a copy of the book as a reference for me as a new user to WordPress. After reading through the book, I thought I would discuss the pro’s and con’s to this book if you too are someone who is new to WordPress and wants to get a good understanding of the basics so that you can optimize your current WordPress website or create a new one!
What the book is about
The book really is a beginners guide to using WordPress. It gives the user all the information they need, along with step by step instructions, to set up a WordPress website from scratch without needing to know or use code. The book also helps the user learn the important steps to take when building a website, like buying a domain name and hosting, and how to choose those services. It dives into the basics of SEO and even how to design and customize your website.
Who this book is written for
This book is for anyone who would like to start a blog or website and knows they want to use WordPress. If you have never setup a WordPress website before, this book will walk you through each step necessary to get your site up and running and looking the way you want. Because this book has to do with building a website, I think that a certain amount of computer experience is necessary in order to use this book properly, and one should also know how to get themselves around their computer fairly well in order to make use of this book!
Limitations of the book
To be completely honest, most if not all of the information in this book can be found online through some simple web searches, so if you are someone who is confident in their ability to find information online for free, you may not want to spend your money on this book. That isn’t to say that this book is useless to anyone who could search for the information for themselves as it would probably save you time to just buy this book and read it, but if you don’t want to spend the money, you can find guides on using WordPress and creating a new site elsewhere.
This book also only focuses on the basics of starting a new website so if you are trying to convert your blog from an alternate hosting site like blogger to WordPress, this book isn’t going to help you with the steps necessary in that transition, but it will help you understand how to set your website up before you make that transition, and how to use the tools available in WordPress after you have transitioned.
Overall, this book is very bare bones basic about using WordPress, but gives you some good SEO tips, suggestions for naming your domain and other tricks that are good reference materials even for those of you who are a little more savvy and have some website know-how. If you are looking for a book that will tell you how to do everything in WordPress, this isn’t it, but its a good starter guide for someone who wants to start a blog but has no WordPress experience!
Click the image below to purchase this book directly from Amazon.com!
Letter writing really is a lost art and sometimes I think a very undervalued one in our modern digital society! What is not lost or undervalued, however, is the art of writing a thank you note. Since the new year and plenty of holidays just passed, I thought this would be a good time to urge everyone to write someone a thank you note. Perhaps it is for a gift you received, or a favor someone paid you, or perhaps its just to thank someone for being there for you when you needed it, but right now I urge you to add sending a thank you note to your to do list for the day!
How To Write a Thank You Note
Writing a thank you note is easy once you know who you are sending it to and why. They don’t need to be long, drawn out letters, although they can be, but just a sentence or two written in gratefulness will do! It is very important, when it comes to thank you notes, that they be written by hand. That is really the only rule I think worth following when it comes to them. Timeliness is also important, but I always think that when it comes to gratitude, better late than never! So, here are a few rules for writing thank you notes that you can keep as a little cheat sheet for yourself!
1. Always write a thank you note by hand (You may need to decide which form of handwriting of yours is best and most legible, it doesn’t matter if you write in cursive or not!)
2. Mail a thank you within two weeks of receiving a gift (unless its a wedding gift in which a 2 month span is allowed for larger weddings).
3. Be sincere when writing the note, your tone will show!
4. Send thank you notes often, even for simple things and favors!
Now, to get you started, I have written a few little excerpts that you can copy and use for your own thank you notes in case you have trouble giving words to your feelings. Don’t be ashamed of this, people often find it difficult to express gratitude, and after a while of using the words of others, you will be able to develop some words of your own.
Dear NAME OF RECIPIENT,
Thank You so much for the GIFT HERE! I am very grateful and appreciative of your generosity!
Best Regards,
YOUR NAME
Thank you, NAME OF RECIPIENT, for the lovely gift! I am so grateful that you thought me on my NAME OF EVENT!
Thanks again,
YOUR NAME
Dear NAME OF RECIPIENT,
I just wanted to take a moment to thank you for DESCRIPTION OF FAVOR! I truly appreciate that you were willing to help me and I am very grateful for your FRIENDSHIP OR SUPPORT!
Thoughtfully,
YOUR NAME
I hope this inspired you to start writing thank you notes to those in your life who show you their generosity and support! Do you have any tips for writing Thank You Notes that you can share in the comments?
This weekend is the first three Day weekend of the year if you live in the US! YAY! I love three day weekends because they are like mini vacations spread throughout the year. They can be a great time to catch up on sleep, binge watch your favorite TV shows or finish a home project. So, here are my tips to making the most of your long weekend!
1. Plan Your To-Dos before the weekend begins: On Friday afternoon, I often find myself thinking how exciting it is to have a three day weekend ahead of me! THREE DAYS OFF! That seems like so much time to do WHATEVER I want! But inevitably by Sunday night I find myself wondering where the weekend has gone? Tomorrow is the last day? HOW DID THIS HAPPEN!! I think you know the feeling! So, if you want to fill your weekend with fun and awesome things to do, you should probably plan out your time before the weekend starts (about Friday at 4:30pm)! You don’t have to make an hour by hour schedule, but have a general idea of what you want to do and who you want to do it with. Make sure plans with friends are hammered out before the weekend begins so you spend more time having fun and less time getting people to agree on dinner reservations!
2. Put your space in order:Whether you have your own place or share with roommates or family members, get your space in order and tidy up before the fun begins. Get your chores done, send off your bills, and get your life in order so that you can maximize your weekend time and not have to worry about the minutiae of daily life for approximately 72 hours!
3. Have at least one adventure: By this I mean, leave the house at least once! Yes, you can break from your Game of Thrones marathon weekend to run out for pizza or something, but make sure to get some fresh air! Lord knows you don’t get enough of it in the normal work week!
4. Manage your expectations: I know I am totally guilty of over hyping my weekends before hand and then feeling a major crash when everything doesn’t work out perfectly or when I don’t feel like I have done enough! Give yourself reasonable expectations of how fun/exciting/productive/amazing your weekend will be so that you can focus on enjoying everything!
5. Take time to breath and relax: The weekend is about decompressing from a week of work, and long weekends give you even more time to decompress. Make sure to relax and just enjoy your weekend, whatever it may bring so that you are recharged for work and life in general once Tuesday rolls around!
How do you like to spend your three day weekends? Share more of your tips for a great three day weekend by letting us know in the comments!